Headbands have re-emerged as one of the most versatile hair accessories in recent seasons, with styles ranging from sleek tortoiseshell to soft crochet. This guide covers 16 distinct headband hairstyles for every length and texture, with real technique details you won’t get from a pin image alone—whether you have long layers, a short crop, or natural curls.
1. The Zigzag Comb Headband on Loose Waves
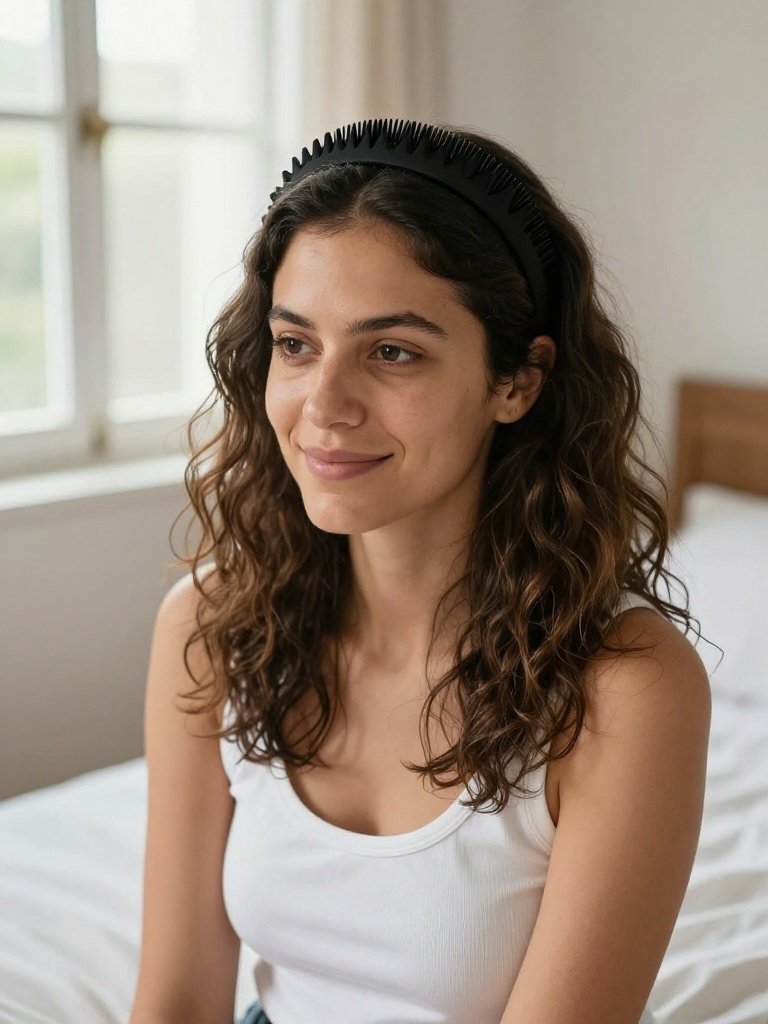
The zigzag headband—that comb‑like accessory with wide, serrated teeth—slides into your hair and pulls it back from your face without needing a single bobby pin. It creates an instant sense of movement and works as well on long hair as it does on shorter cuts. The key is placement: slide it in about an inch behind your hairline so the zigzag pattern sits visible above your waves, not buried in them. This style is ideal for day‑two or day‑three hair because the comb’s grip actually holds better with a little texture. Straight‑out‑of‑the‑shower hair will just slip right through.
Best for
Wavy to straight hair, all densities. The comb’s teeth need some texture to grip effectively. On very fine or slippery hair, rough‑dry the roots with a texturising spray beforehand so the comb has something to hold onto. For coily textures, work in small sections and slide the comb in gently to avoid snagging. This style works across all densities but truly shines on hair with natural bend.
2. Twisted Rope Headband on Long Hair
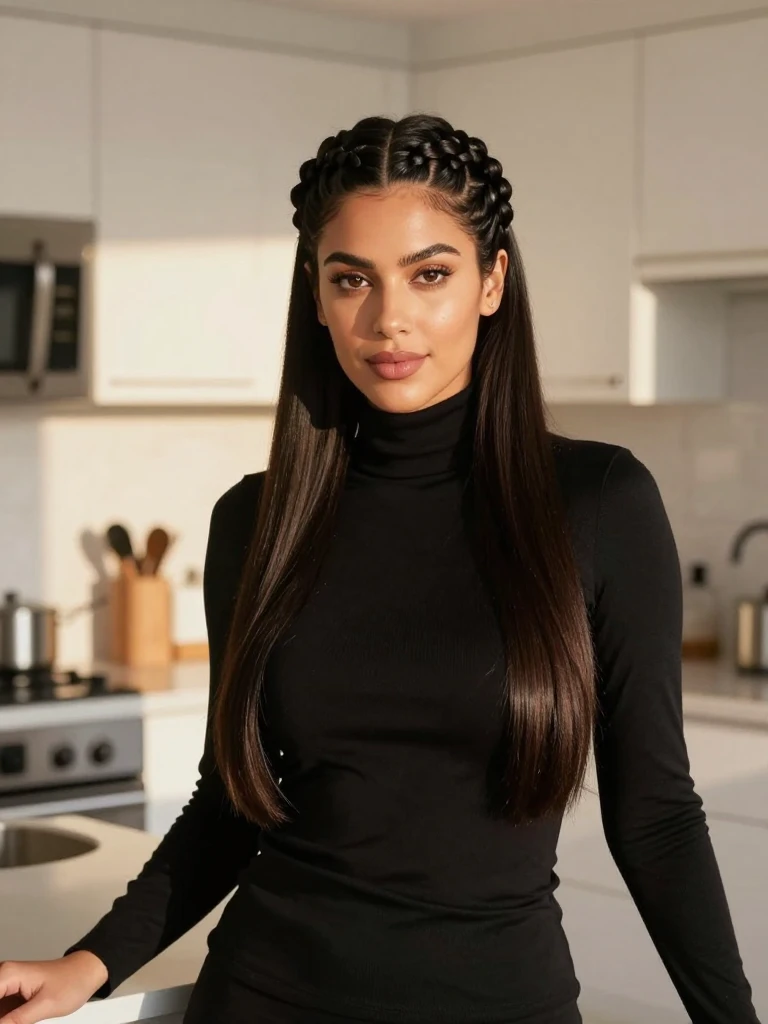
This style uses your own hair as the headband. Section your hair down the middle, then divide each side into two strands and twist them tightly toward the back to form a rope‑like effect. Secure everything with hair pins at the nape, and suddenly your hair looks intentional rather than overdue for a wash. The twist works best on hair that’s at least shoulder‑length—anything shorter and you won’t have enough to wrap around. For extra hold, mist the sections with water before twisting; the rope stays tighter as it dries.
Best for
Medium to long, straight or lightly wavy hair. The twisting motion relies on length and a certain amount of slip. Curly hair will kink and won’t lie smoothly unless you stretch the sections with a blow‑dryer first. Twist each strand in the same direction—all clockwise or all counter‑clockwise—so the finished rope has a uniform, polished appearance that lasts for hours.
3. Braided Crown Headband for Medium Hair
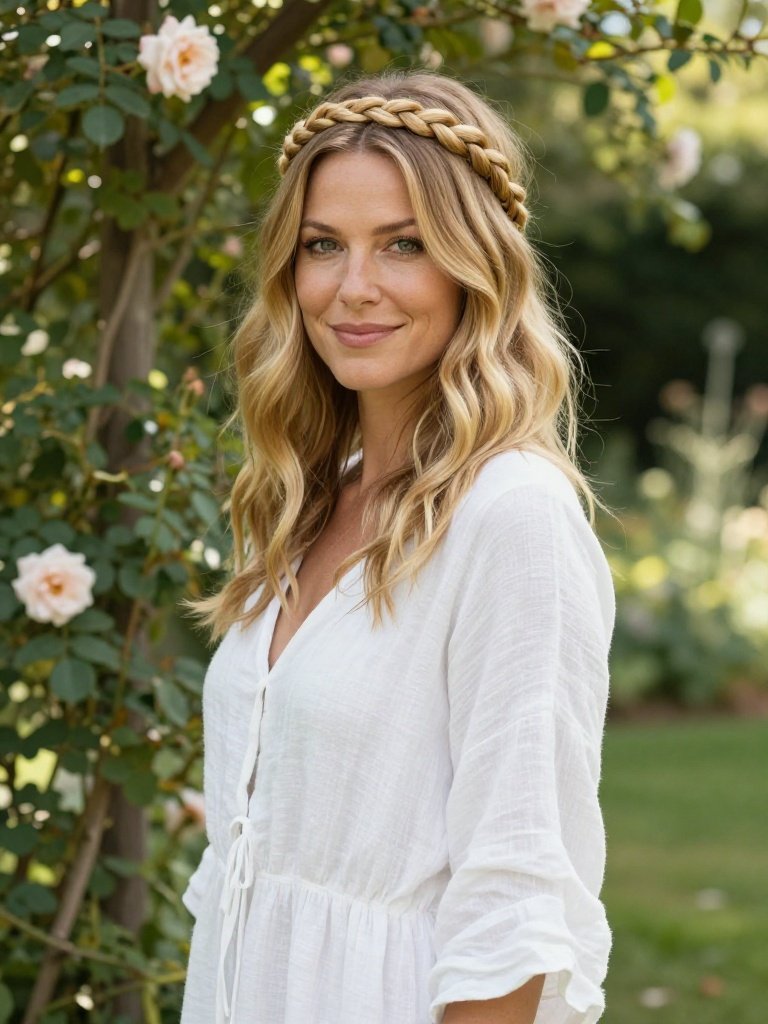
Create a small braid—Dutch, French, or a simple three‑strand—on one side of your head, then take it across your forehead like a headband and pin it securely behind your opposite ear. This style solves two problems at once: it’s a hairstyle and an accessory in one. On medium‑length hair, the braid sits at eye level and frames the face without overwhelming your features. The trick is to braid snugly at the start and let it loosen as you cross over, so the finished look reads boho rather than rigid. Tuck any remaining hair behind your other ear and you’re done.
Best for
Medium to long hair with enough length to cross over. You need at least shoulder‑length hair to have enough braid to span your forehead and tuck behind the ear. Straight hair may unravel quickly, so spritzing with a light‑hold spray before braiding helps. For thick or textured hair, a Dutch braid creates a more pronounced ridge that stays visible above the forehead.
4. Slicked‑Back Low Knot With a Satin Headband
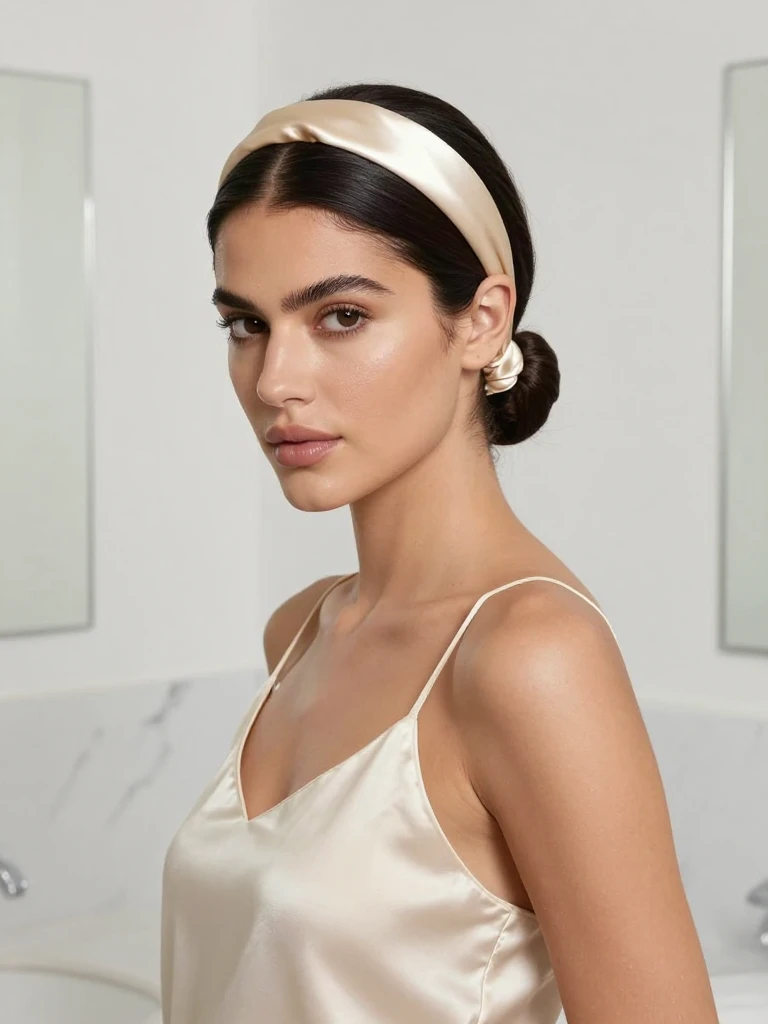
Start with a smooth base—brush your hair taut and apply a lightweight smoothing serum from roots to ends. Gather it low at the nape and twist into a tight knot, securing with discreet pins. Then slip on a satin headband to tame flyaways and add a glossy, finished touch. This look reads polished and intentional, not try‑hard. The satin finish catches light and elevates whatever you’re wearing. One thing to watch: if your hair is fine or slippery, the knot will need extra pins to stay secure—don’t be shy with them.
Best for
Straight to wavy hair, medium to long length. The slicked‑back effect demands hair that cooperates with a brush and serum. Curly or coily hair can be blown out first, but the natural texture will fight the smooth finish without strong‑hold gel. This style works best on medium to long lengths—too short and the knot won’t have enough bulk to stay put.
5. Crochet or Knitted Headband on Natural Texture
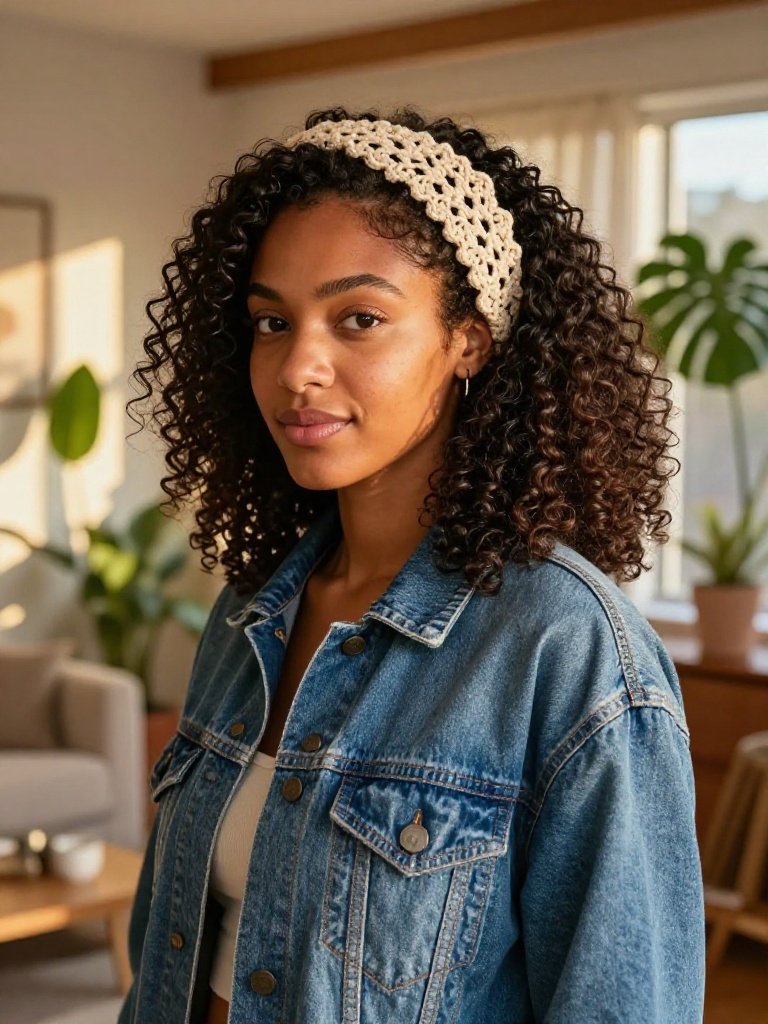
Swap structured headbands for a knitted or crochet version when you want texture that feels lived‑in. The breezy fabric pairs perfectly with loose waves, curls, or even a simple ponytail. On curly or coily hair, a crochet headband adds visual interest without competing with your natural texture—the open weave lets your curls pop through instead of flattening them. Position it about an inch back from your hairline so it sits like a crown, not a sweatband. The softer fabric also means less friction against delicate curl patterns.
Best for
Curly, coily, and wavy textures. Crochet or knit doesn’t snag or disturb your curl pattern the way plastic or metal bands do. For straight hair, the texture adds visual weight that mimics thicker hair. On very fine straight hair, secure the band with a few bobby pins at the sides—the open weave can slide on smooth surfaces.
See Also: 17 Dreamy Soft Shag Hairstyle Ideas That Are Trending Now
6. Half‑Up Twist With a Thin Metallic Headband
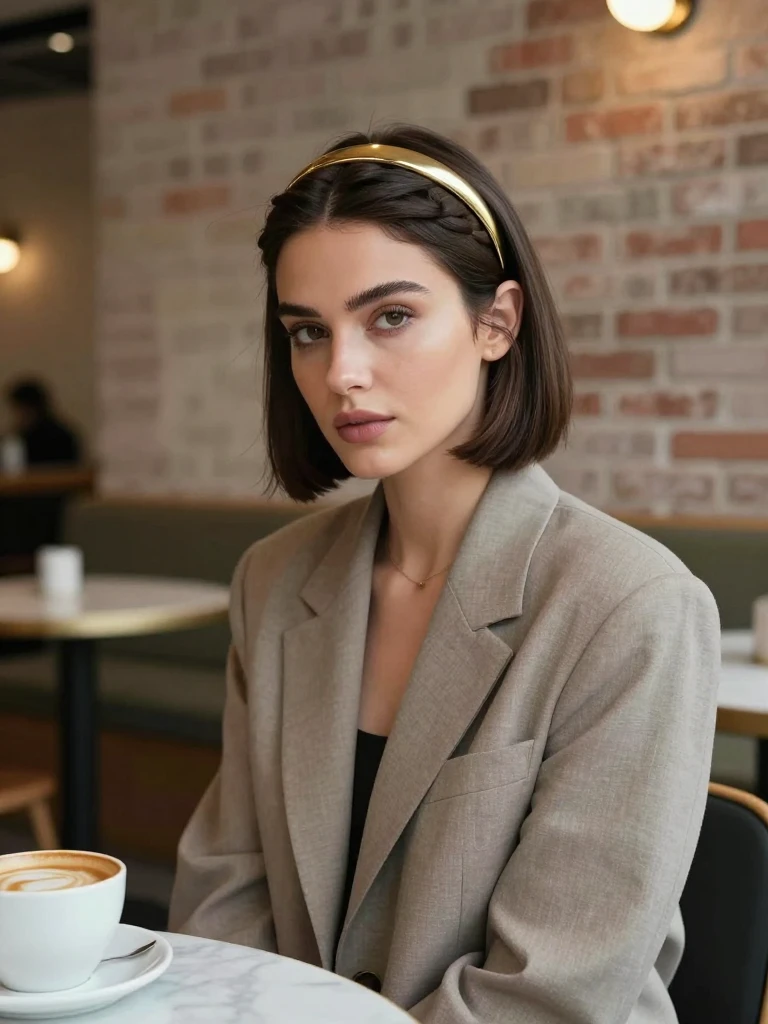
Slip a thin metallic headband just behind your hairline, then twist sections from each side into a soft crown. Pin each twist discreetly, letting a few face‑framing strands escape for softness. The metal adds structure without stiffness, so the whole thing reads modern and easy. This is a go‑to when you want fuss‑free glam in minutes. The thin band works particularly well on shorter hair because it doesn’t overwhelm the cut—a wide band on a bob can look heavy, but a slim metallic one reads as intentional jewelry for your hair.
Best for
Short to medium hair. On pixies and bobs, the thin band keeps the silhouette balanced. On longer hair, you might need two bands for visual impact. The metallic finish reflects light, drawing attention to the hairline, so make sure your edges are neat. This style also covers greasy roots on second‑day hair.
7. Cherry‑Red Headband on a Sleek Bob
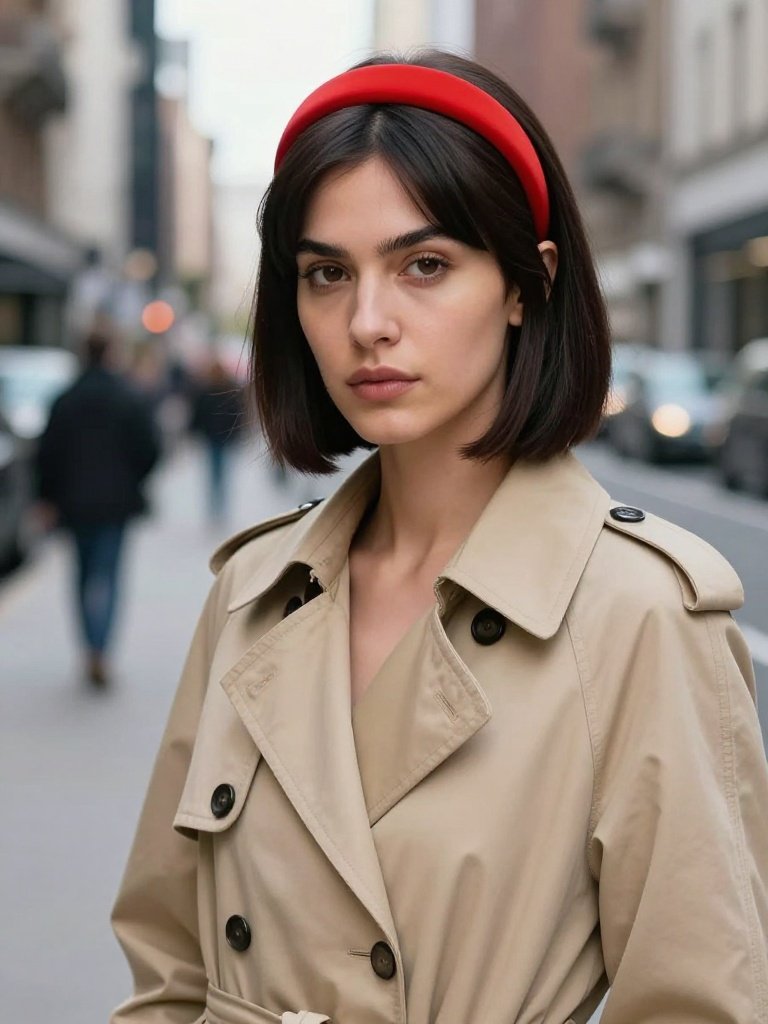
Lean into the season’s love of colourful accessories with a cherry‑red headband. On a sleek bob, a single pop of colour transforms a simple cut into a statement. The key is keeping the hair itself minimal—smooth, straight, no competing textures. Position the headband straight across, about an inch behind the hairline, and let the colour do all the work. This works best on bobs that hit between the chin and shoulders; anything shorter and the headband can overwhelm the proportions.
Best for
Straight bobs and lobs. The sleek finish demands hair that can be flattened—curly hair would need a blowout first. The red shade reads best against dark or medium‑brown hair; on blonde or very light hair, a softer tone like rust or coral might be more flattering. The headband should be rigid, not stretchy, so it holds its shape and sits firmly without slipping.
8. Bandana‑Style Headband on Soft Waves
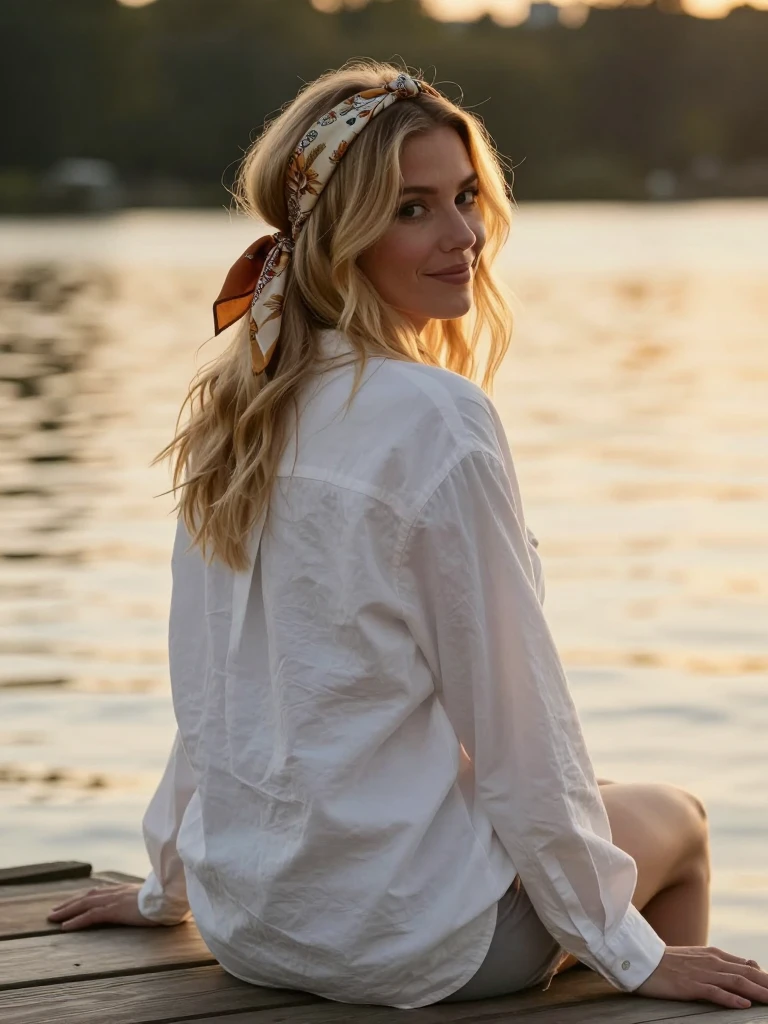
A bandana‑style headband—tied at the nape or knotted on top—adds instant polish to soft waves. The fabric softens the look and works beautifully on second‑day hair when you want to hide flat roots. The trick is in the knot: tie it loosely so the ends hang down or tuck them under for a cleaner finish. On medium‑length hair, this style reads effortlessly cool; on longer hair, it adds a boho layer without competing with the length.
Best for
Medium to long hair with natural wave or curl. The fabric knot needs some volume to anchor itself—very fine, straight hair may let the band slip back unless you secure it with a few pins at the temples. For curly hair, choose a lightweight cotton or silk band so it doesn’t weigh down your curls.
9. Pearl‑Accent Headband on a Pixie Cut
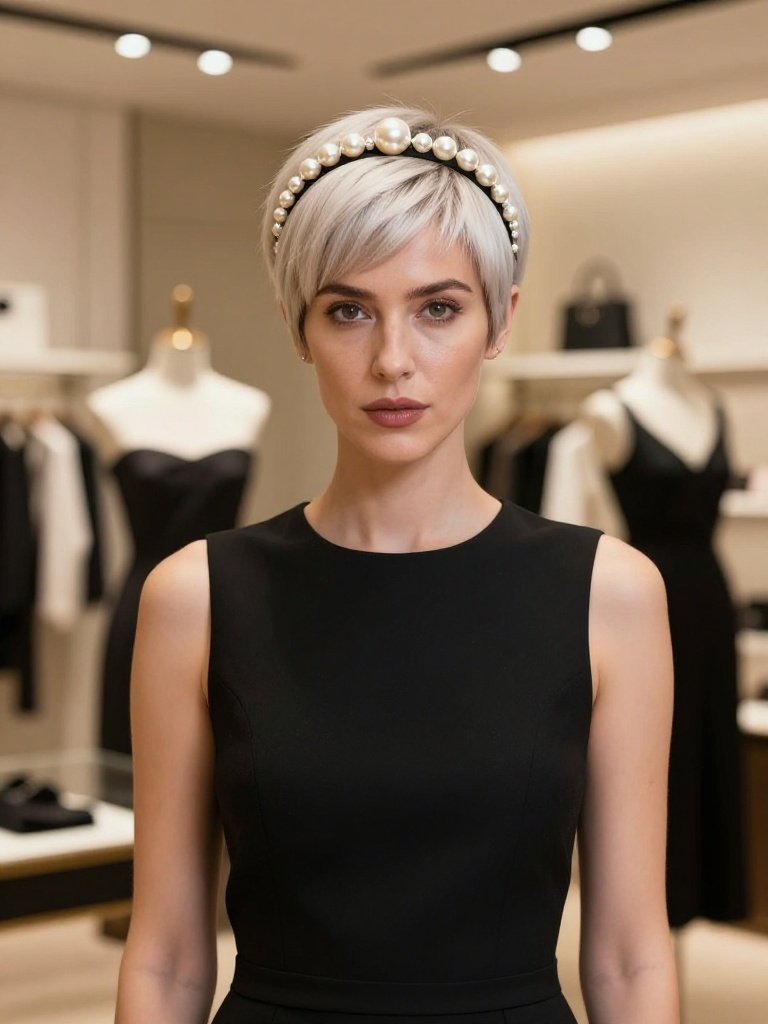
On a pixie cut, a pearl‑accent headband becomes the star of the show—every detail is fully visible and reads as sophisticated jewellery for your hair. The proportion works in your favour: where pearls might get lost in long hair, they pop against a short crop. Position the headband about an inch behind your hairline and let the pearls sit front and centre. This is one of those styles where the pin image shows the finished look, but what it doesn’t tell you is that a skinny, detailed band actually works better than a wide one on very short hair—wide bands tend to look like you’re wearing a sweatband, not an accessory.
Best for
Pixie cuts and very short crops. On longer hair, the pearls compete with the length and often get tangled. For a pixie, the pearls become the focal point, so pick a band with spaced‑out pearls rather than densely packed ones—the latter can look heavy. The band should sit securely; if your hair is too short to grip, use a few bobby pins behind the ears to anchor it.
10. Braided Headband for Little Girls
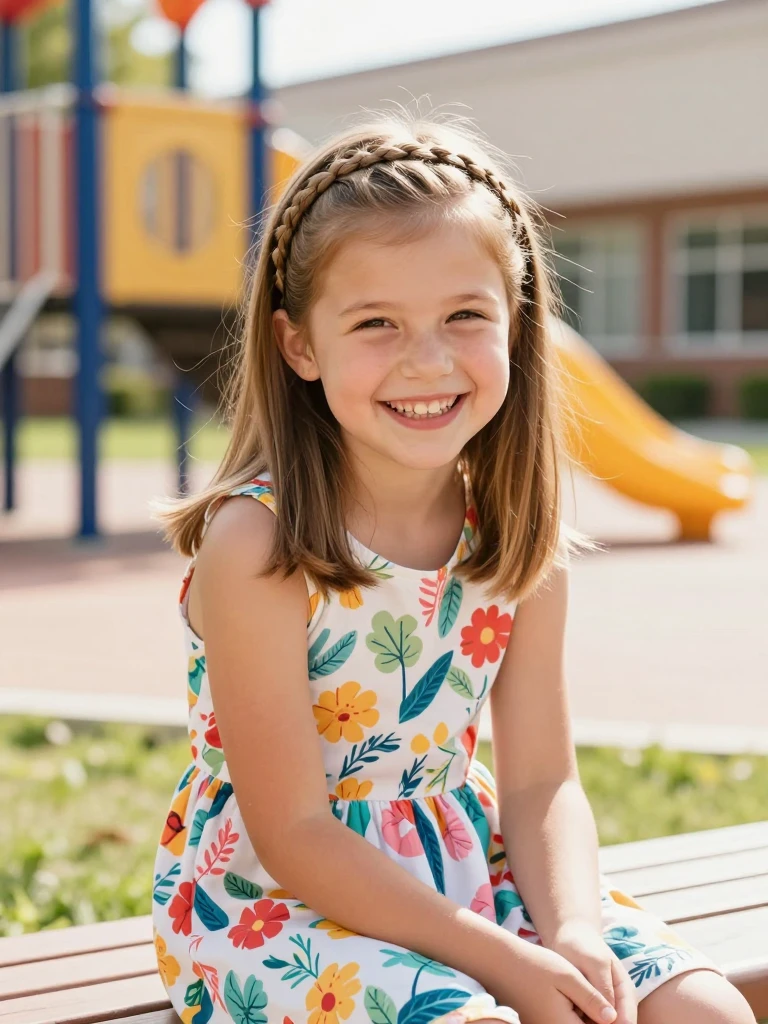
For little girls, a braided headband is one of the cutest and most practical styles you can try. Braid small sections from the front hairline and wrap them across the forehead for a cute finish. The built‑in structure keeps hair out of the face all day without constant adjustment. This works on any length from chin‑length to long, and the braid can be as simple or elaborate as you have time for—a basic three‑strand takes under five minutes and still looks special. For school mornings, this is a game‑changer.
Best for
All hair lengths on children, especially straight to wavy. Kids’ hair tends to be finer and slippier, so the braid needs to be tight at the start. You can dampen the sections slightly to reduce flyaways. For curly hair, braiding while dry can cause frizz, so apply a leave‑in conditioner first.
11. Tortoiseshell Headband With a Low Ponytail
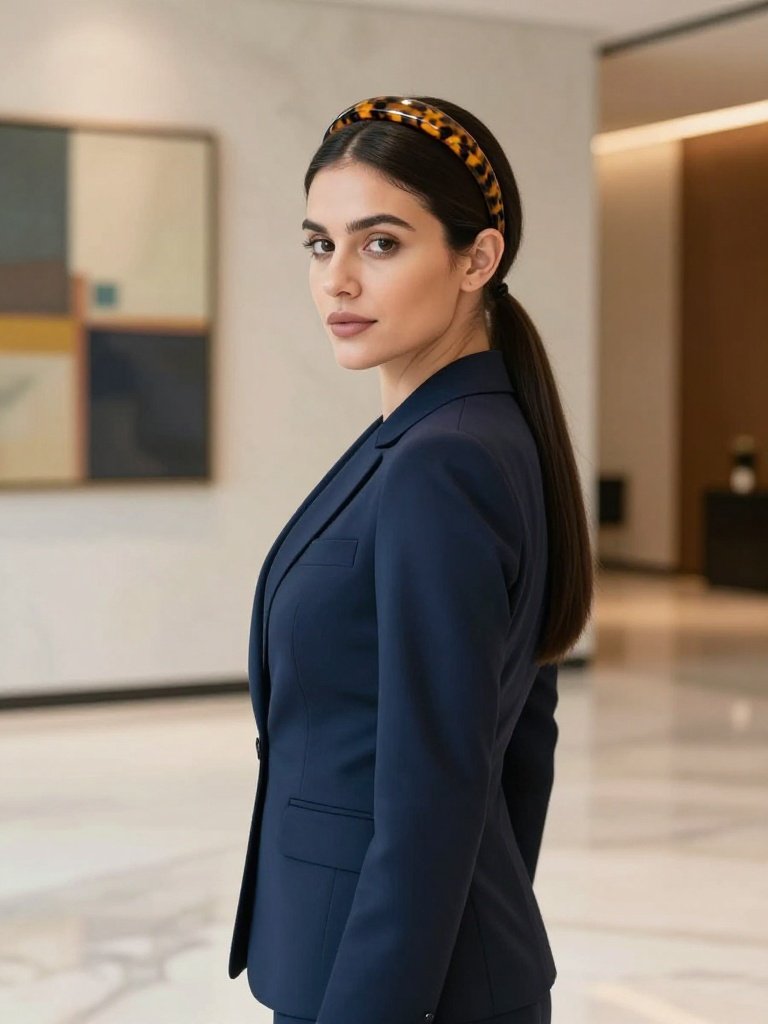
The tortoiseshell headband—the Carolyn Bessette‑Kennedy special—paired with a sleek low ponytail is minimalist elegance at its best. The hard tortoiseshell material adds structure and polish. The ponytail should sit right at the nape, smooth and taut, with the headband placed about an inch back from the hairline. This look works on medium to long hair and reads equally well at the office or out to dinner. What the pin won’t tell you: this headband shape works best on oval and heart‑shaped faces because the curve follows the natural hairline without adding extra width at the temples.
Best for
Oval and heart‑shaped faces, medium to long straight hair. The hard shell doesn’t stretch, so you need to match the size to your head—too tight and it leaves a mark, too loose and it slips. The low ponytail should be centre‑parted or side‑swept; avoid a middle part with this style because it can make the face look longer.
12. Messy Bun With a Boho Headband
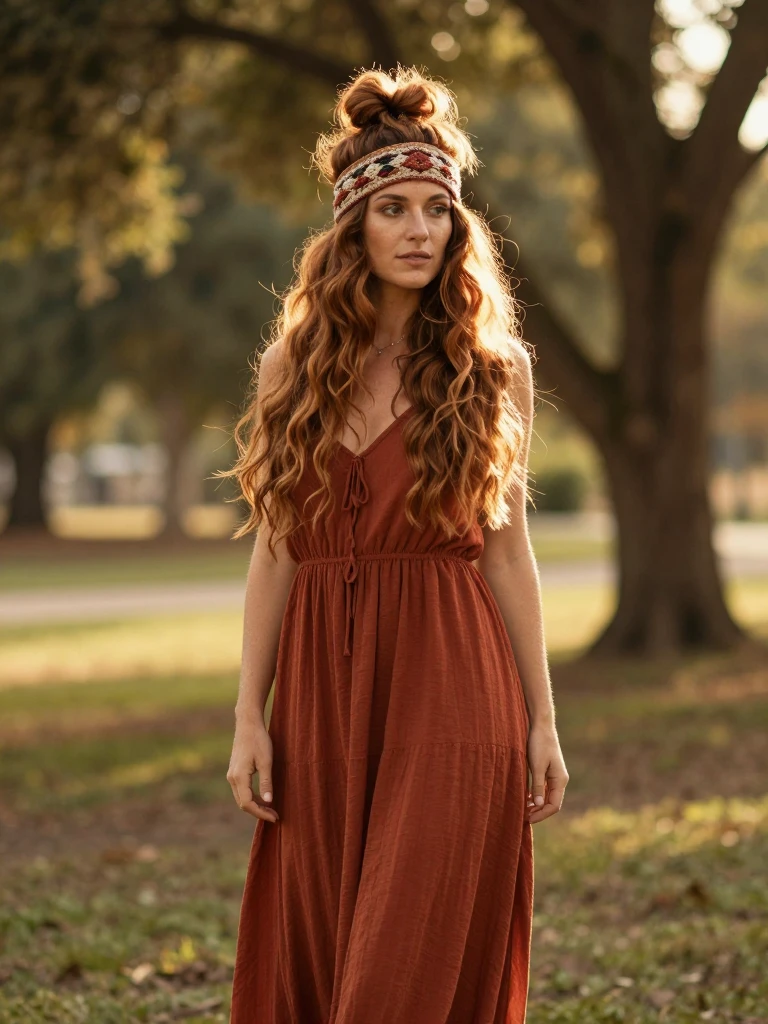
Toss your hair into a messy bun and slip on a boho headband when you want to look pulled‑together without trying too hard. Tease roots for volume, wrap a few tendrils out, and secure loosely. The headband hides imperfections, adds pattern, and instantly makes casual hair feel intentional. This is the ultimate rushed‑morning style—it works on any hair type and takes under three minutes. The only thing to watch: if your bun is too tight, the headband can look like an afterthought. Keep the bun loose and the headband becomes the focal point.
Best for
All hair types, especially medium to long. The boho headband adds texture that complements a messy bun. On fine hair, tease the bun to give it volume so the headband doesn’t look disproportionate. On thick or curly hair, the headband helps tame the bulk at the crown.
13. Zigzag Headband With a Curtain Crop
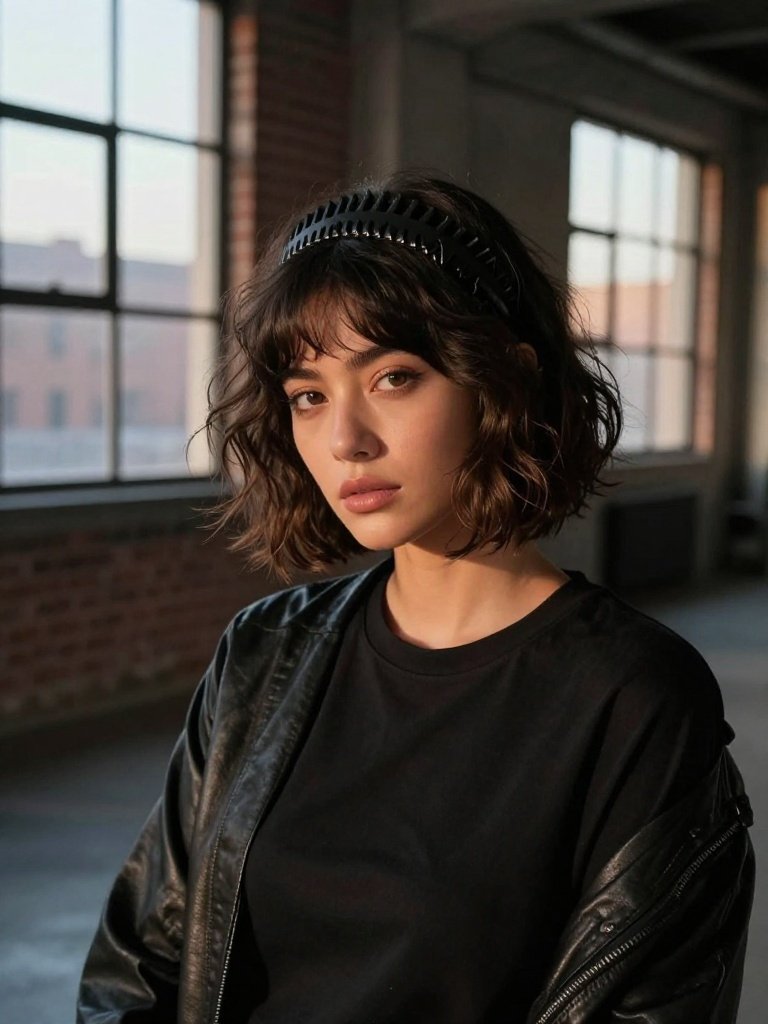
The zigzag headband isn’t just for long hair—it works beautifully with a short curtain crop. The jagged shape keeps hair pulled back and creates movement without sectioning strand by strand. On shorter cuts, the zigzag pattern becomes a graphic element that adds visual interest where there’s less length to play with. Position it so the teeth grip at the crown and the zigzag sits above your forehead—this keeps the style secure and the pattern visible. One caveat: this style works best on hair with some natural texture; pin‑straight crops can look a little severe with the zigzag pattern.
Best for
Short to medium crops with wave or texture. The teeth need something to grab—straight, fine hair won’t hold the comb as effectively. If your crop is very short, make sure the comb’s teeth aren’t too long; they might poke out the other side. The zigzag becomes a graphic line across the forehead on a crop.
14. Twisted Crown With a Velvet Headband
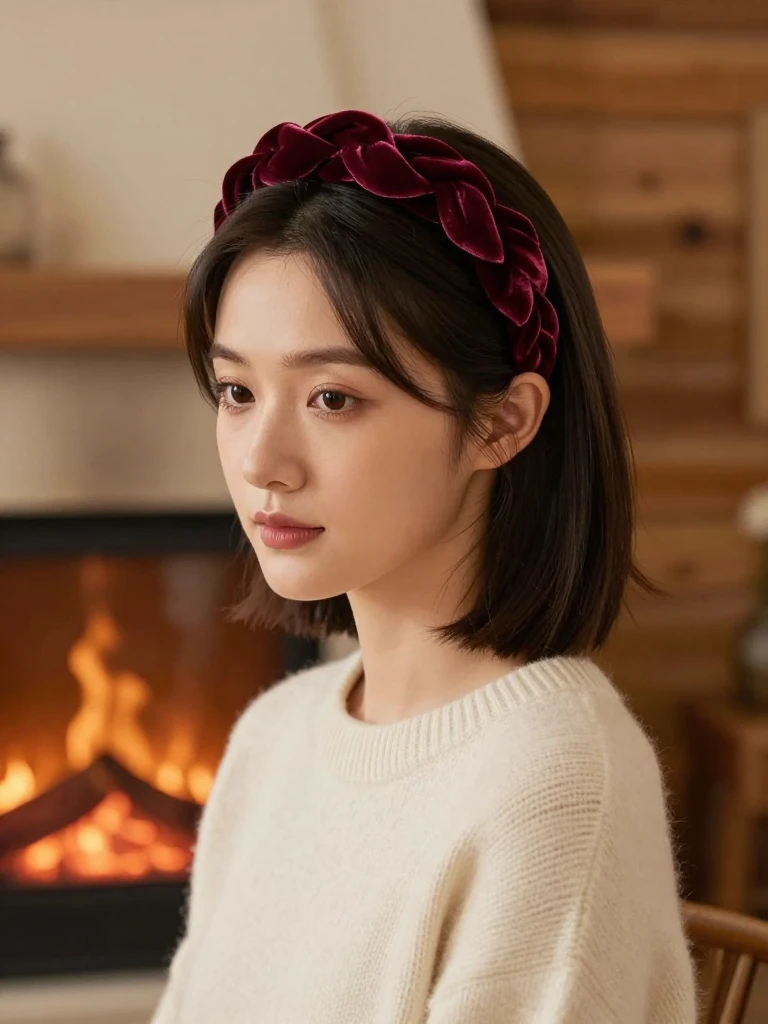
A velvet headband paired with a twisted crown updo reads equal parts polished and romantic. Twist sections from each side toward the back and pin them into a soft crown, then slide a velvet headband over the top. The velvet adds depth and richness—perfect for fall and winter—while the twists keep the style structured. This works on medium to long hair and is substantial enough for events without feeling overdone. The velvet also grips better than satin, so it stays put through dinner and dancing.
Best for
Medium to long straight or wavy hair. The velvet fabric creates friction against the hair, so it rarely slips. On curly hair, the twists may frizz unless you smooth them with a serum first. The crown should be pinned firmly, as the weight of the velvet can pull down looser styles.
15. Bubble Ponytail With a Sporty Headband
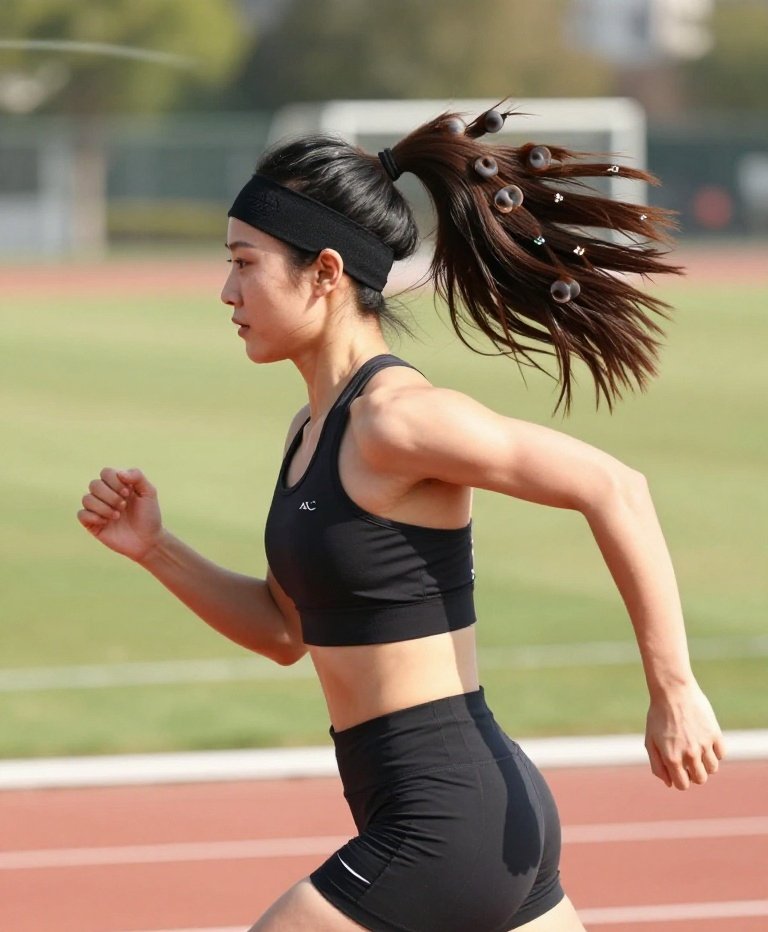
Remember bubble ponytails from the early 2000s? They’re back, and even easier with a sporty headband to anchor the look. Create a high ponytail, space small hair ties about two to three inches apart down the length, and gently puff out the sections between each tie. Add a stretchy sport headband at the hairline to keep flyaways off your face and tie the whole look together. This style holds surprisingly well and reads fun without being childish. The sport headband is non‑negotiable here—it’s what separates this from a basic bubble ponytail.
Best for
Medium to long hair, all textures. The bubble effect needs at least shoulder‑length hair; shorter lengths won’t have enough tail to create multiple sections. On curly hair, you’ll need to stretch or blow‑dry first because the bubbles puff out unevenly with natural curl.
16. CBK‑Coded Headband on Sleek, Down Hair
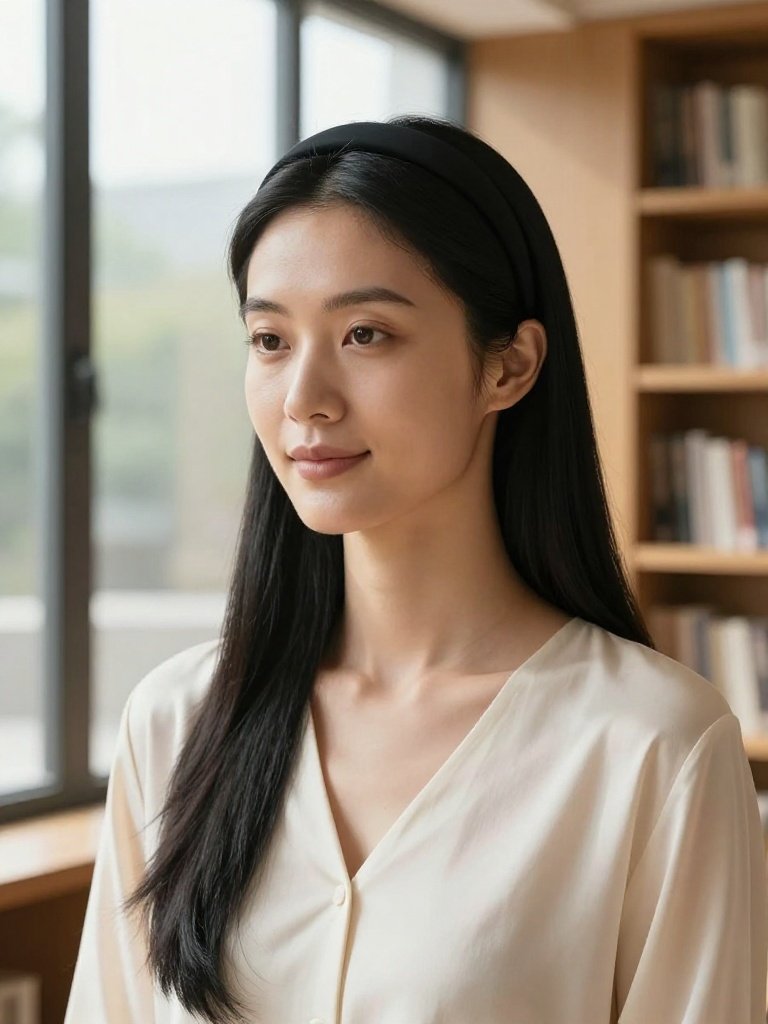
Channel Carolyn Bessette‑Kennedy with a hard tortoiseshell or black headband worn over sleek, down hair. The hair should be smooth and straight, either parted down the middle or swept to one side. The headband sits about an inch back from the hairline and frames the face without competing with the length. This is minimalism at its most effective—there’s nowhere to hide, so the hair needs to be genuinely smooth. The pin image shows the finished look, but what it doesn’t tell you is that this style only works on hair that’s been properly prepped: blow‑dried smooth, no frizz, no flyaways. If your hair has any texture, you’ll need a straightener and a smoothing serum to pull this off.
Best for
Straight or straightened medium to long hair. This is the most demanding style in this list. Any wave or kink becomes glaringly obvious, so only attempt it on hair you’ve recently heat‑styled. The hard headband must sit firmly; if your hair is fine, place a few bobby pins underneath the band at the temples to stop it sliding back.
Which Headband Style Actually Suits You?
Here’s the honest truth: headbands aren’t one‑size‑fits‑all, and the advice you see on Pinterest often ignores this completely.
For Short Hair (pixies and bobs)
Thin headbands and detailed pieces work best because they don’t overwhelm your proportions. A thick knotted band that looks effortless on long hair can swallow a chin‑length bob. Pearl, crystal, and braided details actually show up better on short hair because nothing’s covering them.
For Medium Hair
You have the most flexibility. Braided headbands, twisted styles, and half‑up looks all work because you have enough length to style but not so much that the headband gets lost. The sweet spot is shoulder to armpit length.
For Long Hair
Wider bands and statement pieces hold their own against the volume. Zigzag combs, satin bands, and knotted styles all work, but placement matters more—push the band further back so it doesn’t get swallowed by your length.
For Curly and Coily Hair
Soft fabrics like crochet, knit, and velvet are your friends. Structured plastic or metal bands can snag and create frizz. Position the band gently and avoid pulling it too tight against your hairline.
The One Mistake That Ruins Almost Every Headband Look
People push the headband too far forward. They place it right at the hairline, which flattens the front of the hair and makes the band look like it’s sliding off. The fix is simple: place the headband about an inch behind your hairline. This lets the front sections of your hair sit naturally over or around the band, which looks intentional rather than like you’re trying to keep your hair out of your eyes. For zigzag combs specifically, this placement also gives the teeth something to grip—right at the hairline, they just slip out.
My Honest Take: Start With Number 2 or Number 12
If you’re trying headbands for the first time, skip the elaborate braided crowns and start with the twisted rope style (number 2) or the messy bun with a boho headband (number 12). Both take under five minutes, work on second‑day hair, and hide the fact that you didn’t wash it this morning. The twisted rope style in particular is a revelation—it uses your own hair as the accessory, so you don’t need to buy anything new. Once you’ve got those down, branch out into the braided and zigzag styles.
Frequently Asked Questions
Can headband hairstyles work on fine hair?
Yes, but you need the right approach. Fine hair benefits most from soft fabric headbands or thin metallic bands—heavy structured pieces can slip or look overwhelming. For grip, try zigzag comb headbands that actually clamp onto the hair. Also, add a little texture with dry shampoo or texturising spray before placing the headband so it has something to hold onto.
What headband hairstyles work best for short hair?
Thin headbands, pearl‑accented pieces, and zigzag combs all work exceptionally well on short hair. The key is proportion—skinny bands and detailed pieces read as intentional accessories, while thick knotted bands can overwhelm a pixie or bob. Position the headband about an inch behind your hairline for the most flattering frame.
How do I keep a headband from slipping on slippery hair?
Texturise your hair first. Dry shampoo, sea salt spray, or a light texturising powder at the roots gives the headband something to grip. For zigzag combs, make sure the teeth are fully engaged with your hair—push them in until you feel resistance. For fabric headbands, velvet and knotted styles grip better than satin or silk.
Are headband hairstyles still trending in 2026?
Yes—headbands are having a major moment right now. The zigzag style is back thanks to Miu Miu’s Fall 2026 runway and Hailey Bieber wearing it on repeat. Tortoiseshell headbands surged after the Carolyn Bessette‑Kennedy resurgence, and crochet and knitted versions are trending for warmer weather. Headbands are officially fashion’s favourite finishing touch.
Can men wear headband hairstyles too?
Absolutely. Headbands have become a key accessory in menswear, with a 45% increase in runway appearances over the last three years. For a sporty look, wear a stretch headband across the forehead like an NBA player. For a more styled approach, position it slightly back (two to three centimetres behind the hairline) to add volume at the crown. Bandanas and patterned scarves tied as headbands are also trending for men in 2026.
One Last Thought Before You Try These
The difference between a headband looking like an accessory versus looking like you’re trying to keep your hair out of your face is all in the placement and the prep. Push it back, not forward. Add texture if your hair is slippery. And if you’re wearing a statement headband, keep the rest of your look minimal—let the headband do the talking. Try one of these styles tomorrow morning and see the difference for yourself.


Pingback: 19 Shoulder Length Hairstyles: Effortless Ideas for Every Face - Glow Vibes Spot