A tattoo stencil isn’t the tattoo. It’s the blueprint the artist transfers to your skin before the first line goes in, and it has to solve problems the finished piece never will: which lines stay crisp at size, where skin needs to breathe between marks, and how the whole thing bends around a shoulder, rib, or calf. A gorgeous reference image can make a useless stencil. A plain outline with confident line weight can tattoo beautifully.
The twenty ideas below lean roughly masculine for the first ten and feminine for the last ten, though your artist can adapt any of them. For each one, the focus is on what matters at the stencil stage: the lines doing the structural work, the spacing that keeps details legible, and the specific conversation to have before transfer day.
How to Choose a Tattoo Stencil
Start with the body area, not the image. A design that looks perfect flat can fail on a curved forearm or a narrow ankle, while a simpler composition built for that exact spot will age better and hurt less to execute. Decide where it goes before falling in love with a reference.
Then check line weight at your real size. Print the stencil at the actual dimensions, tape it on, and step back. If the smallest details vanish at arm’s length, they will vanish faster in skin, because fine lines spread over the years. Bold separations between elements matter more than intricate interiors.
Think about the next decade, not just the appointment. Small text blurs, dense dotwork softens, and color fades unevenly. The stencils that hold up best are the ones that still read clearly as an unshaded outline, with shading treated as a bonus rather than the structure.
Finally, bring references but let the artist redraw. A good artist won’t trace your printout; they’ll rebuild the concept for your proportions, your skin, and the way that body area moves. The stencil in this article is a starting point for that conversation, not the final artwork.
1. Tattoo Stencils Ideas for Men: Topographic Compass Map
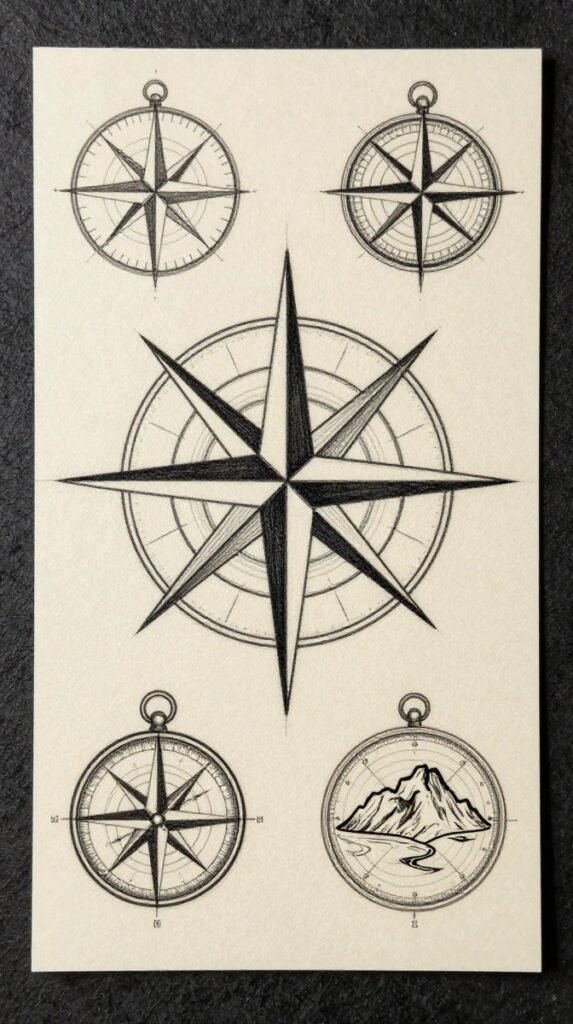
Instead of the usual rope-and-waves backdrop, this compass sits inside nested topographic contour lines. It reads as a trail map rather than a nautical chart. The eight-point rose is drawn heavy and dead-center, and the elevation rings ripple outward in much finer marks.
That contrast is the whole stencil. Because the compass and the contours use clearly separated line weights, the artist can enlarge, rotate, or drop individual rings without the design falling apart. Coordinates for a meaningful location fit underneath without touching the directional points.
Line weights
Check for open skin between the contour lines and the directional markers. If the rings crowd the points, coordinates and rose blur into one texture. Ask for at least two distinct weights, heavy on the rose and fine on the map, and the piece stays readable.
2. Neo-Traditional Tiger and Chrysanthemum Shoulder Stencil for Men
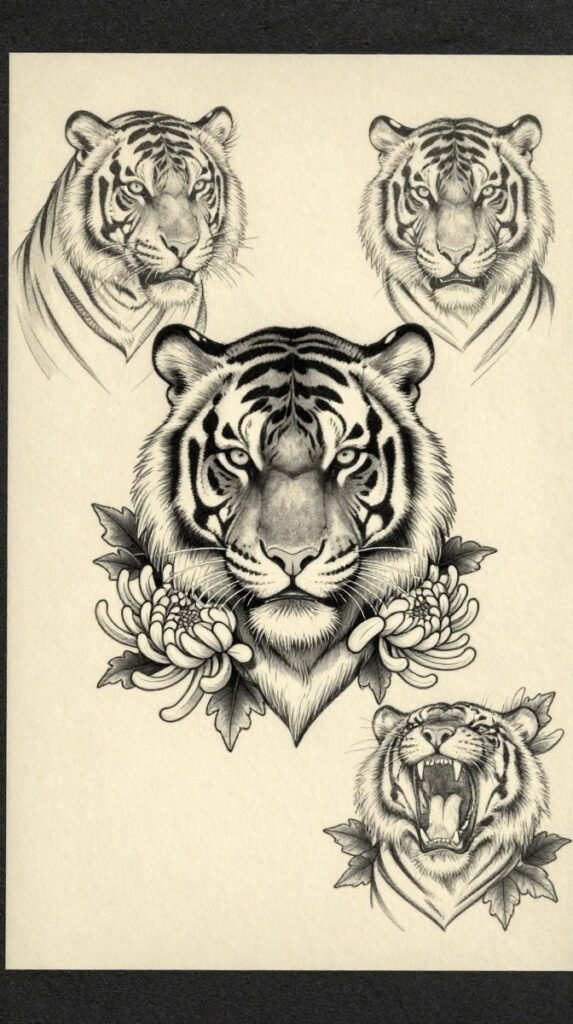
The stencil crops the tiger just below the jaw. No body, no background scene. That crop is what makes it work as a shoulder piece: the portrait becomes a rounded cap instead of a rectangle pasted on the arm. Thick outlines shape the brow, nose, and cheek stripes, while the chrysanthemums are drawn with narrower, curvier lines so the petals never merge into the face.
Two asymmetrical blooms overlap the lower corners, and leaf clusters fill the gaps beside the cheeks. The open skin left around the eyes and muzzle is doing real work. It’s what keeps the face readable against all that floral detail.
Asymmetry
Ask for a symmetrical gaze, since the intensity comes from the aligned eyes, but let the chrysanthemums differ in size and angle. Matched flowers turn the whole thing into a rigid emblem. Offset ones keep it organic.
3. Mechanical Clock and Exposed Gears Forearm Stencil for Men
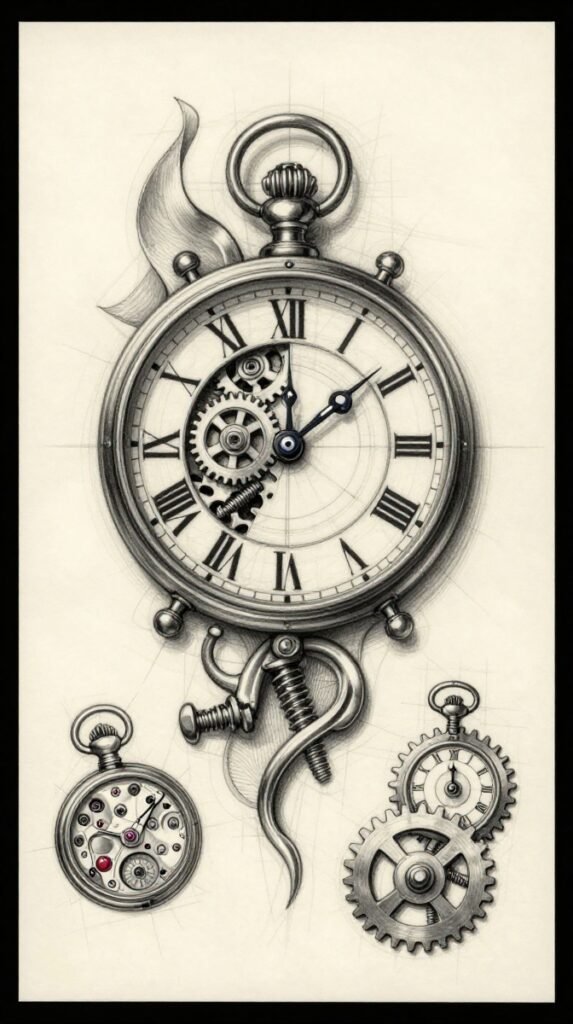
A Roman-numeral dial sits slightly off-center, with a broken section revealing interlocking gears, screws, and springs underneath. Curved ornamental metalwork frames the top and bottom edges, which is what lets this rectangular composition run down a forearm without looking pasted on.
Gears multiply fast, so the stencil needs a strict hierarchy. Numerals, hands, and the two or three biggest gears stay recognizable from across the room, while smaller mechanical marks become texture inside the broken dial rather than extra focal points. In black and gray, dark values sit behind the dial and between the gears, with thin open highlights picking out the polished edges.
Readability
Decide the exact time now, and make sure the hands don’t cover a numeral you care about. If secondary gears start crowding the dial at your chosen size, cut them. A readable clock beats a busy one every time.
4. Tattoo Stencils Ideas for Guys: Nordic Raven Knotwork
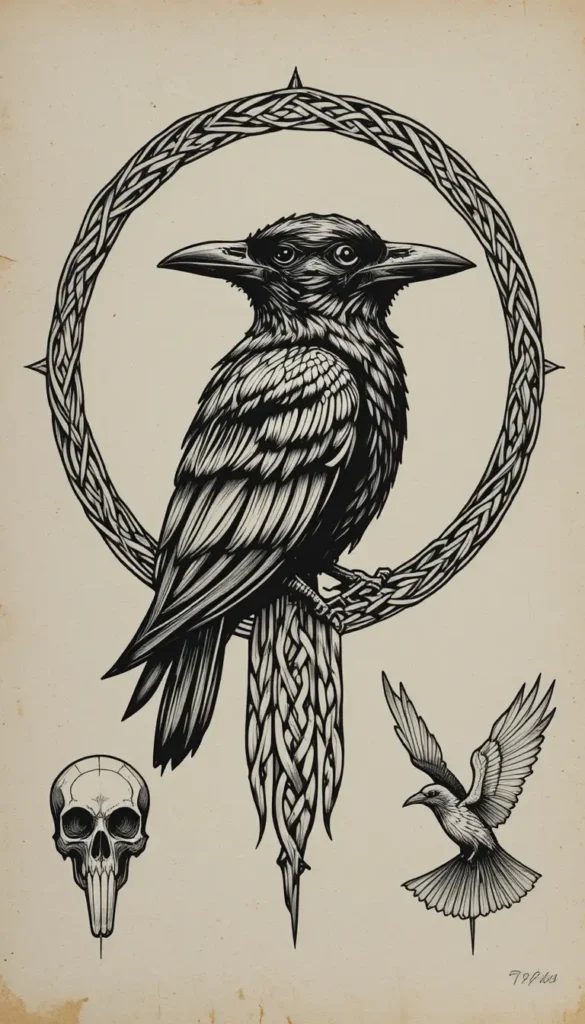
A side-profile raven with its beak tipped upward, one wing dissolving into angular knotwork that loops behind the body. The design runs on woven movement rather than realism: solid black along the chest and wing tips, open channels through the interlace so bird and knots never merge into one dark mass.
The knotwork forms a broken ring instead of a closed circle, with sharp gaps near the head and tail. That interruption is what lets the piece follow the arm’s curve instead of sitting on it like a badge.
Weave mapping
Every strand has to alternate over-and-under consistently through the intersections, or the knotwork reads as tangled instead of woven. Have the artist map the full weave on paper first. One caution on the rune-like border marks: verify any symbol’s meaning before it enters the stencil. Decorative marks shouldn’t pretend to be something they aren’t.
5. Japanese Dragon With Wind Bars and Maple Leaves for Men
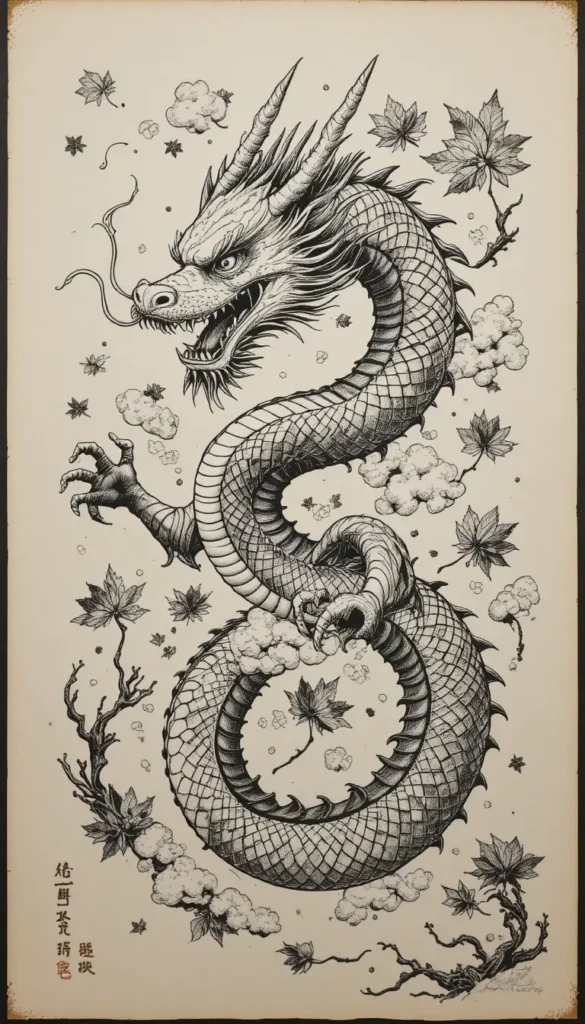
A coiled dragon drawn for vertical wrap: open-jawed head at the top with swept-back horns and long whiskers, scaled body curving down through bands of wind, maple leaves scattered to lead the eye between head, claws, and lower coils.
The stencil separates foreground from background the way irezumi does. A bold outer contour on the dragon, finer marks for scales and leaf veins, broad open wind bars between the dense areas. Soft gradation can smooth the clouds later, but the claws and face need hard contrast now so they don’t sink into the background wash.
Limb fit
This one has to be drawn for your actual arm or calf. Test the full-size stencil wrapped around the limb and check where each coil disappears from view. The face and at least one front claw should stay visible together from the main viewing angle, and the artist can tighten or widen coils so nothing important hides around the side.
See Also: Biceps Tattoo Mens: 25 Unique Designs Worth Trying
6. Split Realism and Geometric Wolf Stencil for Men
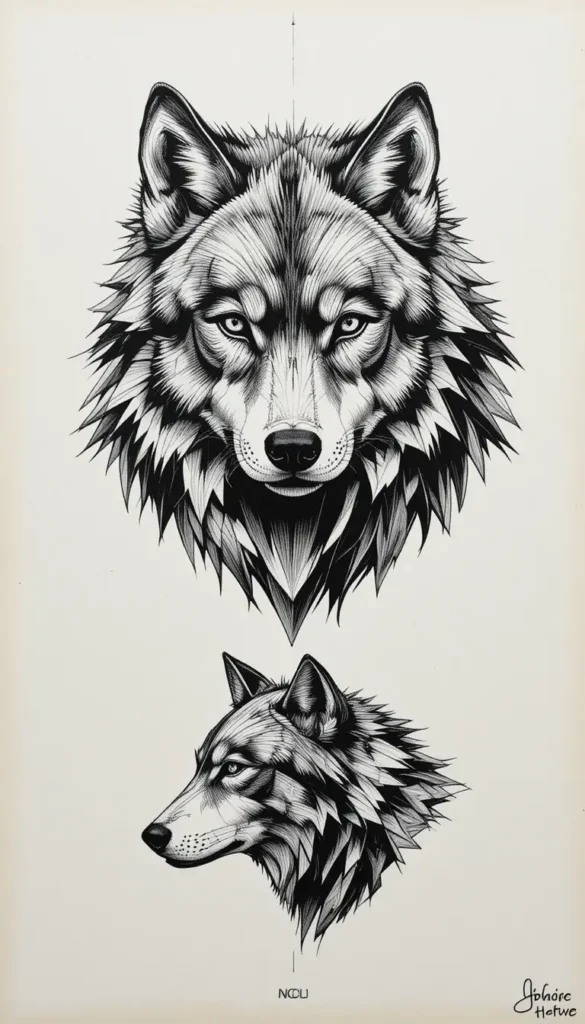
One wolf face, two techniques split down the middle: realistic fur, eye, and facial contours on one side; polygons and angular planes on the other. A narrow broken center keeps the halves distinct without the face looking misaligned.
The realistic half works best with a few large fur sections rather than hundreds of hair-thin strokes. On the geometric side, alternating open triangles and dark facets build the dimensionality, with a faint mountain line under the jaw kept lighter than the eyes and nose.
Shared anatomy
Both halves need identical underlying anatomy, aligned eyes, nostrils, and jaw, before either technique gets developed. If you enjoy this kind of visual trickery, you’ll find more of it in our roundup of clever tattoo ideas.
7. Woodcut Lighthouse in a Storm Stencil for Men
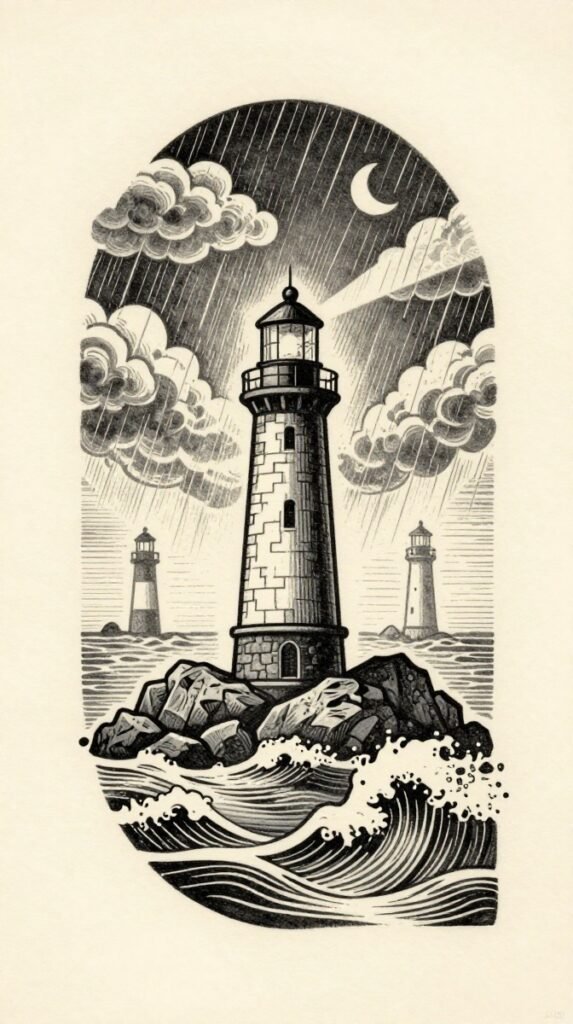
Drawn like an old printed engraving: parallel hatching, carved black marks, waves rising around a rocky base, diagonal rain lines, and a narrow beam cutting through the storm. A rough oval border contains the scene, but water and light break through it in places so it never feels like a framed picture.
In a woodcut stencil, line direction does all the texturing. Curved hatching for rolling water, vertical marks for the stone tower, short diagonal cuts for windblown clouds. Randomize those directions and the separate surfaces flatten into one pattern. Ask for controlled hatching over smooth gray shading, with every mark group following the form it’s describing, from the lighthouse walls to the wave crests.
8. Futuristic Cybersigilism Upper-Back Stencil for Men
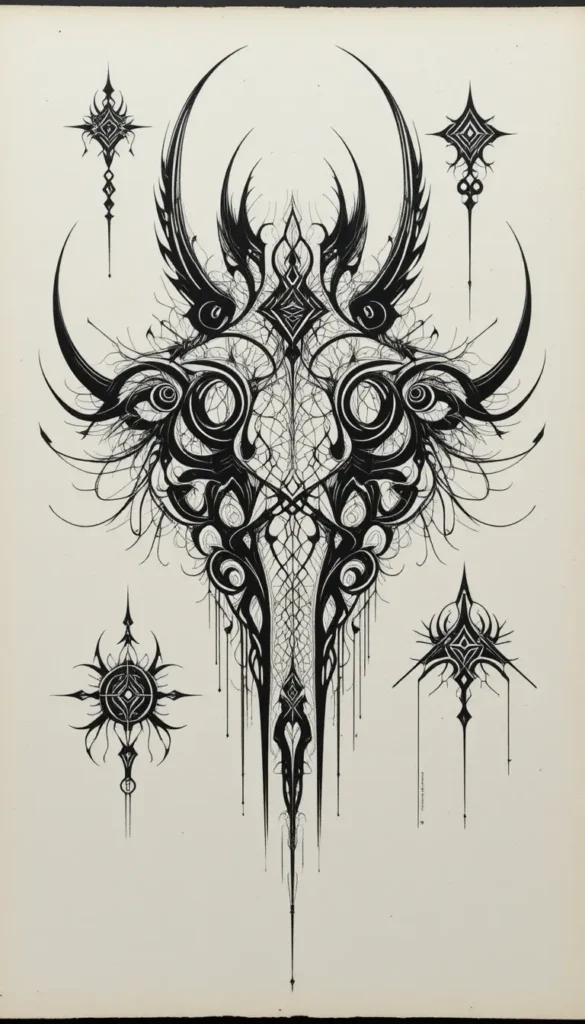
Mirrored hooks, tapered blades, and threadlike connections spread across the upper back in a wide architectural composition. Abstract armor rather than any recognizable object. The heaviest black sits near the center while the outer lines go finer and more fragmented toward the shoulders, so the piece never reads as one heavy tribal shape.
Small gaps between the mirrored sides keep the symmetry from feeling machine-perfect. The design has to be fitted to the wearer’s back, with width and curvature adjusted in the stencil itself, not transferred from a generic symmetrical template.
Distance check
Fine extensions disappear at distance, so view the stencil from several feet away before approving it. If the central structure vanishes behind its own details, ask for a second version with wider gaps and fewer hair-thin lines.
9. Anatomical Heart and Serpent Illustration for Men
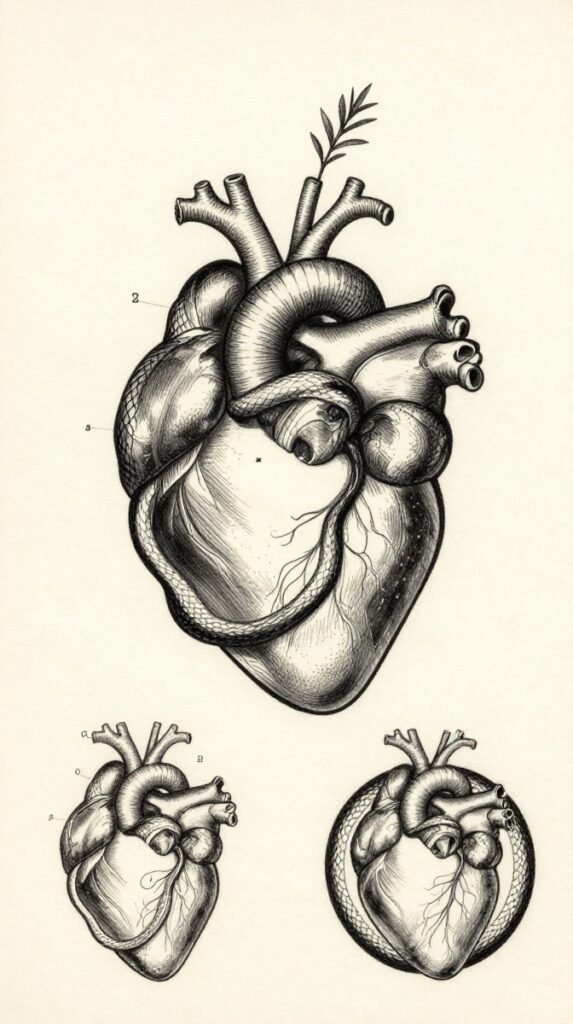
Built like a vintage scientific plate: an anatomical heart wrapped by a slender serpent that passes behind it, surfaces beside the upper vessels, and curves around the lower point without closing it off. A few numbered annotation marks identify selected features around the edges, and a small botanical sprig crosses behind both elements as a straight counterpoint.
The stencil works because heart, serpent, and labels live on separate visual layers with distinct textures. Stippled granular shading on the heart, clean repeating scales on the snake. Keep the annotation numbers large and few. Too many labels eat the open space that separates the two forms.
10. Tattoo Stencils for Beginners: Traditional Patchwork Set
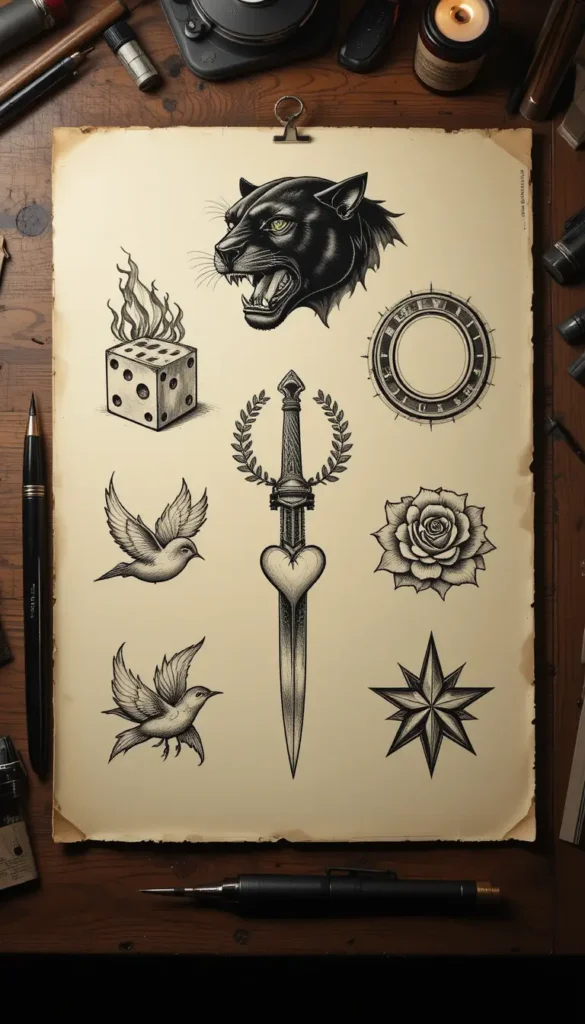
Five standalone flash pieces, a panther head, burning dice, a horseshoe, a dagger, and a small swallow, each with bold outlines and simple interior shading. They’re built to be collected gradually rather than tattooed as one scene. They hang together through consistent bold-line construction rather than a shared narrative, and size differences keep the arrangement lively, with the panther or dagger as the anchor.
This is one of the most adaptable setups for someone building coverage over time, and each image works as a complete design on its own. Starting with one anchor symbol lets you judge whether you want a dense sleeve or a looser collection with wider gaps.
Anchor first
Place the largest design first and leave measured gaps around it. Filling every narrow space with dots and miniature symbols early on restricts where later flash can go. If you’re building toward a full sleeve this way, our patchwork tattoo ideas break down how separate pieces become a balanced collection.
11. Fine-Line Birth Flower Bouquet Stencil for Women
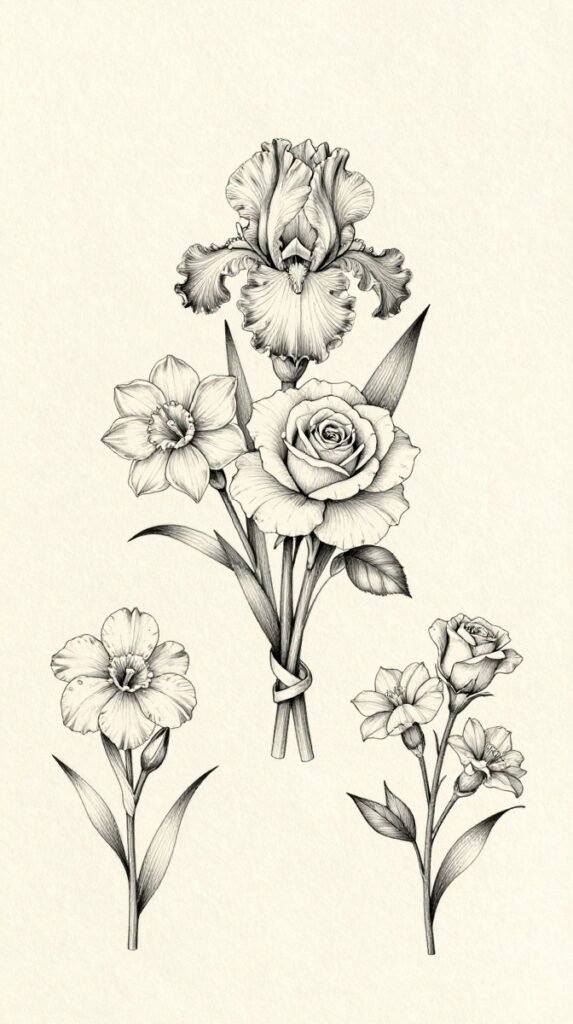
Two or three birth flowers in a loose hand-tied arrangement: one tall stem, one open central bloom, a smaller side flower, with a narrow ribbon or short handwritten name tying the stems. Clean single-needle linework, unopened buds for height, curved leaves widening the base. A tapered bouquet with its visual weight around the central flower.
Fine botanical stencils stay personalizable because different birth flowers can share one stem arrangement. But each flower needs a recognizable structure at final size, like the layered center of a rose or the backward-curving petals of an iris.
Scale test
Shrink the reference and check: if every bloom starts looking like the same circular flower, widen the gaps between overlapping petals before the stencil is finalized. Hidden petals should be removed before the whole bouquet gets reduced, not after.
12. Tattoo Stencils Ideas for Women: Ornamental Chandelier
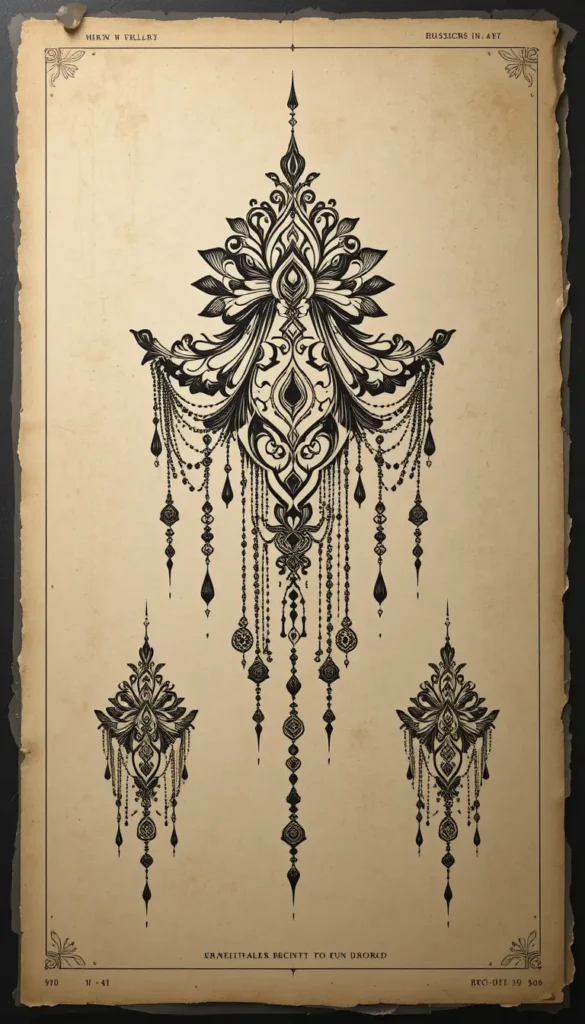
A suspended chandelier rendered as body jewelry: central teardrop under a small lotus crest, symmetrical chains, beads, and curved filigree extending outward, three hanging points along the lower edge. The open spaces matter as much as the linework. The center stays open instead of becoming a solid black chest panel.
The center can hold a small gem shape, crescent, or diamond. It doesn’t need literal gemstone rendering. What it does need is width built through the chains and curved ornament while the middle breathes.
Centerline
Before any bead gets refined, the artist should map the design against your body’s centerline. The two sides need to balance on you, even if your contours ask for slight asymmetry in the curves. For more jewelry-inspired pieces in this vein, see our ornamental tattoo ideas.
13. Celestial Luna Moth and Moon Phase Stencil for Women
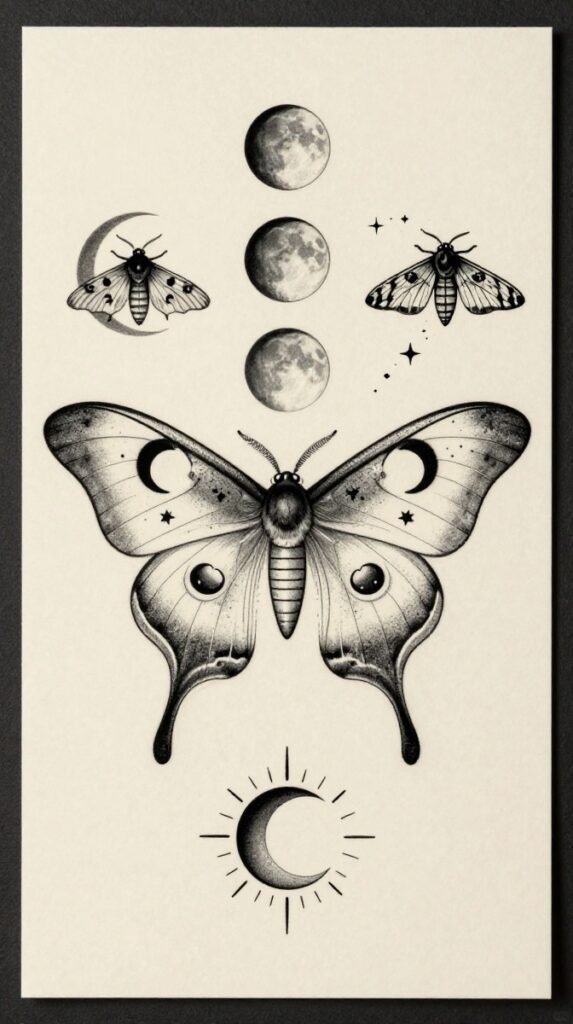
A fully spread luna moth with eye-marked wings, small stars, and open crescent cutouts instead of realistic insect coloring, with five moon phases arcing above it. Dotwork fades the darker wing edges into lighter centers. Fine rays around the full moon echo the antennae and tie the two elements together without a border.
The wide wings set the horizontal axis while the moon phases add height without introducing another large subject. Pepper shading can soften the wings, but the dots should disperse gradually toward the centers rather than stopping along a visible edge.
Moon sequence
Keep each phase simple enough to read in order. Five heavily detailed miniature moons would fight the moth for attention. The same discipline applies to the wing markings: fewer dots near the smallest details so the outlines stay distinct. If moonlit, slightly witchy imagery is your lane, our Practical Magic tattoo ideas collect more designs in that spirit.
14. Art Nouveau Muse and Iris Portrait for Women
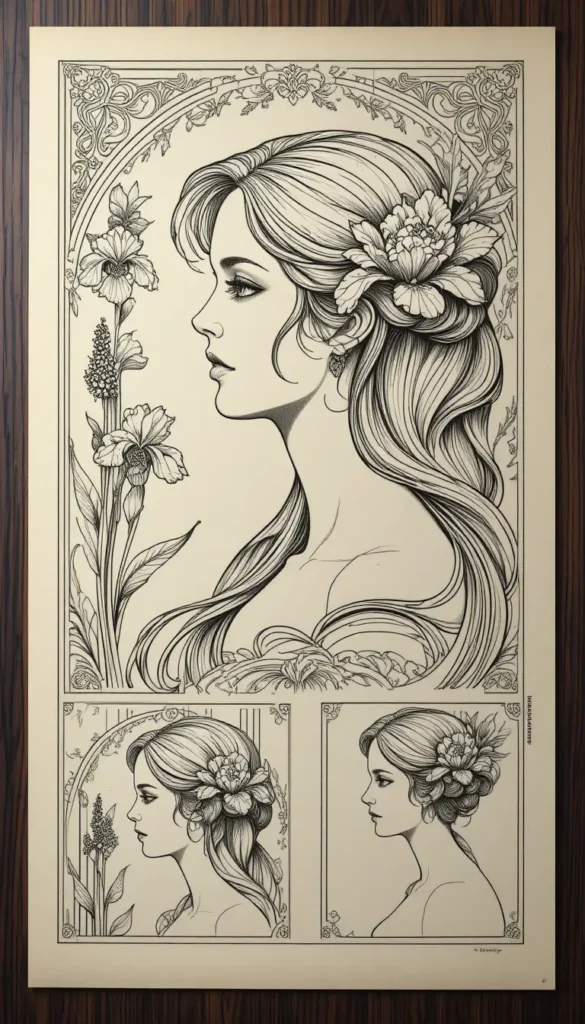
A side-facing woman with flowing hair, framed by tall irises and a curving Art Nouveau arch. The face is built from a few deliberate contours, nose, lips, eye, and jaw, rather than photographic tonal detail. Smooth continuous curves in the border play against pointed petals and individual hair strands.
The border’s open circles near the top of the arch add period ornament without competing with the face. Everything here depends on hierarchy: the facial profile gets the cleanest open area, then smaller marks distribute through the hair and botanical frame.
Profile first
Choose the facial profile before finalizing anything around it. The nose, lips, eye, and jaw need room to stay distinct, so the artist should scale the irises around the portrait rather than shrinking the face to fit a pre-drawn arch. In a portrait stencil, a cramped face is the one flaw you can’t hide.
15. Red Spider Lily and Black Brushstroke Stencil for Women
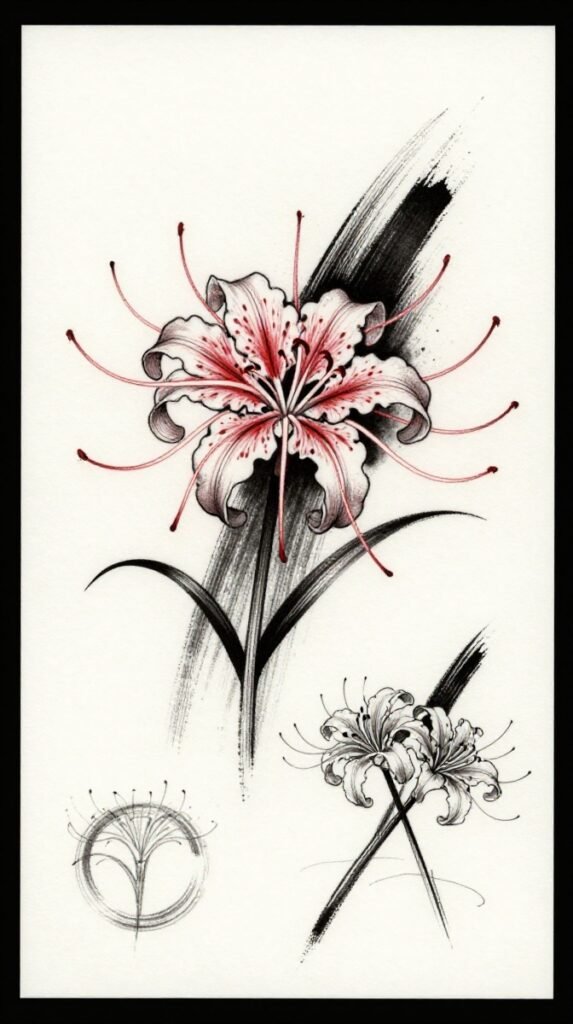
Long curling petals, extended stamens, one loose black brushstroke sweeping diagonally behind the bloom, a short stem with two narrow leaves anchoring the base. The stencil needs genuinely separate guides for the red floral lines and the black stroke. Each petal must hold where the colors overlap, or the flower ends up depending entirely on its redwork palette for definition.
The spider lily’s narrow stamens create outward motion while the broad black stroke gives those thin red lines a dense contrasting background. A few uneven splatter marks can support the brush effect, but they should stay concentrated near one end of the stroke.
Color separation
Keep the stroke broad and uninterrupted so it supports the flower instead of slicing through every small petal. The stamens, petals, stem, and brushstroke need separate paths in the stencil. Color should enhance the design, not be the only thing holding it together.
See Also: 21 Ornamental Tattoo Ideas for Females With Meaning
16. Tattoo Stencils for Woman: Flowing Koi and Water Ripples
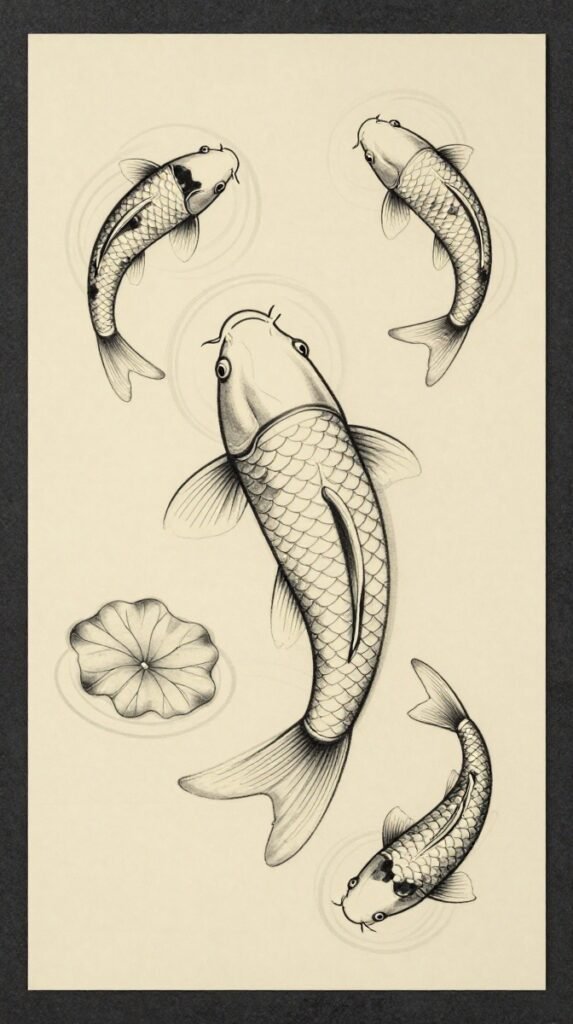
A single koi circling inside three clean concentric ripples. Head up, tail bending around the bottom of the circle, two small lotus leaves interrupting the ring on the far side. The offset layout keeps it from feeling like a perfectly symmetrical emblem, and the open geometric water makes it airier than a traditional koi sleeve.
Wider spacing near the flexible tail fins, tighter scale divisions along the body. If the design includes color, orange or red sections can follow the scale divisions rather than being applied as flat fills.
Circle breaks
Let the tail and fins interrupt selected sections of the ripple. Those breaks are what create depth. A fully closed circle flattens the fish against the water instead of letting it move through it, so keep open skin between the koi and each ripple and let the water frame the fish instead of crowding it.
17. Negative-Space Olive Branch Bracelet for Women
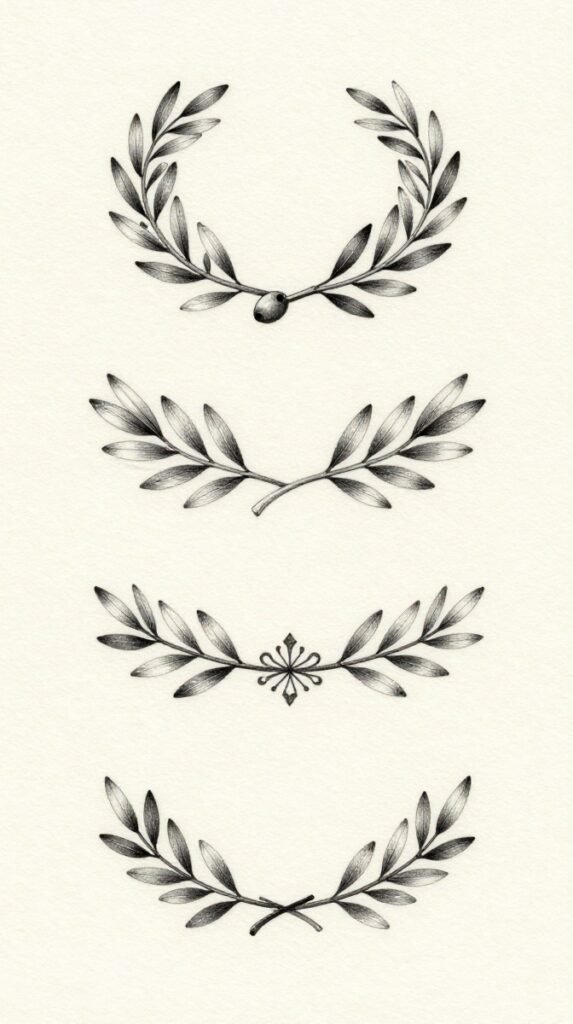
Two olive branches that approach each other around the arm without closing. Tapered stems forming the band, leaves alternating up and down, a narrow opening on the inner arm. Slightly thicker stems than leaf veins keep it legible at a glance. One small olive or initial near the opening is plenty, and anything more would interrupt the clean branch rhythm.
A wraparound stencil lives or dies on circumference. The artist has to account for your actual arm so the leaves don’t overlap at the back or leave an unexpectedly wide gap at the front. The side view matters as much as the front, since a leaf cluster near the inner-arm opening can make one end look heavier.
The gap
Have the artist measure and test the stencil around your arm rather than transferring a straight branch drawing. Check the opening from the front and back before approving its width. That negative space is a deliberate design element, not leftover skin.
18. Y2K Chrome Butterfly Lower-Back Stencil for Women
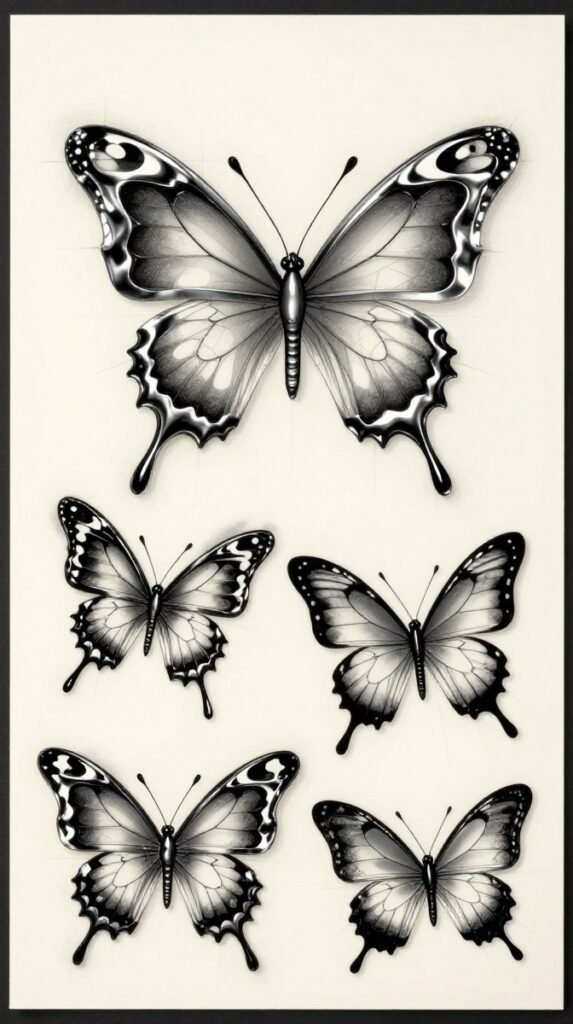
Flame-tipped wings, reflective panel shapes, and oval cutouts over a narrow body and long antennae. Y2K nostalgia rebuilt with a chrome structure. The stencil has to outline every reflective panel even though the finished piece may use airbrushed gradients. Each highlight must follow the wing’s curvature rather than float inside it as an unrelated white shape.
Dark sections along the lower wings create the contrast, while open highlights produce the polished-metal illusion. Its horizontal structure also sets it apart from vertical compositions like the luna moth piece above.
Panel size
Broad chrome sections with a simplified highlight map read as polished metal. Dozens of tiny reflections just fragment the wings into disconnected shards, so simplify the highlight map before anything else if the stencil starts looking busy.
19. Micro-Realistic Arched Window Landscape for Women
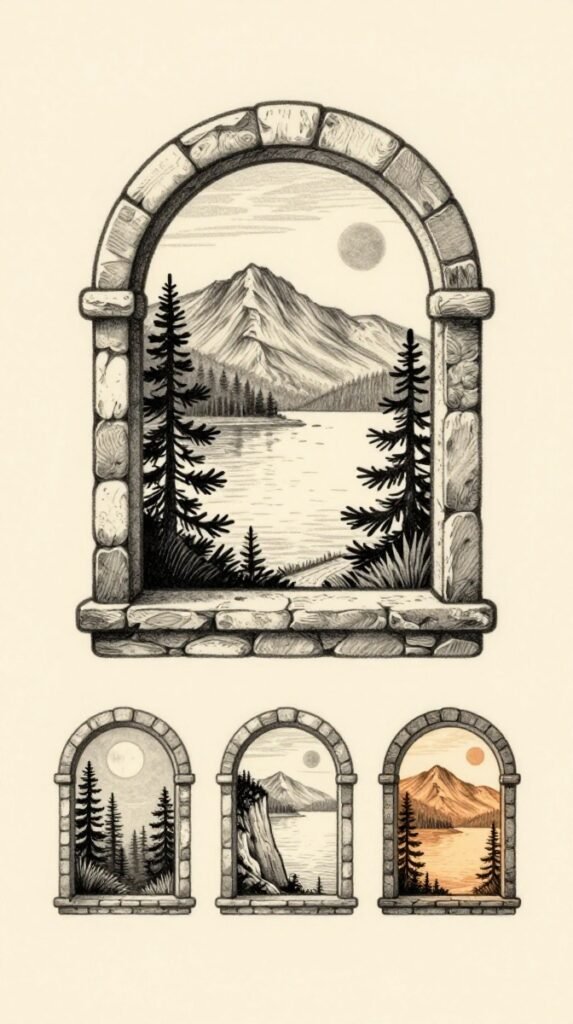
A miniature mountain lake seen through an arched stone window: narrow path leading to the water, two pines flanking, distant sun over the ridgeline. The stencil’s job is disciplined simplification. Window, horizon, trees, and major reflections in precise outlines, with a controlled value map guiding sky, water, and mountains only after the scene reads clearly unshaded.
Depth here comes from atmospheric perspective, not object count. Lighter, simpler contours push the far mountains back while the window frame and nearest trees take the strongest contrast.
Simplify first
Micro-realism fails when the stencil tries to hold too much. Two foreground trees, one ridge, one clear horizon. That’s the entire depth system. If the test stencil looks crowded, remove background trees before reducing anything else, and compare the artist’s small-scale landscape work at similar dimensions before committing.
20. Lace Fan and Peony Hip Stencil for Women
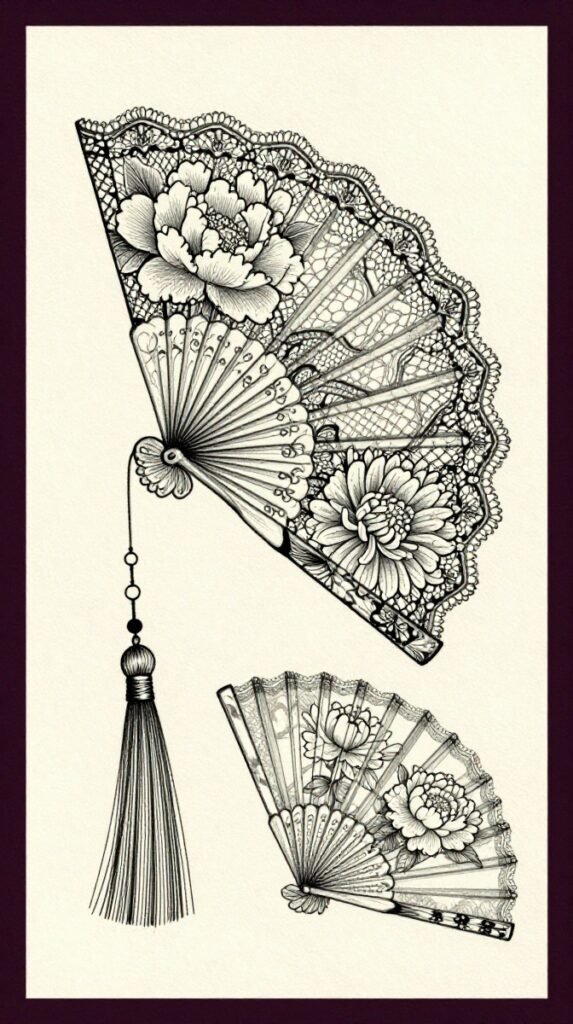
A folding lace fan edged with an open peony and a silk tassel curving down from the handle. Radial geometry up top, a flowing diagonal below. The peony’s broad petals give the eye a focal point against the fine fan lace, while the tassel keeps the design from ending in a stiff half-circle.
Size it by simplifying the lace, not by shrinking everything equally. Preserve the divisions between fan panels, let the peony overlap only part of the fan, and keep flower, ribs, and lace identifiable as three separate things. A few hanging beads can connect fan to tassel without introducing an unrelated symbol.
Mistakes to Avoid With Tattoo Stencils
Choosing detail the size can’t hold. The most common failure in stencil work is falling for a highly detailed reference at a size that can’t support it. If the design depends on elements thinner than a millimeter at your chosen dimensions, either go bigger or simplify. Shading can’t rescue lines that were too fine to begin with.
Ignoring the body’s shape. A stencil drawn for flat paper behaves differently on a curved forearm, a tapered calf, or ribs that expand when you breathe. Always test the full-size stencil on the actual placement. Designs with strong horizontal or vertical axes are the least forgiving.
Tracing instead of adapting. A stencil copied line-for-line from someone else’s tattoo inherits decisions made for their body, their artist’s hand, and their healing. Use references for direction, then let your artist rebuild the composition for you. The result will look more original because it actually is.
Picking placement for the photo, not the life. Highly visible placements photograph well on day one and complicate job interviews, formal events, and your own changing taste for years. There’s nothing wrong with a visible tattoo, but the decision deserves more than one afternoon of enthusiasm.
Skipping the stencil check. Never approve a design from a phone screen. Look at the physical stencil at full size, on your body, in normal light. If you can’t identify the subject instantly in the unshaded outline, the finished tattoo won’t be any clearer.
Frequently Asked Questions
What are the easiest tattoo stencils for beginners?
Simple symbols, botanical outlines, bold-line flash, and designs with generous open space transfer most reliably. There’s less fine detail to lose at small sizes.
How do I choose tattoo stencils for my body shape?
Match the composition to the body area: vertical designs on limbs, curved designs wrapping shoulders and hips, broader stencils across the chest or back. Test the actual stencil on the spot before approving it.
Can tattoo artists customize tattoo stencils before tattooing?
Yes. An artist can adjust scale, line spacing, orientation, and surrounding details to fit the selected body area. That’s a normal part of the process, not an imposition.
What references should I bring for a custom tattoo stencil?
Bring two or three clear references and be specific about what you want from each: the linework, subject, placement, scale, or color treatment. “I like this one” gives the artist nothing to work with.
Are tattoo stencil ideas for men and women actually different?
Gender labels are a useful way to organize inspiration, but technique, scale, body flow, subject, and placement are the criteria that actually matter when choosing.
Where to Start
Save the tattoo stencils whose linework and overall silhouette remain clear at your preferred size. Compare two or three options directly on the intended body area before settling on scale and orientation. If the central subject gets hard to identify in the unshaded stencil, simplify the supporting details first.