
Surfside nails ideas are all about that easy, sun-warmed feeling — soft blues, sandy neutrals, and little bursts of tropical color that look like they belong on a boardwalk, not a runway. Whether you’re prepping for an actual beach trip or just chasing that coastal mood at home, this roundup pulls together sixteen genuinely different looks, from hand-painted florals to glossy jelly finishes. Scroll through and save whichever ones match your nail shape, your patience level, and your vacation itinerary. Here are the best Surfside nails ideas given below.
1. Classic French Tip With A Painted Wave Line
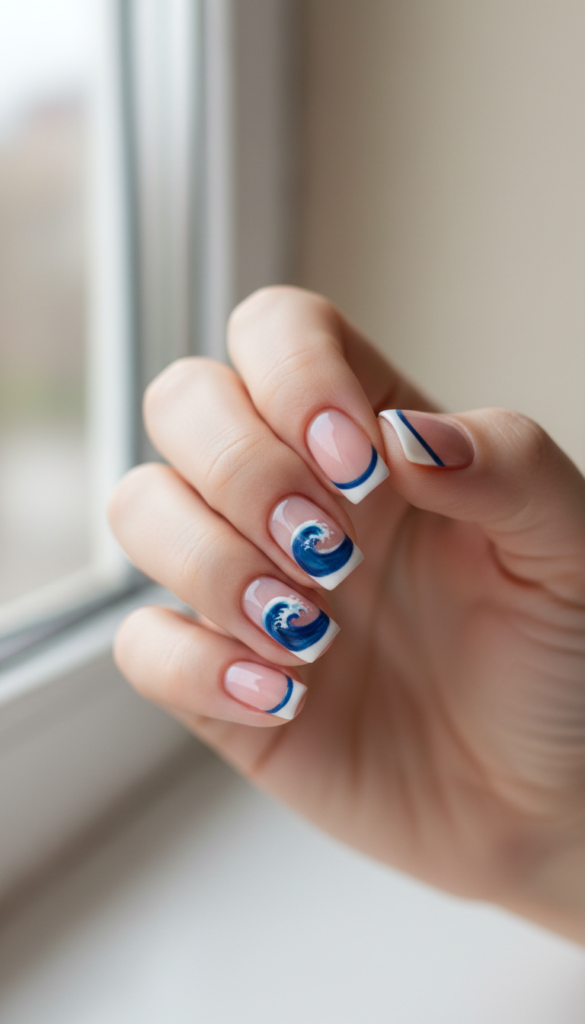
This one takes the traditional French manicure and swaps the straight white tip for a soft, hand-drawn wave in ocean blue. Instead of a crisp line across the nail bed, the polish dips and curves like a tide rolling in, usually in a mid-tone teal or cobalt. The base stays a clean, sheer pink or nude, which keeps the wave itself as the only real focal point.
A reverse French places color near the cuticle instead of the tip, but this design keeps the color right at the edge in wave form, which is what makes it one of the more recognizable surfside nails ideas in this list. Nail artists often add a thin white foam line along the wave’s crest to sharpen the ocean effect. Because the wave sits near the tip rather than the cuticle, the design also holds up through two to three weeks of growth without an obvious grow-out line.
Tip
Ask your nail artist for a “thin-line wave French” and bring a reference photo — the width and placement of the wave line make or break this look.
Best For
This design suits medium almond or oval nails best, since the extra length gives the wave line room to curve naturally without looking cramped.
2. Marbled Sea Foam Swirl Nails
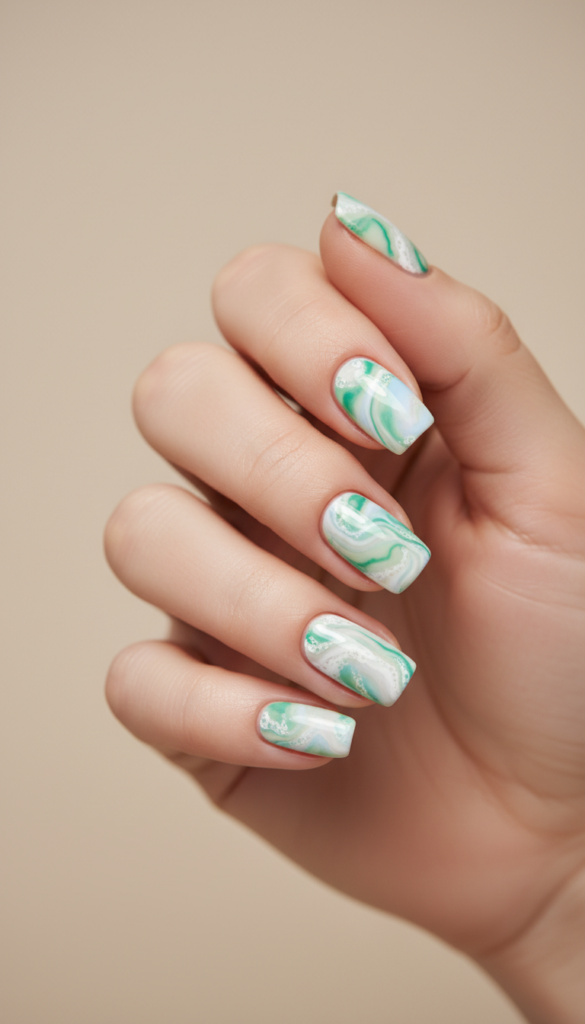
Marbling brings a completely different technique to the table than the clean French tip above. This look uses a water-marbling or gel-swirl method to blend white, seafoam green, and a whisper of pale blue directly into the nail. The colors never fully mix; instead they form organic, veined patterns that resemble foam breaking over the shoreline, so no two nails end up looking identical.
Some versions layer a thin coat of encapsulated glitter between the swirls, trapping shimmer inside the pattern rather than sitting on top of it. That trapped sparkle is what gives the marbling real depth under direct light instead of looking flat. Many people pair the swirl with one plain matte nail per hand as a visual break from the pattern.
Tip
For a DIY version, use the water-marbling method with cool water and a toothpick to drag the colors — gel marbling at a salon gives a longer-lasting, glossier result.
Best For
Sea foam marbling looks strongest on square or squoval nails, where the flatter surface gives the swirling pattern more room to spread evenly.
3. Crackled Sand-Effect Nails
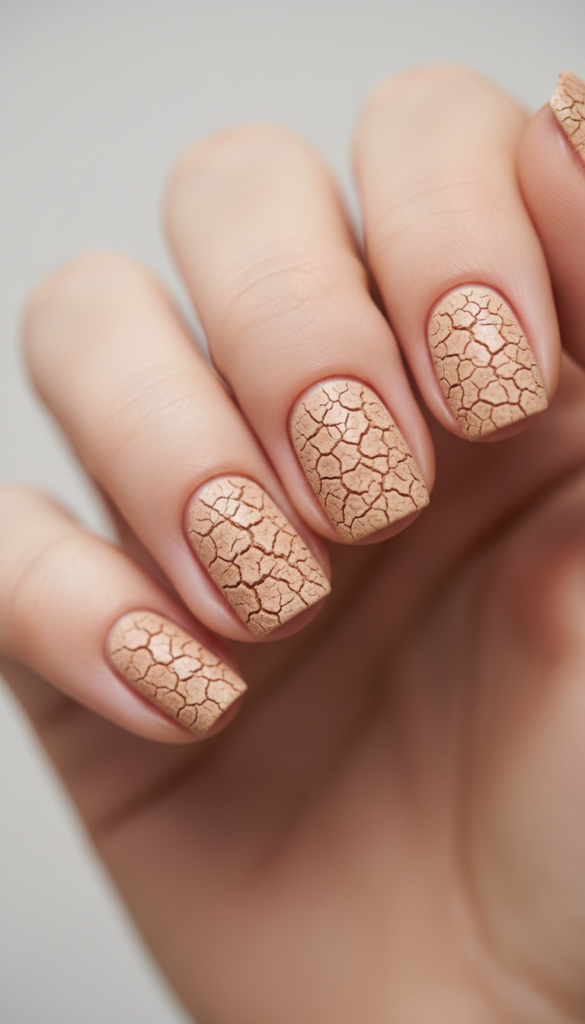
This design uses a crackle-effect top coat over a warm beige or sandy base, a completely different technique from the blended gradients elsewhere on this list. As the crackle lacquer dries, it contracts and splits into fine, irregular fissures that expose the base color underneath, mimicking sand that has dried and cracked along the tide line.
The crackle top coat adheres the same way over natural nails or an acrylic overlay, so the technique isn’t limited to one nail type. You can feel the texture under your fingertip, which sets this look apart from every glossy or blended finish in this roundup. It works best layered over a plain neutral base, since the crackle pattern needs real contrast to actually show once it sets.
Tip
Apply the crackle top coat in one thick, even layer and let it sit undisturbed while drying — thinner layers crack less dramatically.
Best For
This textured effect suits shorter, sturdier nail shapes like square or round, where the crackle pattern stays contained instead of stretching awkwardly.
4. Simple Tropical Nail Design: Hand-Painted Hibiscus Accent
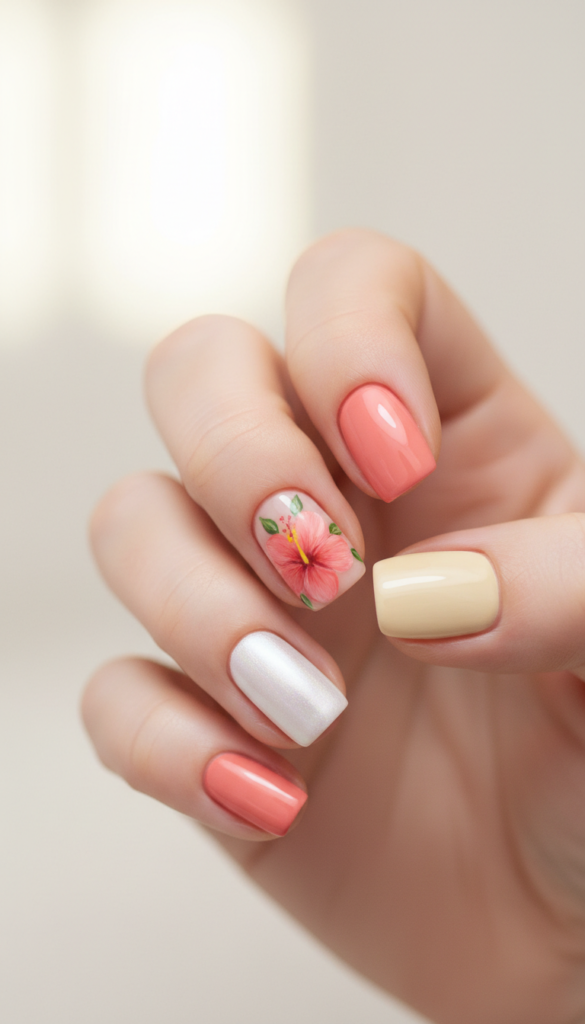
Rather than covering every nail in pattern, this idea keeps four nails in a simple solid color — often a soft coral, white, or pale yellow — and reserves one nail per hand for a detailed, hand-painted hibiscus flower in coral pink and green. The petals usually come from a one-stroke technique, where a single loaded brushstroke creates the light-to-dark shading in one motion instead of layering separate colors.
This is one of the more approachable simple tropical nail designs for anyone who loves florals but doesn’t want an entire hand of busy pattern. The single accent nail carries the whole theme, while the rest of the manicure stays calm enough to wear to work or a formal event. The flower color can also shift to match an outfit or event without changing the technique itself.
Tip
Request the hibiscus on the ring finger specifically — it’s the nail people notice first in photos and casual hand gestures.
Best For
Hand-painted florals like this show up best on medium-length almond or coffin nails, which give the artist enough flat surface area to render the petal layers clearly.
5. Negative Space Sun Circle Accent
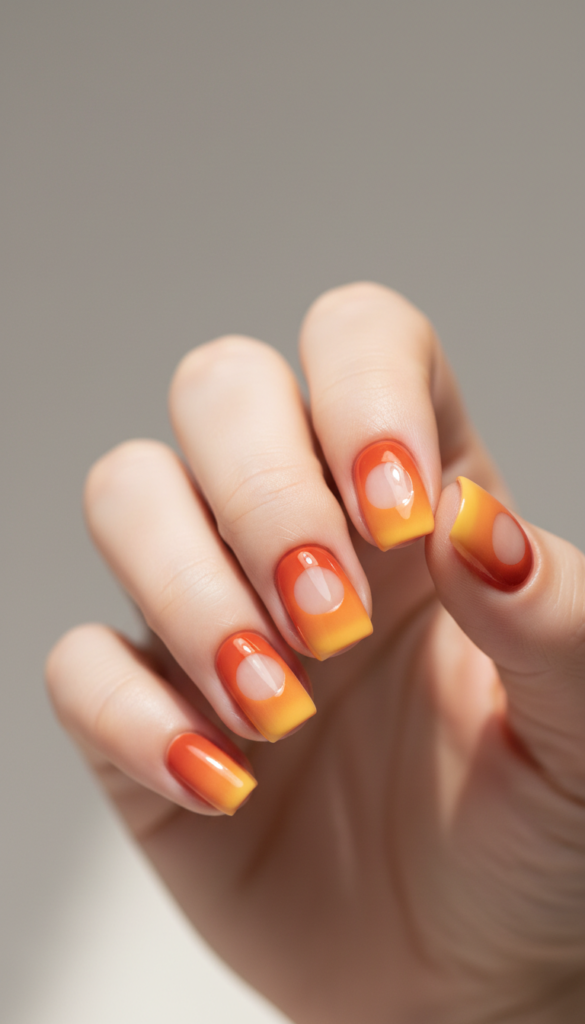
This design uses a single clean circular cutout near the center of the nail, left bare or clear, surrounded by a warm gradient that runs from deep orange to soft yellow. The bare circle stands in for a rising or setting sun. Unlike most designs on this list, the negative space here subtracts color instead of adding it.
Some artists build the surrounding gradient with an airbrush gun rather than hand-blending, which produces a smoother fade around the circle’s edge. That poster-like, graphic quality sets this design apart from the softer, more organic florals and marbling covered earlier. It’s typically limited to one or two accent nails per hand, with the rest kept in a simple solid warm tone.
Tip
Mask the circle with a small dotting tool or the rounded end of a bobby pin dipped in base coat before painting the gradient around it.
Best For
This design suits square or squoval nails best, since the flat surface keeps the circle looking symmetrical rather than distorted by curvature.
6. Glossy Aqua Jelly Nails
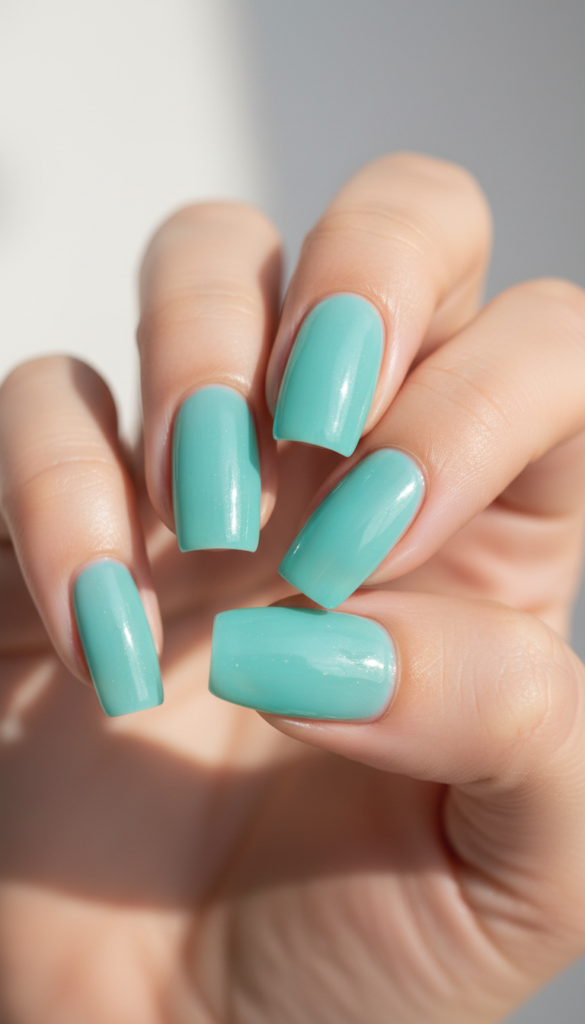
Jelly nails are a texture-driven idea rather than a pattern or gradient — the finish itself is what sets this one apart. A translucent aqua or seafoam polish, built up in thin layers rather than one opaque coat, lets light pass through the nail and gives it a jiggly, glass-like quality similar to actual sea glass.
Jelly nails are a cousin of the aura nails trend, but they hold more true color saturation than aura’s softer, diffused finish. The saturated, candy-glass color reads more retro and playful than the muted coastal shades elsewhere on this list, especially in direct sun, where the translucency visibly shifts tone. Because the color is sheer to begin with, small application flaws tend to blend in rather than stand out.
Tip
Ask specifically for a “jelly finish” rather than just a sheer polish — true jelly formulas are thicker and glossier.
Best For
The see-through quality of jelly polish looks especially good on shorter nails, where the glassy effect stays visible across the whole nail.
Read About: 17 Piercing Nails Ideas That Turn Basic Manicures Into Statement Looks
7. Chrome Seashell Accent Nails
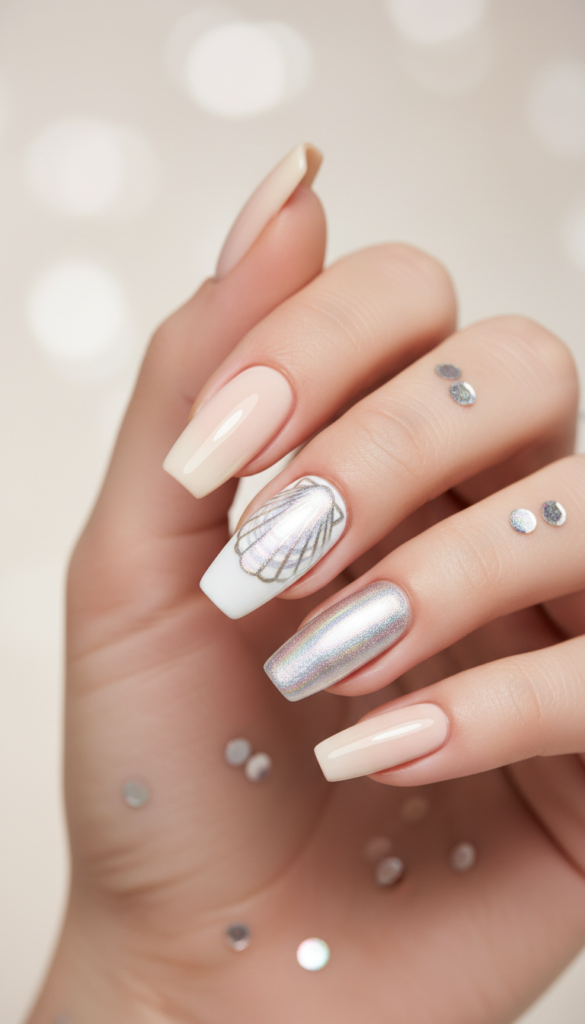
Chrome powder introduces a metallic, reflective finish that nothing else on this list uses. Most nails stay a simple nude or white base, while one accent nail per hand gets a silver or iridescent chrome powder over a hand-painted or stamped seashell outline. The chrome catches light the way the inside of a real shell does, with a soft, all-over pearlescent sheen.
Cat-eye gel creates a different effect, since a magnet pulls its metallic particles into one directional shine rather than a full mirror finish. This idea leans more glamorous than most of the beach-inspired surfside nails ideas on this list, which makes it a good fit for evening events during a coastal-themed trip. Pairing a matte or glossy neutral base with the one high-shine chrome nail also keeps the rest of the set from feeling flat.
Tip
Chrome powder needs a tacky gel top coat to adhere properly — mention this to your nail artist ahead of time.
Best For
Chrome accents show up most clearly on nails with a flatter surface, like squoval or square shapes, since curved nail beds can distort the reflective effect.
8. Tiny Palm Tree Silhouette Nails
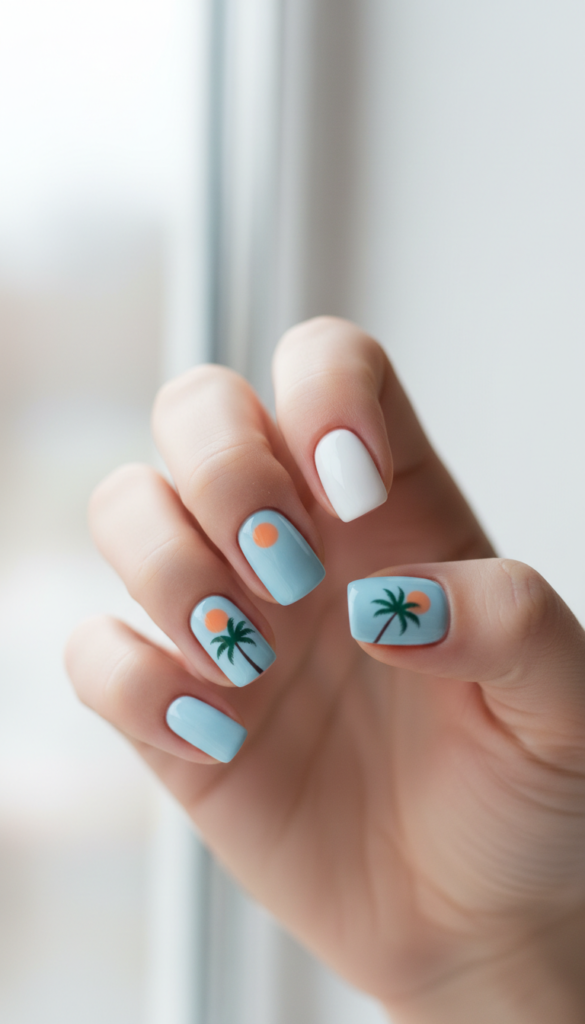
This design uses a silhouette technique — solid black or dark green shapes painted against a light background — which reads very differently from the softer, blended looks earlier in this list. A simple, stylized palm tree goes on one or two accent nails per hand, usually set against a pale blue or white sky-colored base, sometimes with a small orange circle standing in for a setting sun.
3D nail art builds a palm tree up with sculpted acrylic for a raised, textured shape, but this version stays completely flat, which makes it faster to execute than florals or marbling. That graphic, high-contrast look is easy to spot in photos and gives the whole manicure a clear theme without needing pattern on every nail.
Tip
Keep the palm tree confined to the top two-thirds of the nail with space below it — crowding the design into the full nail length makes it read as cluttered.
Best For
This graphic style works well on medium-length coffin or almond nails, which give the silhouette enough vertical space to look proportional.
9. Pastel Tie-Dye Sunset Swirl
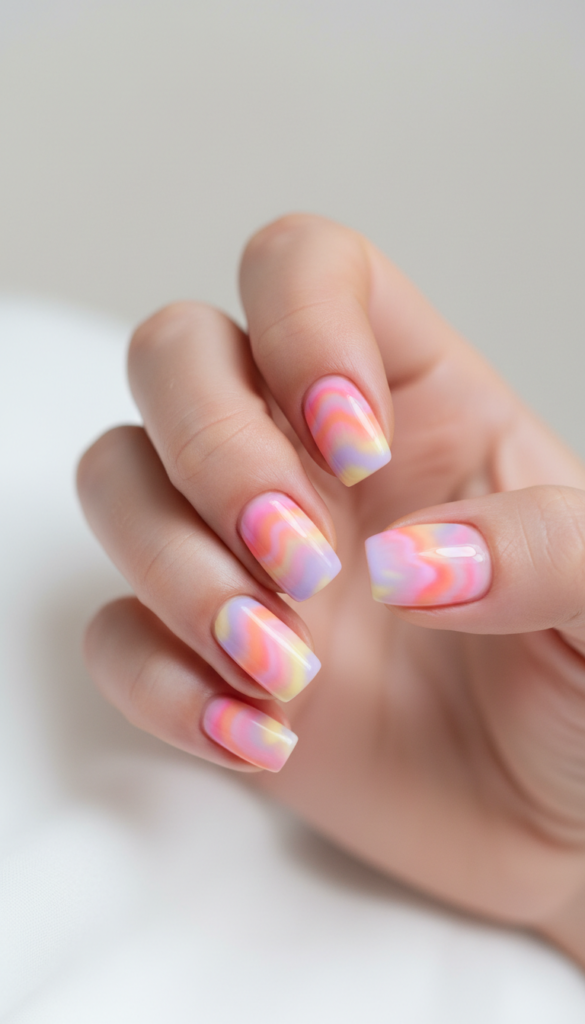
Tie-dye application is its own distinct technique. It blends multiple pastel shades — usually pink, orange, yellow, and lavender — directly into wet polish so the colors swirl together without a defined pattern. Unlike the sea foam marbling earlier, this version leans into warm sunset tones and covers the entire nail rather than one section.
A babyboomer ombré blends only two shades in a soft vertical gradient, so this four-color swirl reads far busier and warmer by comparison. It’s also a forgiving technique for anyone newer to nail art, since the blending happens somewhat naturally as the colors get dragged together.
Tip
Work with wet polish only — once any of the colors start to dry, dragging them together creates streaks instead of a smooth swirl.
Best For
Tie-dye swirls suit longer oval or almond nails best, since the extra surface area lets all four colors show up clearly.
10. Short Beach Nails Idea: Micro-Glitter Sandy Texture Nails
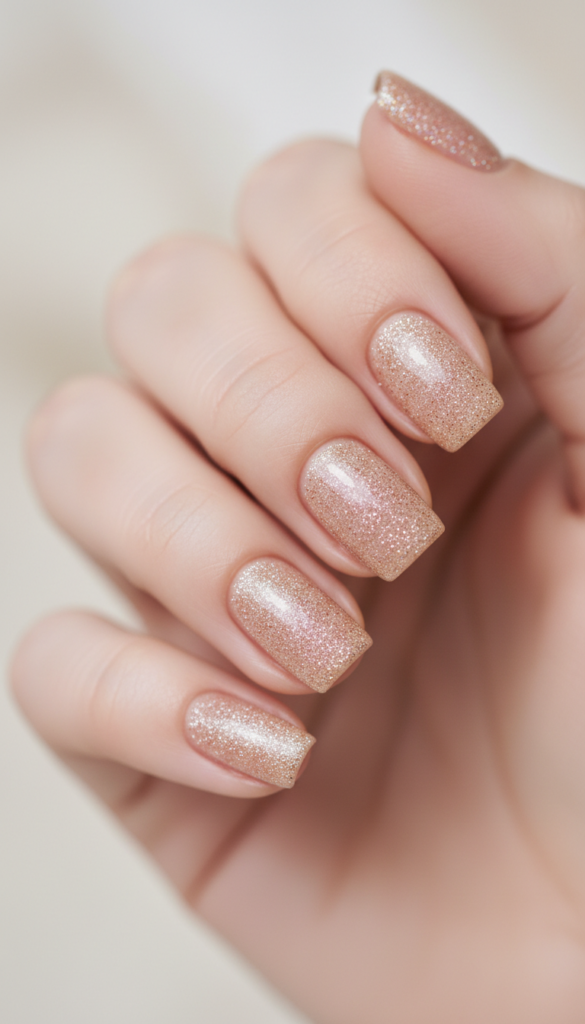
This idea is built entirely around texture rather than color contrast or line work. A fine, sand-toned micro-glitter gets packed densely over a nude or pale beige base, creating a gritty, dimensional surface that resembles a handful of beach sand caught in the light.
Concentrating the heaviest glitter near the free edge, where sand naturally collects, gives the texture a more believable gradient than spreading it evenly to the cuticle. This makes it one of the more low-maintenance surfside nails ideas here, since the dense texture hides small chips and regrowth better than a solid or patterned design does.
Tip
Ask for a “fine sand glitter” rather than standard glitter polish — the grain size is what separates a subtle sandy texture from generic sparkle.
Best For
This texture works on nearly any nail shape, but it looks especially natural on shorter square nails, where the dense glitter mimics an actual sand-dusted surface.
11. Caribbean Nail Design: Coral Reef Abstract Splatter
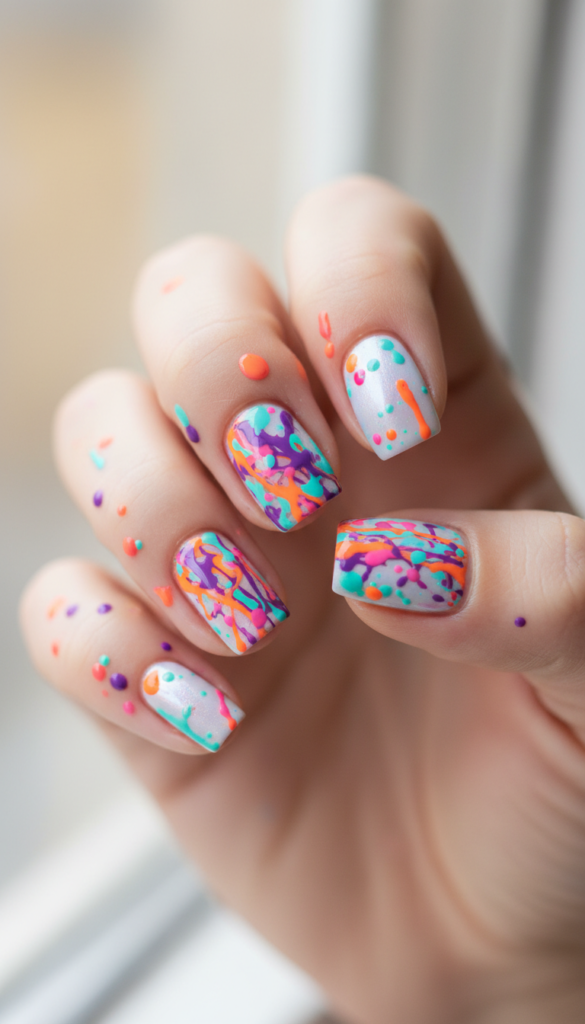
Splatter technique is a distinct, more energetic approach compared to the smoother gradients and marbling covered earlier. Small droplets of orange, pink, purple, and turquoise polish get flicked or dotted across a white or pale blue base, loosely evoking the chaotic color mix of a coral reef without painting anything literal.
This is one of the most vivid Caribbean nail designs in the roundup, and it also translates well to a press-on set, since the droplets can be pre-painted onto the full set before it’s applied. The uneven, imperfect droplet placement is the whole point here, unlike the more controlled techniques covered elsewhere in this list.
Tip
Protect the surrounding skin with tape or a barrier cream before splattering, since flicking polish is messy by nature.
Best For
Splatter designs read best on square or squoval nails with a flat surface, which keeps the droplets distinct instead of pooling into curved edges.
12. Striped Cabana Nails
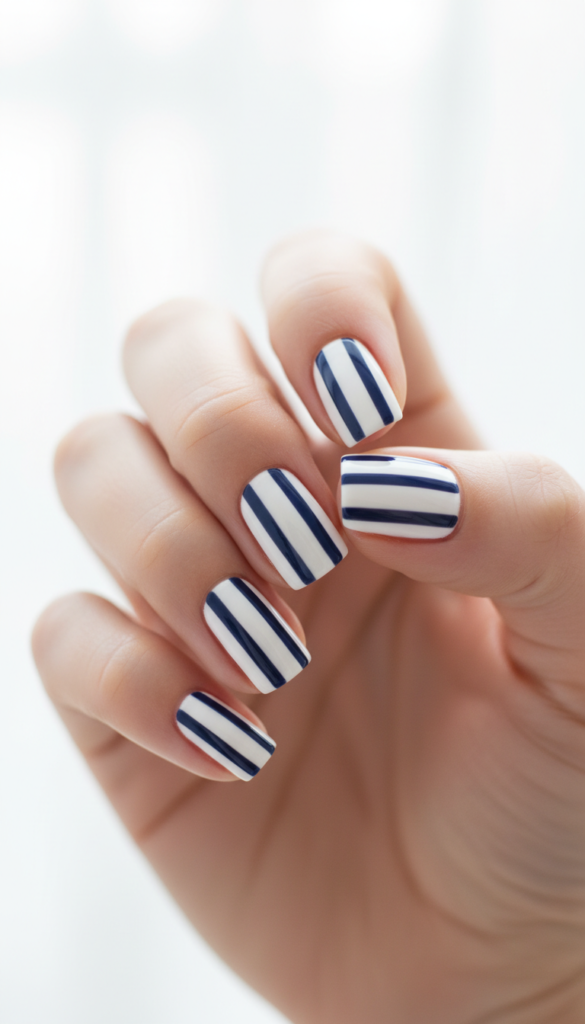
Striped cabana nails borrow directly from beach cabana awnings, using clean, evenly spaced vertical stripes in alternating white and a single bold color — often navy, red, or turquoise. Unlike the softer, blended looks on this list, the stripes here are crisp and geometric, usually built with striping tape to keep the lines perfectly straight.
This is one of the more structured, graphic surfside nails ideas in the roundup, and each stripe stays visually distinct as the nail grows out, since the tape creates hard edges rather than a blended transition. It also works nicely as a full-set design rather than an accent nail, since the repeating stripes look intentional across all ten nails.
Tip
Use striping tape rather than freehand lines for this one — even slightly wobbly stripes read as a mistake in a design this geometric.
Best For
The clean vertical lines in this design elongate shorter nails nicely, making it a good option for anyone with naturally shorter nail beds.
13. Matte White Base With Gold Foil Starfish
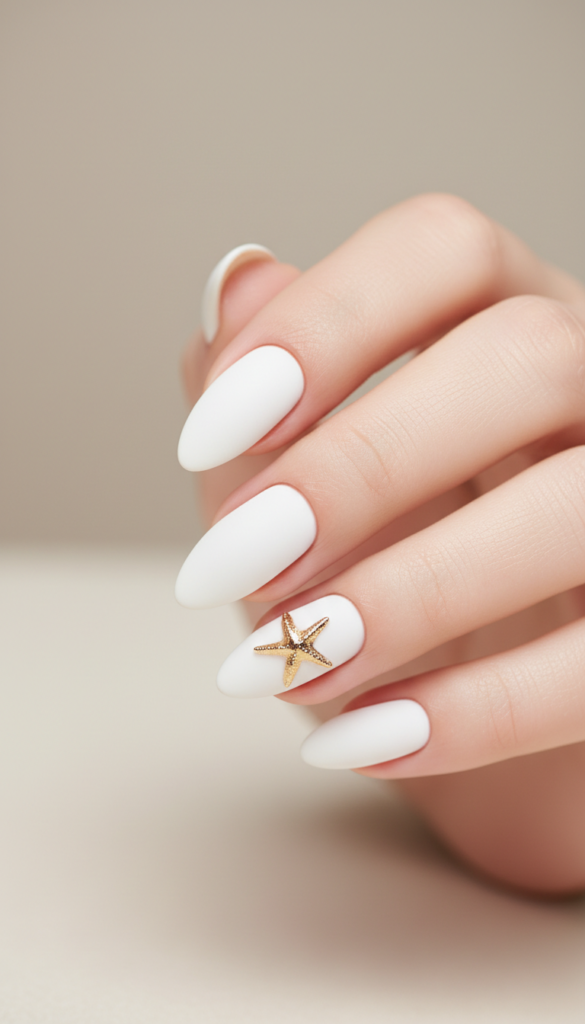
This design of Surfside nails ideas pairs a completely matte white base — a finish not used anywhere else on this list — with small gold foil starfish shapes as an accent detail on one or two nails per hand. The matte texture flattens the light, which makes the metallic foil starfish stand out even more sharply by contrast.
This matte-and-foil pairing sits at the opposite end of the spectrum from a glazed donut finish, which relies on high-shine, sheer glaze rather than a flat matte base. It’s a quieter, more minimal take on beach-themed nail art that leans into texture contrast instead of bright color, which makes it a solid option for a resort dinner or a beach wedding.
Tip
Gold foil needs a specific foil adhesive, not regular top coat, to transfer cleanly — confirm with your nail artist beforehand.
Best For
This pairing looks most elegant on medium coffin or almond nails, where the matte surface and the small foil accent both have enough room to read clearly.
14. Watermelon Pink-To-Green Tropical Fade
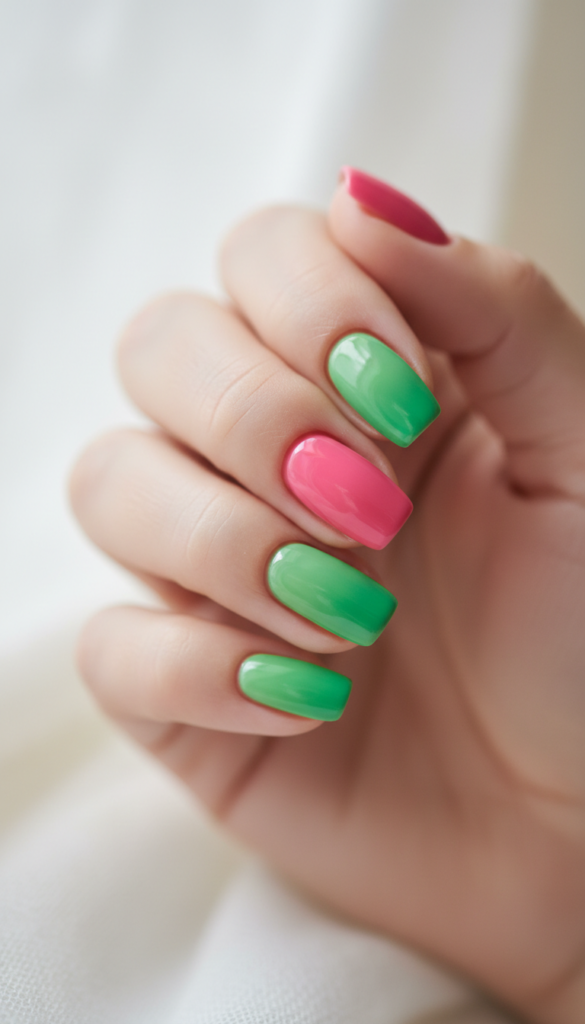
This gradient stands apart from the crackled sand effect earlier because it uses two saturated, high-contrast colors — a bright watermelon pink transitioning into a fresh green — rather than a textured neutral finish. The blend usually happens in the lower third of the nail, leaving the tip a cleaner, lighter shade so the color doesn’t feel heavy.
This look also holds up well in dip powder, which carries saturated color further than regular polish and keeps it vivid through two full weeks of wear. That durability makes it one of the more practical picks among nails for beach vacation planning, alongside its bright, fruit-inspired palette.
Tip
Blend the two colors with a small makeup sponge rather than a brush — sponging creates a much smoother transition between saturated colors.
Best For
This fade works particularly well on longer oval nails, since the extra length gives the pink-to-green transition more room to blend gradually.
15. Blue And White Checkerboard Surf Nails
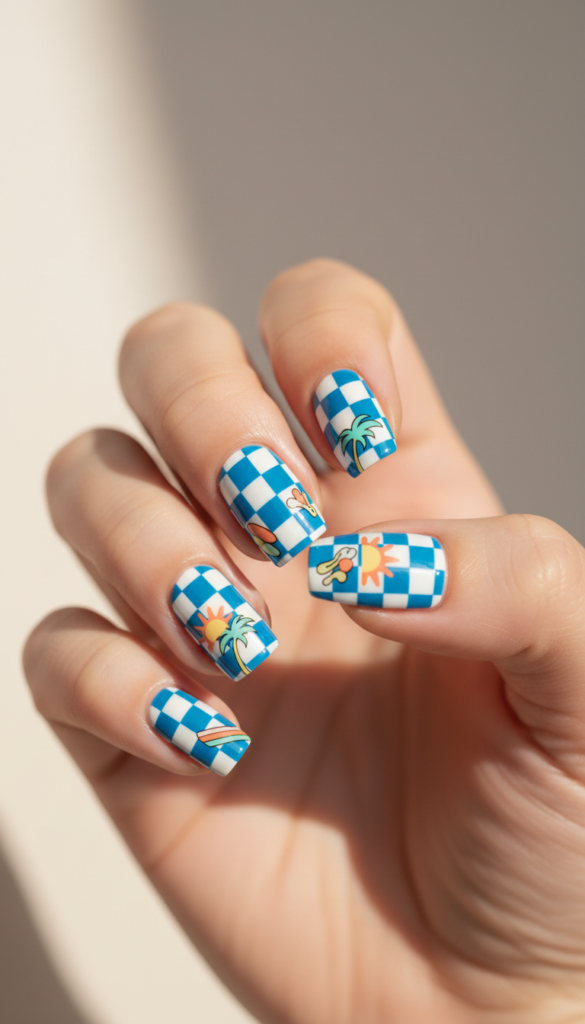
Checkerboard patterns are a completely different geometric approach from the vertical stripes covered earlier, using a grid of alternating blue and white squares instead of straight lines. The squares stay small and evenly spaced, which gives the design a retro, surf-shop energy built entirely from repetition rather than blending or shading.
This is one of the more detail-intensive surfside nails ideas here, since getting the grid evenly spaced takes real precision. Most people wear it as an accent on just one or two nails, keeping the rest of the set in a simple solid blue or white so the busier pattern has somewhere to rest visually.
Tip
Nail stickers or vinyl stencils make this pattern far more achievable than freehand painting — ask whether your nail artist uses checkerboard stencils.
Best For
Checkerboard patterns show up most clearly on square or squoval nails, where the flat, wide surface keeps each square looking proportional.
16. Iridescent Fish Scale Accent Nail
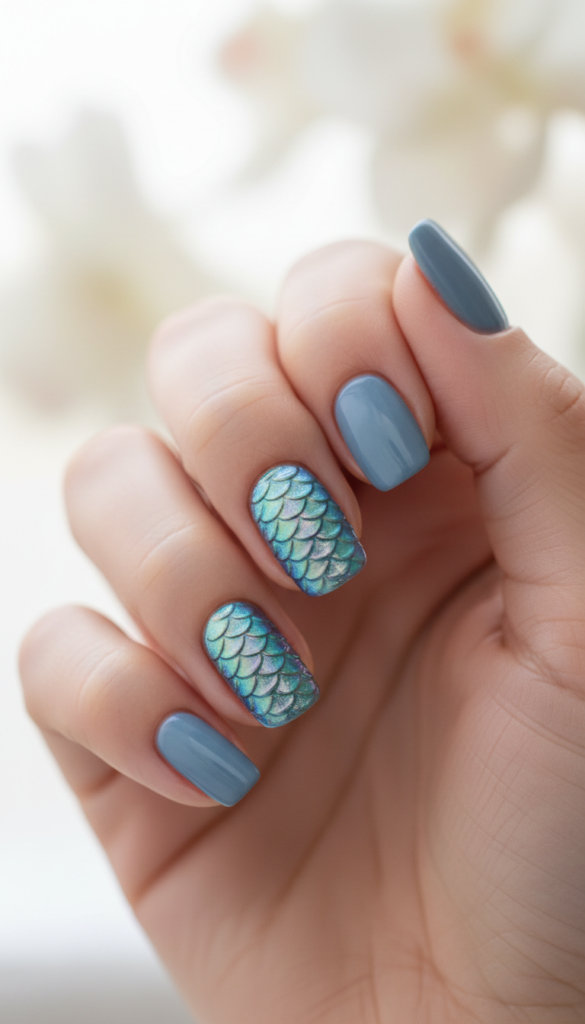
This final idea for Surfside nails ideas uses an iridescent, overlapping scale pattern — small curved lines layered in rows to mimic fish scales — finished with a color-shifting or holographic top coat. The layered curved lines create a raised, dimensional look even under a single glossy coat, a texture-and-shine combination that hasn’t appeared anywhere else on this list.
The holographic finish shifts between blue, green, and purple depending on the angle and light, which gives the design more visual movement than a static color ever could. Most artists reserve this one for a single accent nail per hand, since the row-by-row detail work takes longer than a full set would reasonably need.
Tip
Request a holographic or “mermaid” top coat specifically for the scale rows — a standard glossy top coat won’t create the same color-shifting effect.
Best For
This detailed scale work suits longer almond or stiletto nails best, since the curved shape mirrors the natural taper of the scale rows.
Frequently Asked Questions of Surfside nails ideas
Which surfside nails ideas are simple enough to do at home?
Sea foam marbling, negative space accents, and sandy micro-glitter texture are the most beginner-friendly of these surfside nails ideas, since they rely on sponging or dabbing rather than precise linework.
What are the best short beach nails ideas from this roundup?
Crackled sand texture, negative space sun circles, and sandy micro-glitter texture all suit shorter nails, since none of them depend on extra length to read clearly.
Can these surfside nails ideas work for acrylic sets?
Yes — the crackle, foil, and hand-painted looks all transfer directly onto acrylic, and the added length gives detailed art like the hibiscus more room to show.
What are good nails for beach vacation this summer?
Watermelon fades, jelly finishes, and sandy glitter textures hold up especially well through pool days and sun exposure without much touch-up needed.
Are these surfside nails ideas good for pinning to Pinterest boards?
Yes — graphic looks like the checkerboard, palm tree silhouette, and coral splatter tend to perform best as standalone saves since they read clearly as thumbnails.
Final Thoughts of Surfside nails ideas
The strongest surfside nails ideas aren’t the ones that cram every beach cliché onto ten nails at once — they’re the ones that pick a single technique, whether that’s a hand-painted flower, a chrome shell, or a crackled sand texture, and execute it well. Start by deciding whether you want something soft and neutral or bright and graphic, since that one choice filters out most of the guesswork. From there, bring a clear reference photo to your appointment, or set aside proper time if you’re trying it yourself, and let the design do the talking.

Ali Hamza Lali is the founder and content lead behind GlowVibesSpot. Every article is personally researched, tested, and published by Ali. I am covering makeup, hairstyle, nail, piercing, and tattoo inspiration you can actually trust.