
Green eye makeup is the fastest way to make an everyday look feel brand new without buying a whole new routine. One sweep of the right green and your eyes look brighter, your lashes look darker, and people ask what you did differently. These 10 ideas cover every green family, from soft daytime sage to full dramatic emerald, and each one comes with the actual technique to pull it off.
Green Eye Makeup at a Glance
Quick answer: green eye makeup means using green eyeshadow or liner as the main color story on the eyes. It suits every eye color when you match the shade: olive and emerald flatter brown eyes, deeper greens contrast blue eyes, and olive or golden greens harmonize with green and hazel eyes. This guide includes 10 wearable ideas, a complete step-by-step tutorial, a shade cheat sheet by eye color, and the mistakes that ruin green looks most often.
1. Soft Sage Green Eye Makeup for Day
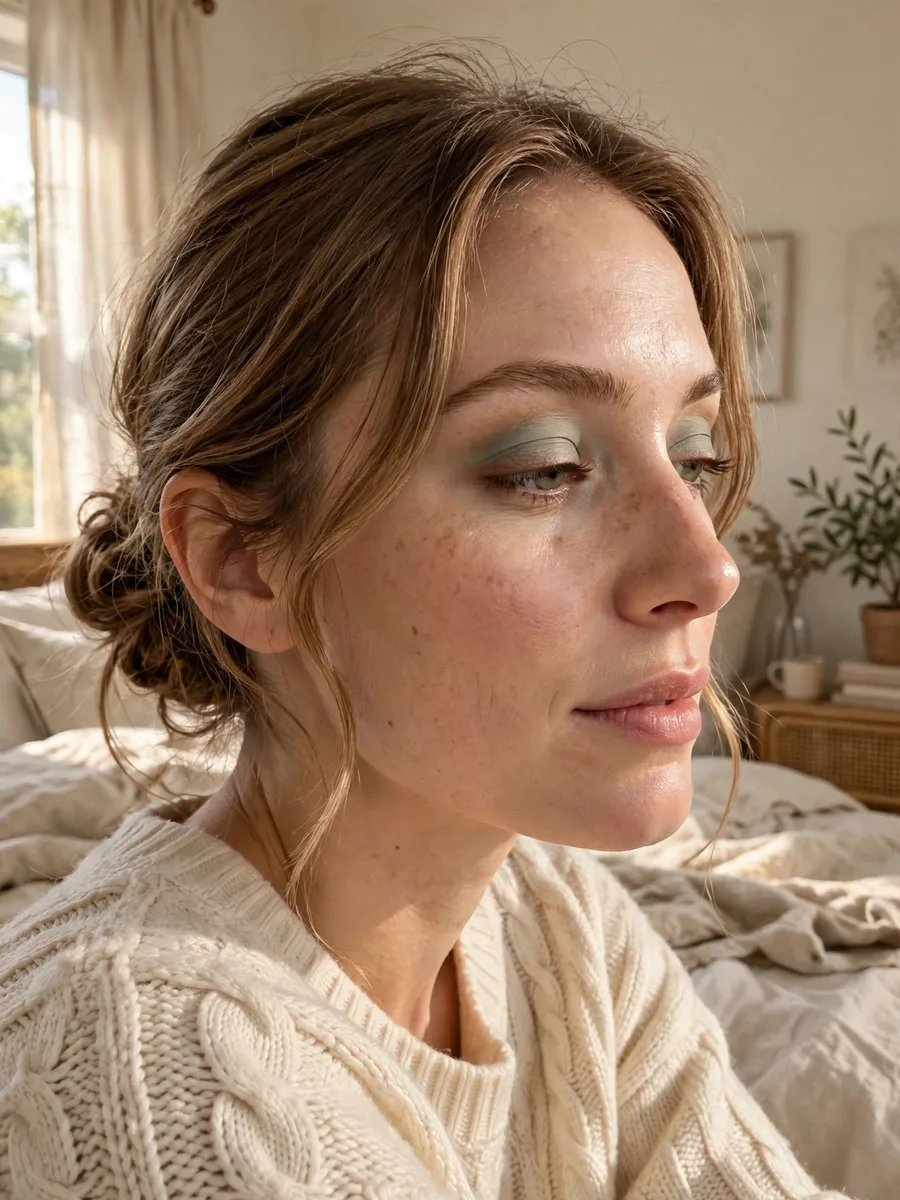
A wash of matte sage across the lid is the gentlest entry into green eye makeup, and it works for offices, classrooms, and anywhere bold color would feel like too much. Sage is muted and greyish, so it reads as a neutral from across the room while still giving your eyes that fresh lift. Sweep it over the whole mobile lid with a fluffy brush, then blend a soft brown through the crease so the green never has a hard edge. Keep the lower lash line to a whisper of brown, finish with mascara, and the look is done in about five minutes.
Why sage works for daytime
Sage sits close to neutral on the color wheel, so it adds interest without shouting. Sheer is better than saturated here; one layer reads fresh, two layers start to look intentional in a way daytime does not always want.
The brown crease trick
A soft brown blended through the crease makes green look wearable instead of stark. Keep the brown on the edges only, never mixed into the sage itself, or the whole thing can turn muddy.
2. Mint Fresh Glow

Mint green on the lids feels like spring air: bright, clean, and younger than your actual morning. Press a pastel mint shimmer across the center of the lid with a flat brush, then blend a slightly deeper mint or soft sage toward the outer corner so the color has somewhere to go. Line the upper lash line thinly with dark brown or black to ground the pastel, and add a bright champagne shimmer to the inner corner. This one photographs beautifully in daylight, so save it for brunches, park days, and any afternoon where you want to look lit from within.
Keeping mint from looking chalky
Pastels can grab patchy on bare lids. A smooth eyeshadow primer underneath makes all the difference, and pressing beats sweeping: press the mint on first, then blend only the edges.
3. The Olive Smokey Workhorse

Olive is the green that behaves like a neutral, which makes this the look you will reach for most. Pack a rich olive shadow across the lid with a flat brush, then sweep a warm brown through the crease and into the outer corner with a fluffy blending brush. Smudge a dark green or espresso liner along the upper lash line and soften it with the same brown. The result is smokey without being heavy, green without being loud, and it suits everything from workdays to dinner plans. For more help matching green to your coloring, the shade-by-eye-color guide on this green eyeshadow reference breaks down which tones suit brown, blue, green, and hazel eyes.
Pack, then blend
Olive goes patchy when you blend too early. Press the color on first to build even pigment, then blend the edges. That order fixes most patchiness problems before they start.
The liner that ties it together
A deep green or espresso liner smudged into the lash line keeps olive from looking flat. Keep it close to the lashes so it reads as depth, not a separate dark line.
4. Emerald Glam Green Eye Makeup
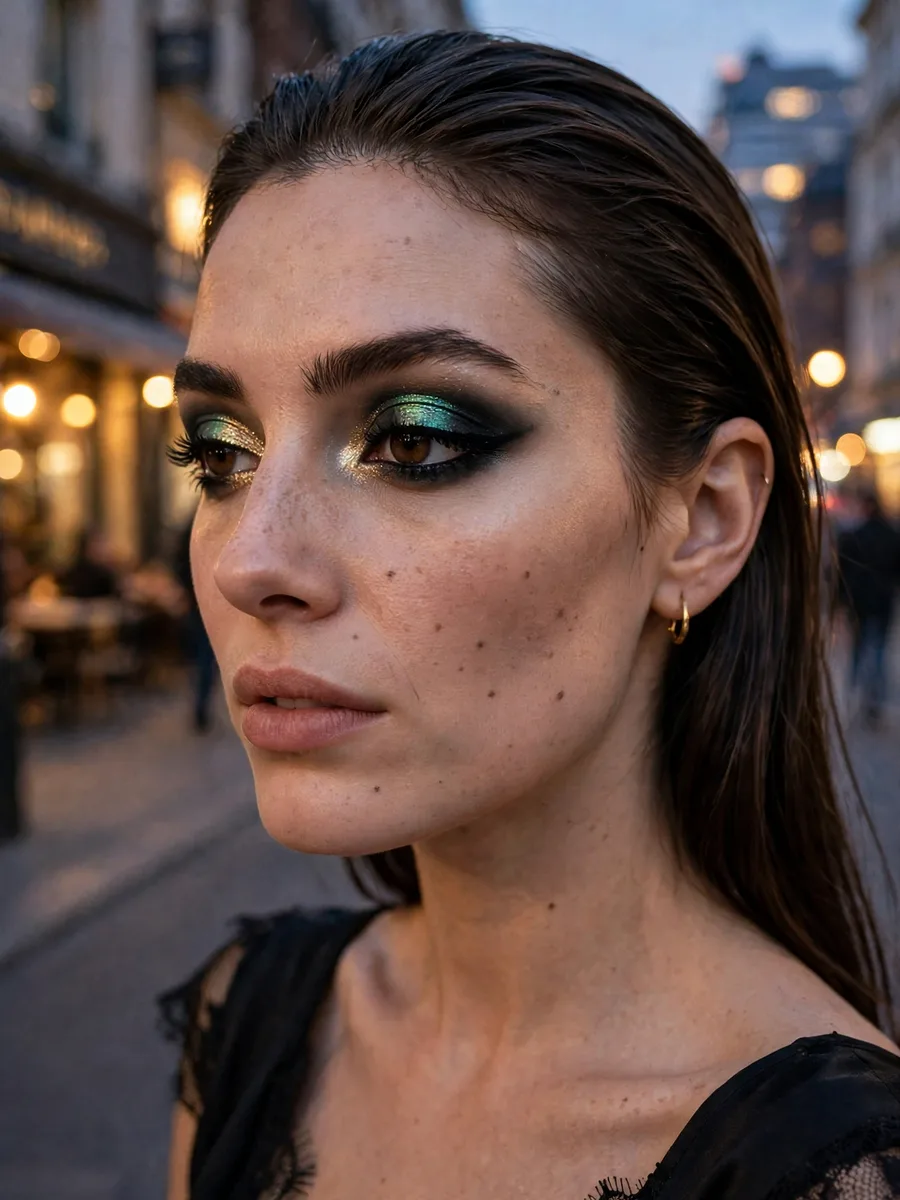
When you want the full jewel-toned moment, emerald is the answer. Press a metallic emerald shadow onto the center of the lid with a flat brush or your fingertip for maximum reflectivity, then blend a matte black or deep charcoal into the crease and outer corner so the emerald has a dark frame to glow against. A soft brown transition shade between the emerald and the black keeps the blend from turning harsh. Add a champagne gold shimmer to the inner corner, line the waterline, and finish with two coats of mascara. This is evening makeup at its best: dramatic in person, unreal in photos.
The matte crease rule
Keep shimmer off the crease. Metallic belongs on the lid, matte belongs in the crease; shimmer in the crease catches light unevenly and makes the blend look messy instead of smoky.
Re-brighten after blending
Blending black into the crease can dull the emerald beside it. Press a little more emerald back onto the lid after the smoke is done. That back-and-forth is what keeps the green vivid.
Face pairing
Let the eyes own the look. A nude or soft rose lip and neutral cheeks keep everything balanced; a bold lip next to emerald smoke can make the face look like it is competing with itself.
5. Forest Green After Dark
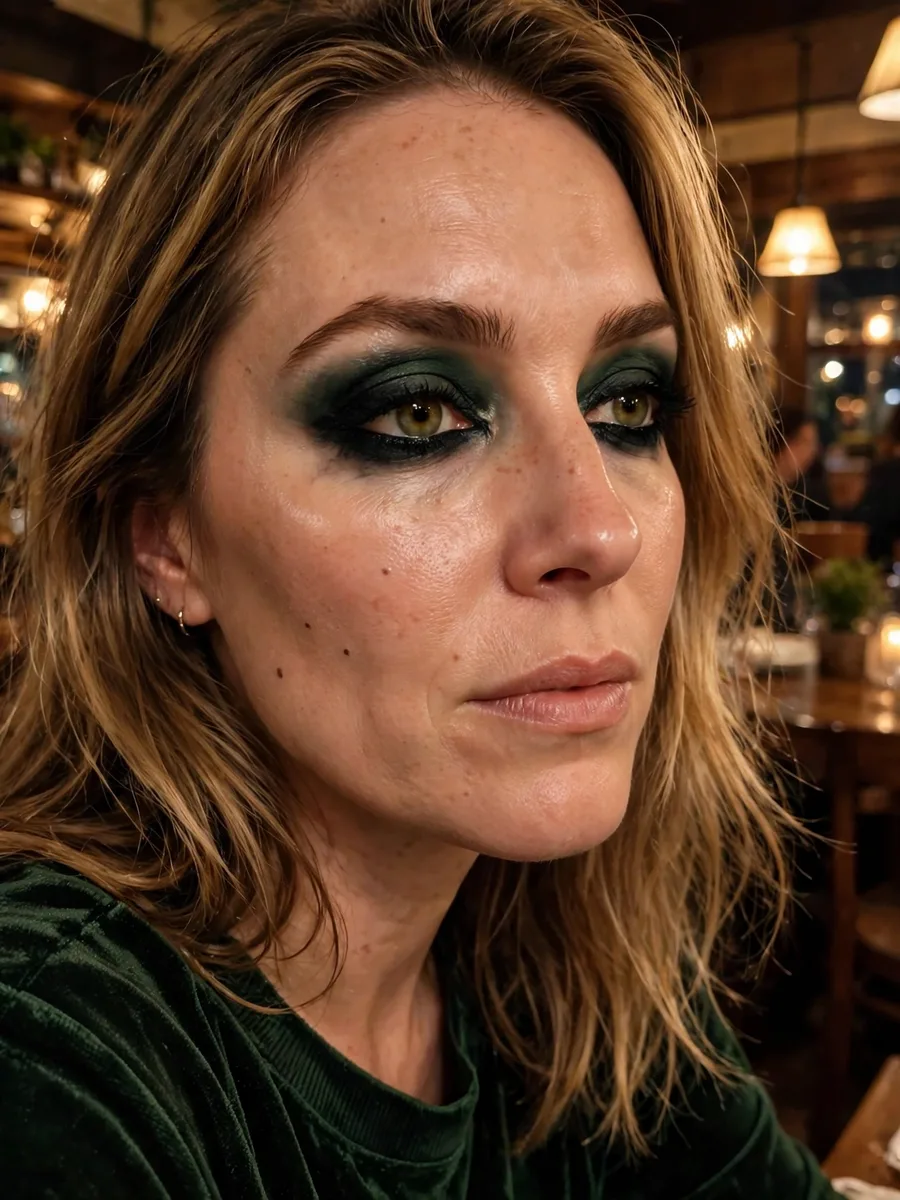
Forest green is emerald’s moodier sibling, and it owns the nighttime slot. Start with a matte forest shadow across the lid, pressing it on rather than sweeping so the color stays dense. Blend a deep brown through the crease first, then layer the forest over it; the brown underneath gives the green something to melt into instead of sitting flat. Smudge black along the upper lash line and the outer half of the lower lash line, connecting top and bottom so the look feels like one continuous shape. This is the look for concerts, late dinners, and anywhere you want your eyes to look like they have a secret.
Eyes before base
Dark green shimmer means fallout. Do your eye makeup before foundation and concealer, or dust a little powder under the eyes first so stray sparkle sweeps away cleanly.
6. Teal Ocean Eyes

Teal sits between blue and green, and it makes brown eyes in particular look almost golden by contrast. Sweep a shimmering teal across the lid, keeping the color strongest near the lash line and fading it upward. Add a bright gold shimmer to the inner corner; gold and teal together are one of the most reliable color pairings in makeup. A navy or deep teal liner along the upper lashes deepens the shape without the heaviness of black. This one reads fresh rather than dramatic, so it works for warm evenings, weddings, and any event where you want color with polish.
The gold connection
Gold in the inner corner is not decoration here. It pulls the teal forward and stops the cool tones from looking flat against warm skin.
Blending teal cleanly
Teal can stain the crease if overworked. Blend with short, light strokes and stop while the edge still looks soft; over-blending is what turns teal grey.
7. Golden Hour Green
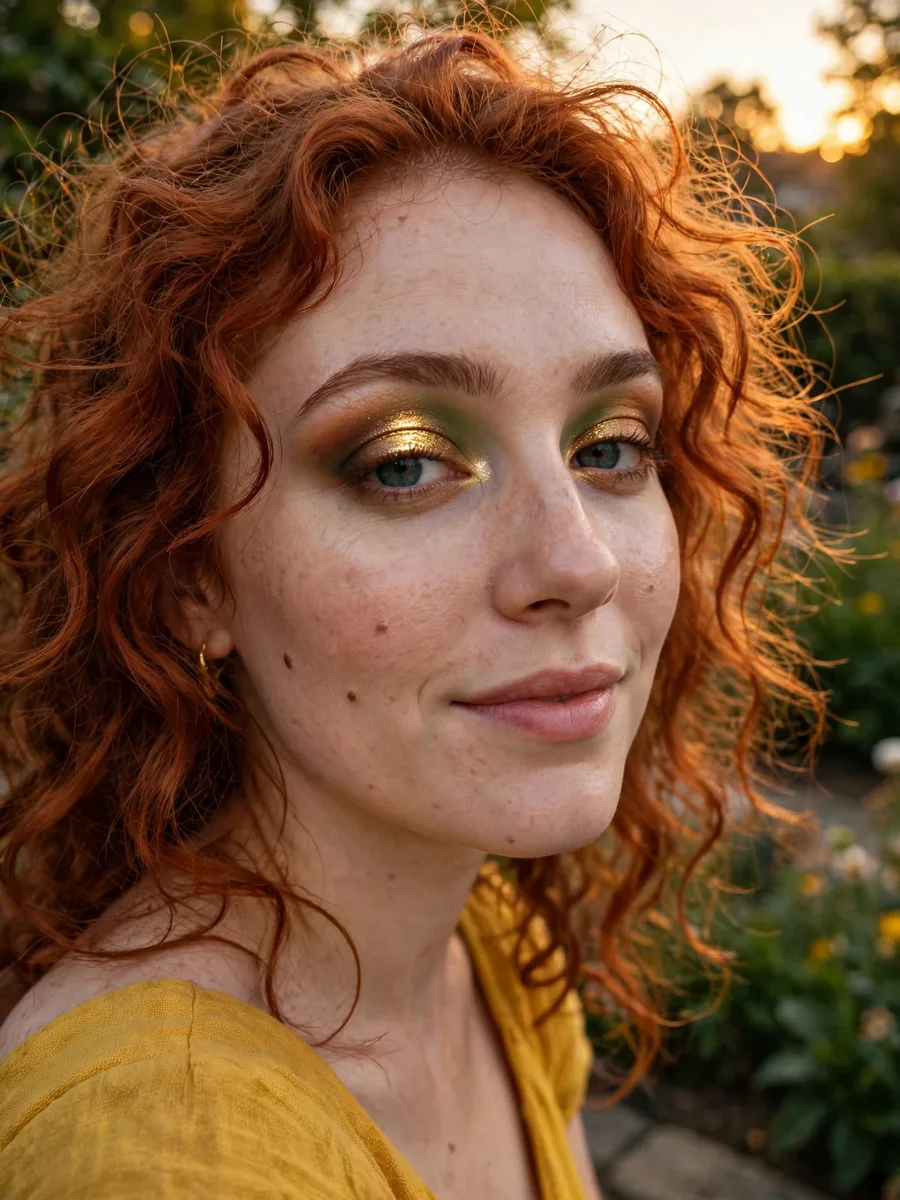
This is the festive one: green eyeshadow with a molten gold center, made for holidays, parties, and golden-hour photos. Lay down an olive or medium green base across the lid, blend the edges with warm brown, then press a metallic gold shimmer right onto the center of the lid with your fingertip. The green acts as a frame and the gold acts as a spotlight, so the eye looks rounder and brighter. Line the upper lash line with brown or black, keep the lower lash line soft, and let the gold do the talking. It is the easiest party look on this list because the technique is simple and the payoff is huge.
Fingertip for the gold
Metallic shimmer applies most intensely with a fingertip. Press, don’t drag; dragging scatters the shimmer and thins the payoff exactly where you want it brightest.
8. The Emerald Liner Pop

Not every green eye makeup look needs green shadow. A single emerald liner wing over neutral lids is the fastest version of this whole article. Apply your usual neutral shadow or just a wash of skin-toned base across the lid, then draw an emerald liner along the upper lash line and flick it outward into a small wing. The neutral lid makes the green line look deliberate and graphic instead of random. This is the five-minute, no-blending version, and it survives heat, humidity, and long days better than full shadow because there is less to crease or fade.
Wing sizing
Keep the wing short and slightly upturned. A tiny wing lifts the eye; a long one drags the look toward costume.
When liner beats shadow
Liner-only green suits hooded and deep-set eyes especially well, since the color sits on the lash line where it stays visible instead of disappearing into the crease. It is also the best green option for glasses wearers.
9. Halo Spotlight Emerald

The halo technique puts the brightest color in the center of the lid and the darkest shades on both the inner and outer thirds, which makes eyes look rounder and wider. Apply a deep green to the inner and outer corners of the lid, then press a bright shimmering emerald or light green-gold right into the center. Blend where the sections meet so there are no visible borders, just a gradient from dark to light to dark. Highlight the inner corner lightly and keep liner thin. The spotlight center catches light every time you blink, so this look is practically built for photos and candlelit rooms.
The center is sacred
Once the bright center is placed, do not blend over it. Blend only the dark edges toward the center; touching the middle with a blending brush dulls the spotlight you just built.
10. Sage and Copper Sunset

Green and copper are not an obvious pair, but warm copper in the crease makes sage and olive lids glow. Apply a sage or soft olive shadow across the lid, then blend a warm copper or bronze shimmer through the crease and outer corner. The warm-cool contrast is what makes this look interesting: the green stays fresh while the copper adds depth and warmth. Finish with brown liner and mascara. This one flatters warm skin tones and brown eyes especially well, and it is a lovely autumn look when everything outside is turning gold and rust. For more wearable everyday inspiration, these eye makeup ideas cover the neutral looks this pairs with.
Warm in the crease, cool on the lid
The order matters: cool green on the lid first, warm copper in the crease second. Reversing them lets the warmth take over and the green disappears.
Skin tone note
Copper suits warm and medium skin tones most naturally. On very fair cool skin, swap copper for a soft rose-gold in the crease so the warmth does not overwhelm the green.
The Universal Green Eye Tutorial: 9 Steps
Every look above follows the same bones. Learn this order once and you can build any green eye makeup idea on the list.
Step 1: Prep the lid. Start with clean, dry lids. Apply a thin layer of eyeshadow primer all over the mobile lid and up to the brow bone, and let it set. Primer is what keeps green vivid for hours instead of fading by lunch.
Step 2: Lay the neutral base. Sweep a skin-toned or light neutral shadow across the whole lid. This gives green a smooth canvas and makes blending ten times easier.
Step 3: Pack the green. With a flat brush, press your main green shade onto the mobile lid, from the lash line up to the crease. Pressing builds even color; sweeping scatters it. Build in two thin layers rather than one thick one.
Step 4: Blend the crease. With a clean fluffy brush, sweep a transition shade (soft brown works with almost every green) through the crease using small circular motions. Keep the transition shade on the border of the green, not on top of it.
Step 5: Deepen the outer corner. Tap a small amount of a darker shade, deep green, brown, or black, onto the outer third of the lid and outer corner. Build slowly; it is easier to add depth than to remove it.
Step 6: Add the shimmer moment. Press a shimmer or metallic shade onto the center of the lid with your fingertip. This is the step that makes green look expensive.
Step 7: Define the lash line. Line the upper lashes with pencil, gel, or liquid liner in black, brown, or deep green. Smudge slightly for smokey looks, keep it crisp for graphic ones.
Step 8: Smoke the lower lash line. Sweep a little of your lid green along the outer half of the lower lashes and soften it with the transition shade. Keep it tight to the lashes so it reads sultry, not messy.
Step 9: Brighten and finish. Add a light shimmer to the inner corner and brow bone, curl your lashes, and apply mascara. Step back, check symmetry, and soften any harsh edge with a clean fluffy brush.
Find Your Green: Shade Cheat Sheet
Matching the green to your coloring is half the battle. Use this as your starting point, then experiment.
Brown eyes: you have the most options. Olive looks chic and natural, emerald looks rich and dramatic, and golden green picks up the warm flecks in brown eyes.
Blue eyes: deeper greens like emerald and forest create the strongest contrast. Teal and sage work too, especially as shimmer on the center lid for a softer effect.
Green eyes: skip the exact shade of your eyes and choose a green with different undertones instead. Golden green suits green-hazel eyes; cooler blue-green shades suit blue-green eyes. Metallic finishes add brightness.
Hazel eyes: warm greens with golden undertones are the sweet spot. Moss and bronze-green enhance the gold and green flecks together.
Fair skin: pastel greens like mint and sage, shimmer finishes, and delicate metallics. Avoid overly warm greens that can look harsh against light skin.
Medium skin: the full range works. Emerald is especially flattering, olive looks sophisticated, and gold-green shimmer warms the complexion.
Deep skin: go bold. Intense emerald, forest, and jewel greens show up beautifully, and metallic green-gold finishes illuminate. Do not shy away from bright color; it reads richer, not louder, on deep skin.
Mistakes to Avoid
Blending the green too early. Sweeping a blending brush across freshly applied green moves the pigment around and creates patchy spots. Press the color on first, let it sit, then blend only the edges. This one habit fixes most green eyeshadow frustration.
Mixing brown directly into the green. Brown belongs on the borders as a transition shade. Stirred into the green itself, it dulls the brightness and turns everything muddy. Keep your transition shade and your green in separate zones.
Putting shimmer in the crease. Shimmer belongs on the lid where it catches light. In the crease it highlights every fold unevenly and makes the blend look messy instead of smoky. Matte in the crease, shimmer on the lid, every time.
Skipping the lower lash line. A finished upper lid with a bare lower lash line looks unbalanced, especially with smokey greens. Even a soft sweep of brown along the lower lashes connects the look.
Pairing green eyes with a loud lip. Two statement features fight each other. When the eyes are green and bold, keep lips nude, soft pink, or muted. Save the red lip for a neutral eye day. For party looks that balance bold eyes and lips properly, these Halloween makeup and pink makeup guides show how to keep the face harmonious.
Frequently Asked Questions
What is the easiest green eye makeup for beginners?
The emerald liner pop (idea 8). You apply your normal neutral shadow, draw one green wing, add mascara, and you are done. There is no blending to get wrong, no fallout to manage, and it takes about five minutes. Once that feels easy, try the soft sage wash next.
Why does my green eyeshadow look patchy?
Almost always because of application order. Press the shadow onto the lid first with a flat brush to build even pigment, then blend only the edges with a fluffy brush. Blending too early is the usual culprit. A primer underneath also helps the color grab evenly instead of skipping over texture.
Can I wear green eyeshadow to work?
Yes, if you choose the right family. Soft sage (idea 1) and olive (idea 3) read as sophisticated neutrals in an office. Save emerald, forest, and anything shimmer-heavy for evenings and weekends. Keep the rest of the face neutral and the green will look intentional, not loud.
Which green suits hooded eyes?
Techniques matter more than shades here. The liner pop works beautifully because the color sits on the lash line where it stays visible. For shadow looks, bring the color slightly above the natural crease so it shows when the eyes are open, and keep shimmer on the center lid rather than the brow bone.
How do I stop green eyeshadow from creasing?
Primer is the main fix: a thin, even layer across the whole lid before any color. Set it lightly with a skin-toned shadow, then apply green in thin layers instead of one thick one. If your lids get oily through the day, a quick midday blot with a tissue (no rubbing) refreshes the look without reapplication.
Final Thoughts
Here is the thing nobody tells you about green eye makeup: it is not really about the green. It is about placement. The same emerald that looks dramatic packed across the whole lid looks elegant as a thin liner wing, and the same olive that feels earthy in a smokey eye feels fresh as a soft daytime wash.
Once you understand that, green stops being a scary color and becomes a tool. Start with the liner pop or the soft sage, learn the nine-step order, and let your eye color and skin tone guide the shade. The green was never the hard part. The technique was, and now you have it. For more everyday eye looks to round out your routine, browse these soft glam ideas.