Fairy makeup has quietly escaped the Halloween aisle. It shows up at summer festivals, in engagement photos, and, in its softest form, on completely ordinary Tuesdays. The appeal is easy to understand: glowing skin, light-catching eyes, and color that looks dreamy rather than done. The problem is that most guides either give you a costume or a vague list of pastels with no real technique.
This guide does both jobs properly. You get 12 distinct fairy makeup looks, each one explained with the actual technique behind it, followed by a complete step-by-step tutorial built on professional application order, plus the mistakes that ruin the effect and how to fix them. Pick your fairy, then execute it.
Quick answer: the fairy makeup looks that work best pair glowing, dewy skin with one clear color story and shimmer placed where light naturally hits: inner corners, cheekbones, brow bone. The professional secret is order: do your eyes before your base whenever glitter is involved, because fallout wipes off bare skin but grinds into finished foundation. Choose soft pastels for daytime wear and deeper, smokier tones for evening.
1. Woodland Glow Fairy Makeup
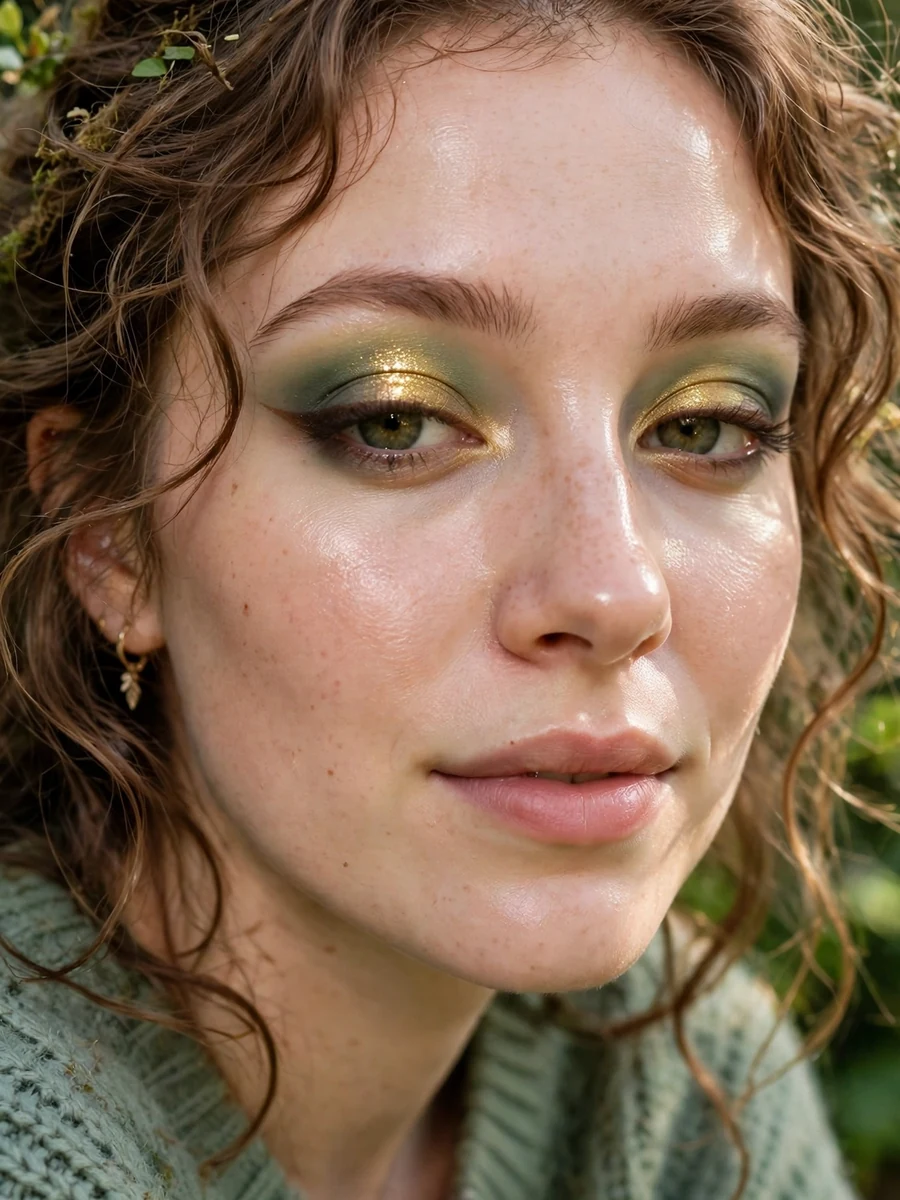
The classic fairy, and still the most flattering: mossy greens melted into warm gold. It suits nearly every eye color because green sits opposite red on the color wheel, which makes the whites of your eyes look brighter by contrast.
The two-tone lid trick
Press gold onto the center of the lid and blend mossy green into the outer V. The gold catches light when you blink; the green gives the shape. Keep both sheered out at the edges so nothing reads harsh.
Keep the green soft
Swap black liner for dark brown. Black against green can turn costume-like fast, while brown keeps the whole look earthy and wearable.
2. Pastel Petal

Pink and lilac washed over lids, cheeks, and lips in one continuous tone. This is the romantic fairy, and it photographs beautifully in daylight because pastels reflect light instead of absorbing it.
One color, three places
Use the same pink tone on lids, cheeks, and lips to make the look feel intentional rather than scattered. A cream blush dabbed on the lids ties everything together. For more pink-centered inspiration, browse these pink makeup ideas.
3. Moonlit Silver
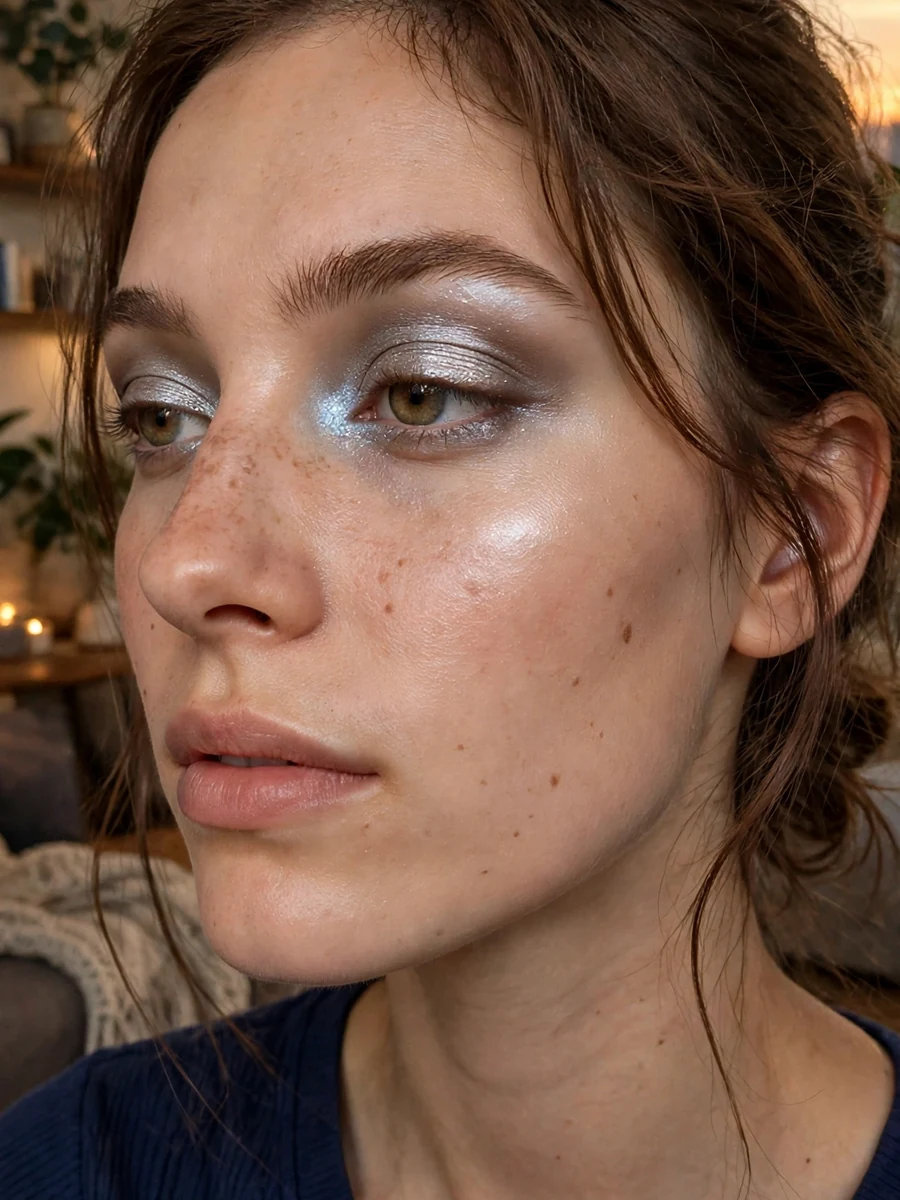
Silver and icy blue built for evening. This is the fairy that comes out after dark, and it works because cool metallics mimic moonlight on skin. The danger is looking grey and washed out, which happens when silver is applied flat without depth underneath.
Silver without the grey cast
Lay a soft taupe or mauve in the crease first, then press silver over the lid. The darker base gives the metallic something to sit on, so it reads luminous instead of chalky. A detailed breakdown of fairy makeup application order, including why eyes come before base, is covered well in this fairy makeup technique guide.
4. Golden Hour
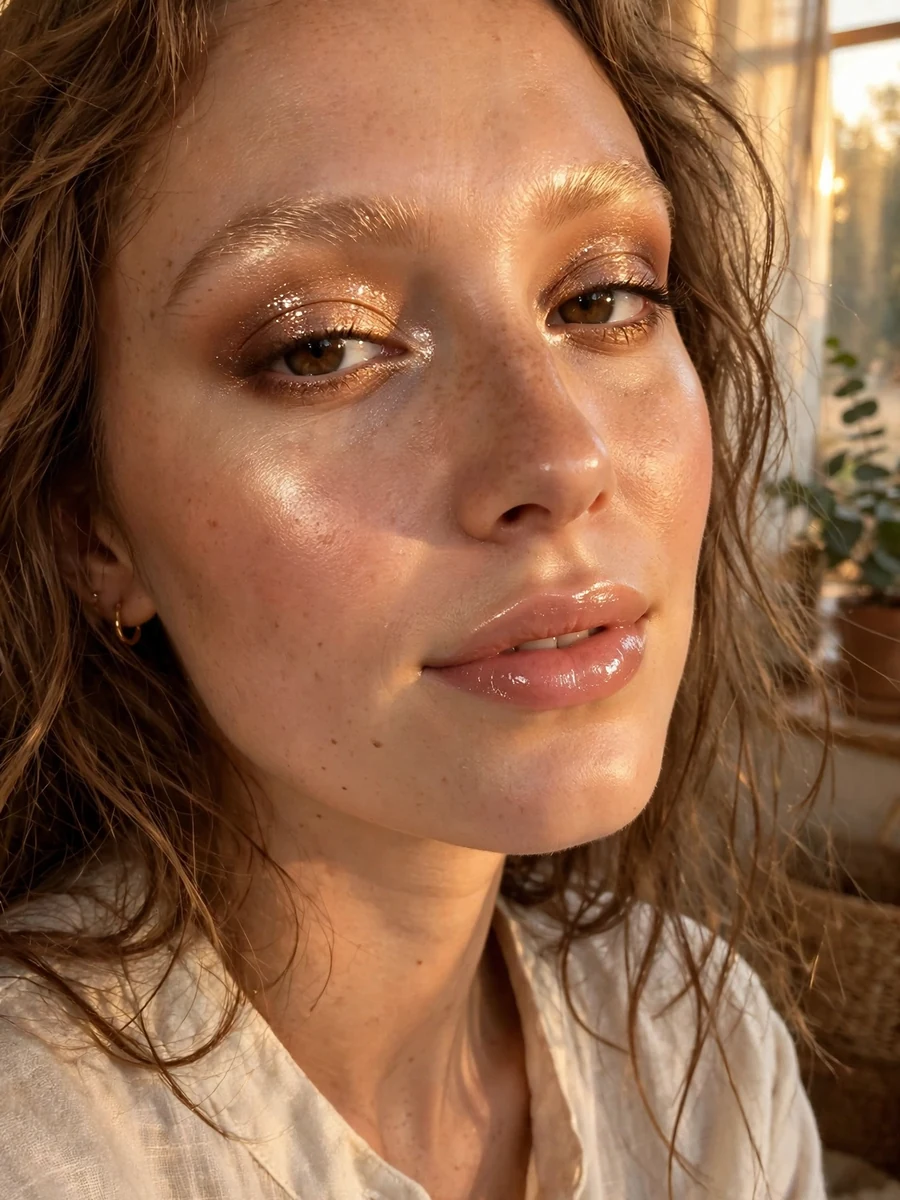
Bronze, champagne, and warm amber: the fairy version of sunset light. This is the most universally wearable look on the list and the best first attempt if you have never tried fairy makeup before.
Where the light lands
Concentrate shimmer on the high points: cheekbones, brow bone, inner corners, cupid’s bow. The warmth does the rest. This glowy approach shares DNA with soft glam bridal makeup, so it transitions easily from festival to formal.
5. Dark Fairy Makeup
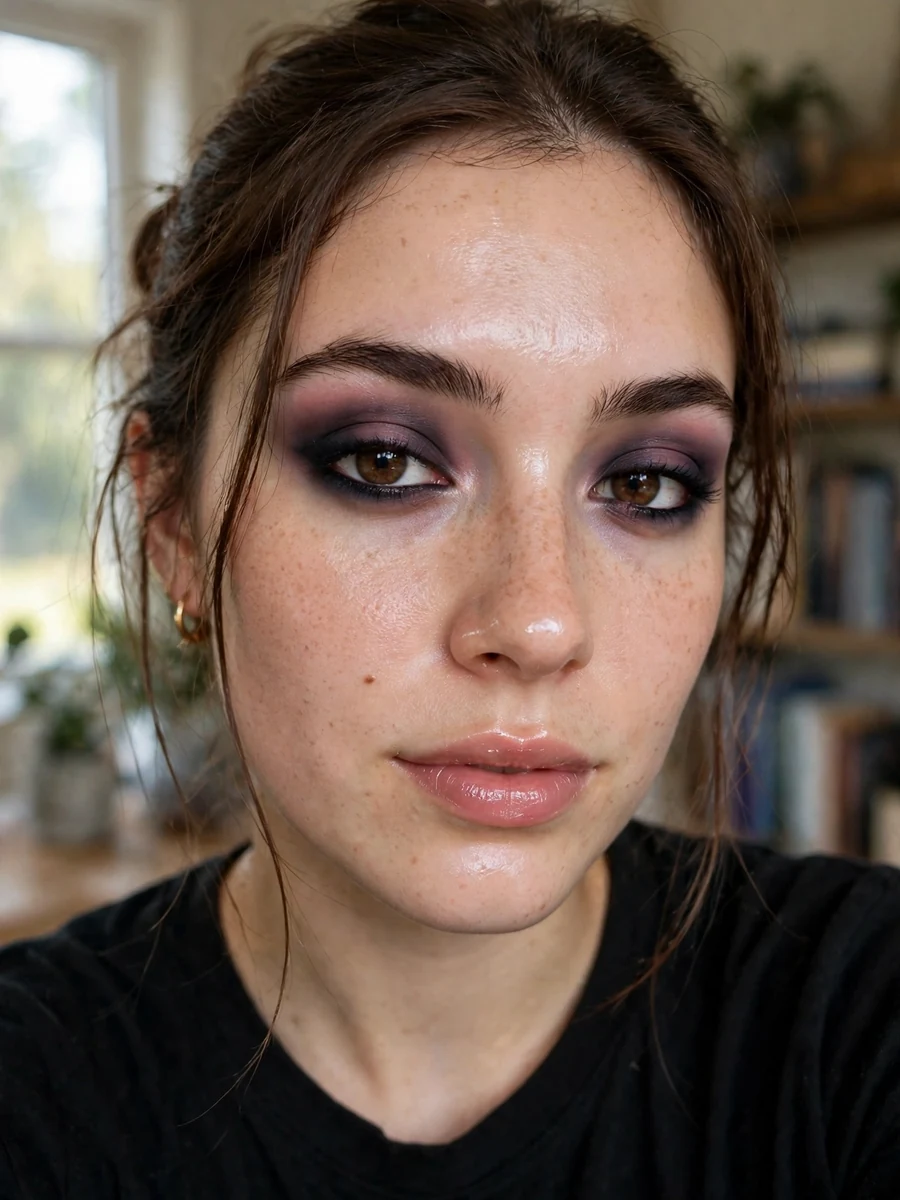
Smoky plum and charcoal with soft, diffused edges. The dark fairy keeps the ethereal glow but trades pastels for depth. It is the evening answer to the woodland look and the most striking option for photos.
Smoky but make it fairy
The difference between goth and dark fairy is diffusion. Blend every edge until no line is visible, and keep the skin dewy rather than matte. Harsh lines kill the magic. If you love the moodier side, these goth makeup ideas show how far the dark aesthetic can go.
The lip decision
With a dark smoky eye, keep lips sheer and glossy. A heavy dark lip plus a heavy dark eye tips the look from fairy into vampire, which is a different article.
6. Frost Fairy
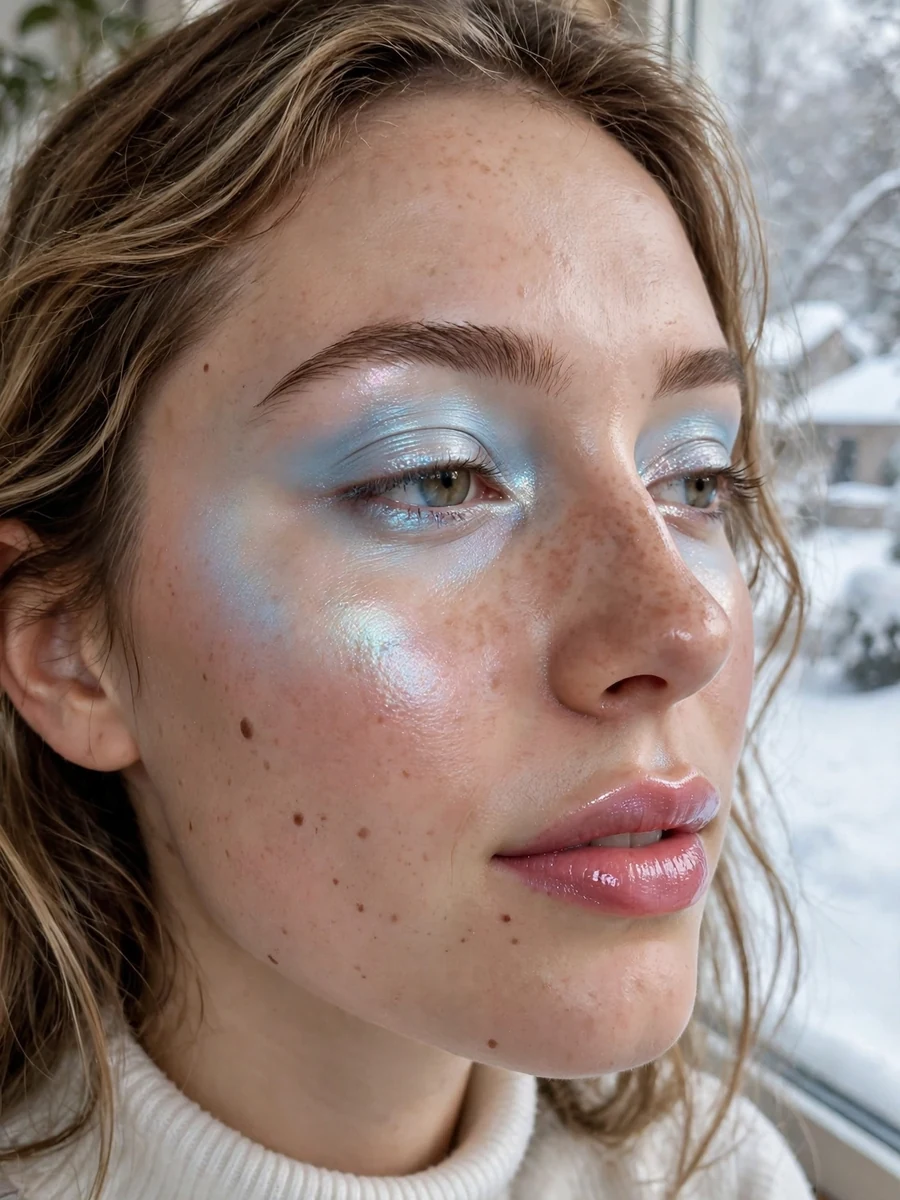
Icy white, pale blue, and holographic shimmer. The frost fairy belongs to winter: holiday parties, snowy photoshoots, and anyone who wants to look like cold air feels.
White shadow turns chalky when it is too dry or too thick. Use a cream or liquid formula and press it on thin. One sheer layer over primed lids reads as ice; three layers reads as correction fluid.
7. Blushing Spring
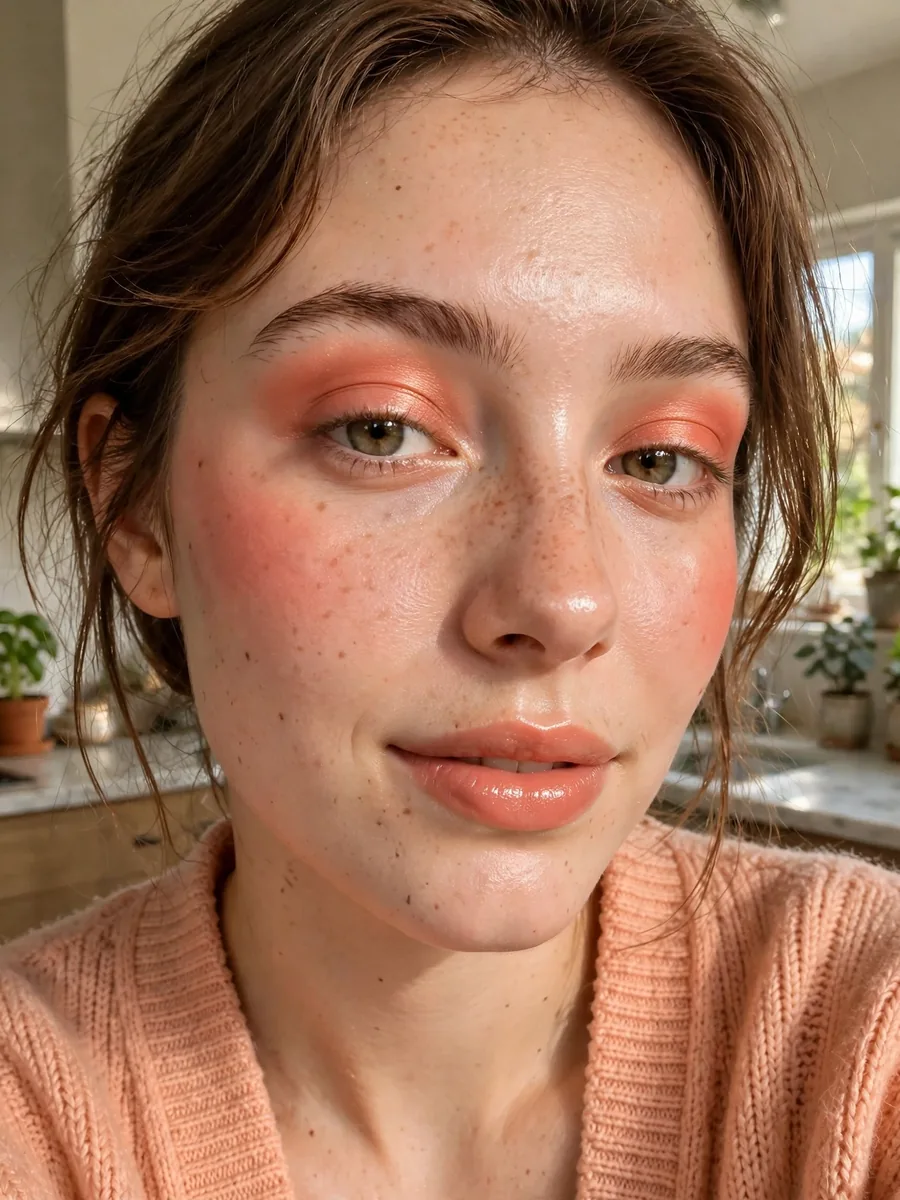
Coral and peach with a fresh, just-pinched flush. This is the youngest-feeling look on the list and the easiest to wear in daylight, since it mimics a natural flush amplified slightly.
Blush as eyeshadow
Sweep your cream blush across the lids before any powder shadow. It creates a seamless wash of color from cheek to eye with zero harsh lines, and it takes about thirty seconds.
8. Tidepool
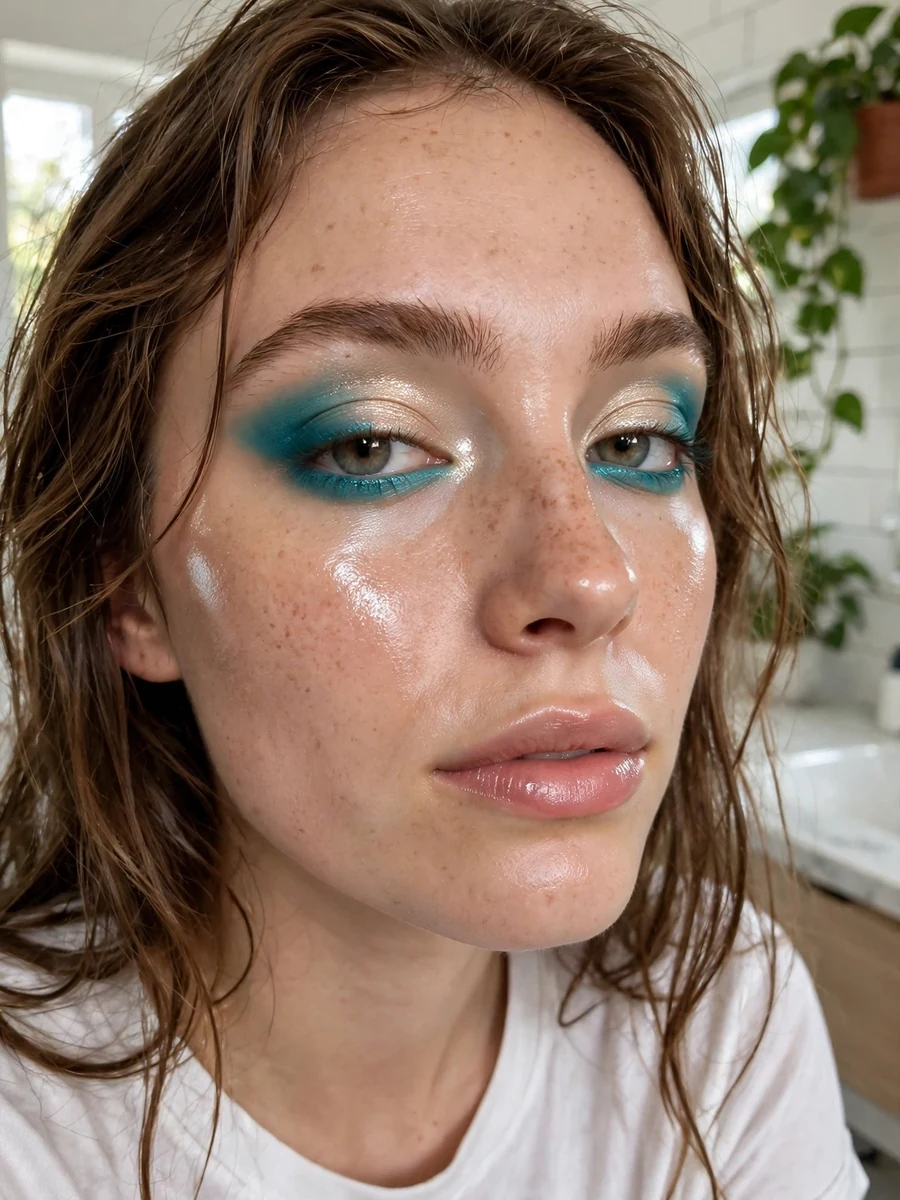
Teal and aqua with a wet-look finish. The water fairy. Teal intimidates people, but sheered out and paired with glowing skin it reads fresh rather than theatrical.
Teal that flatters, not startles
Keep teal to the outer half of the lid and lower lash line, with a neutral champagne on the inner half. Containing the color stops it from overwhelming the face, and the contrast makes the teal look deliberate.
9. Autumn Ember
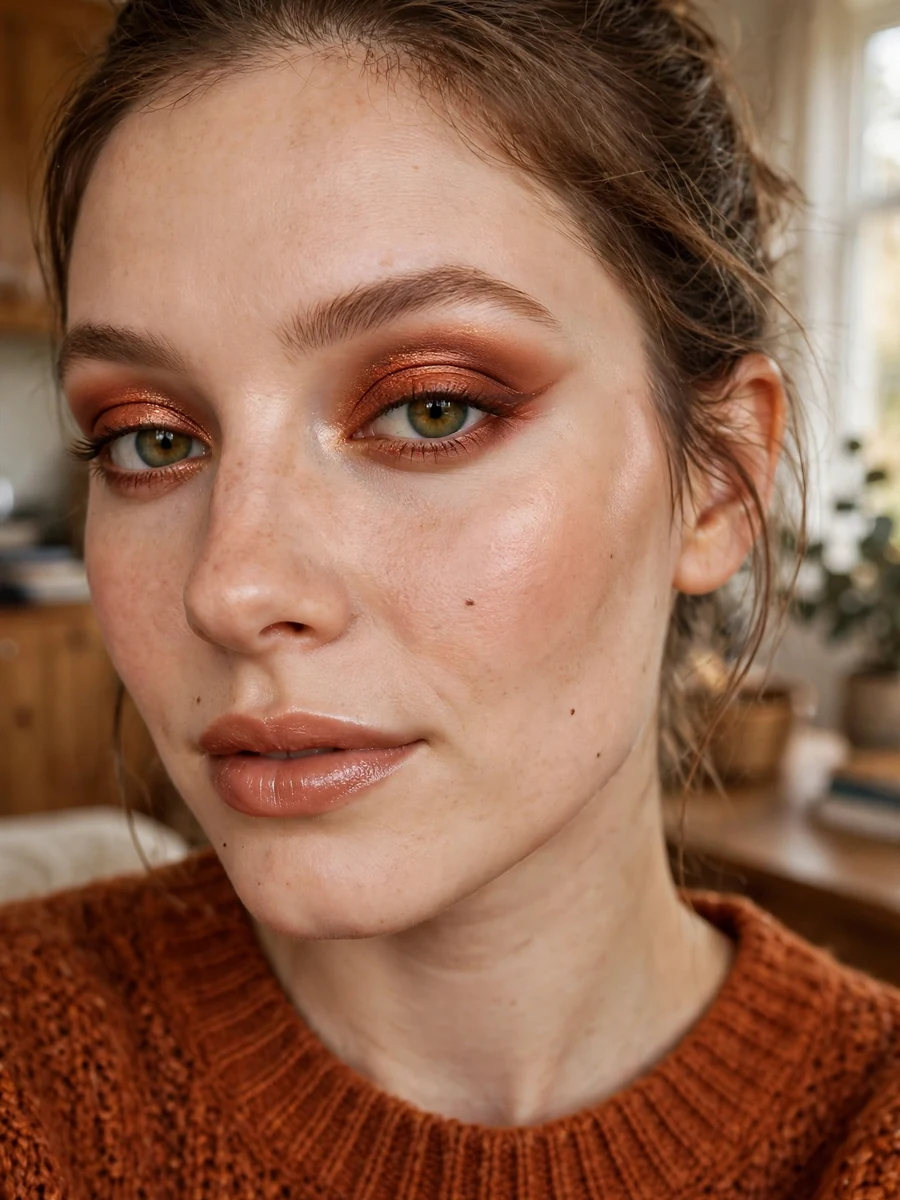
Copper, rust, and burnt amber. The autumn fairy glows like leaves backlit by sun, and warm metallics are the most forgiving shimmer tones across skin tones because they mimic natural warmth.
Pair the eyes with a soft brown wing instead of black. The wing gives the eye its fairy elongation without the severity that black brings to warm tones.
10. Starlight Celestial
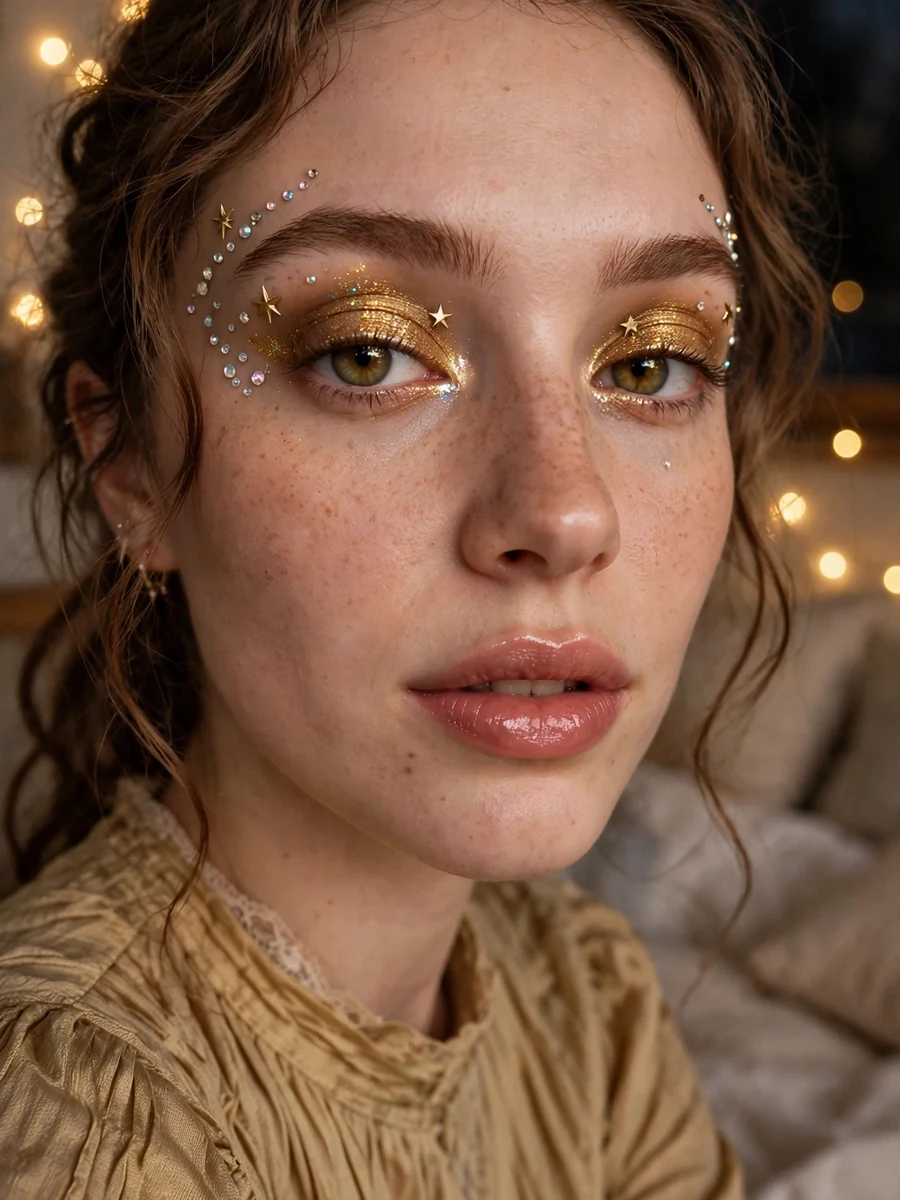
Gold glitter, tiny star decals, and adhesive gems arranged like a constellation. This is the maximalist fairy, built for festivals and photos where the makeup needs to read from ten feet away.
Glitter glue is non-negotiable
Loose glitter applied over bare shadow migrates within the hour. Dab glitter glue or a tacky glitter primer exactly where you want sparkle, then press glitter on with a fingertip. Press, never sweep.
Placement over quantity
Five well-placed gems beat fifty scattered ones. Cluster accents at the outer corners and temples, following the eye’s natural line outward, and leave the center of the face clean.
11. Rose Garden
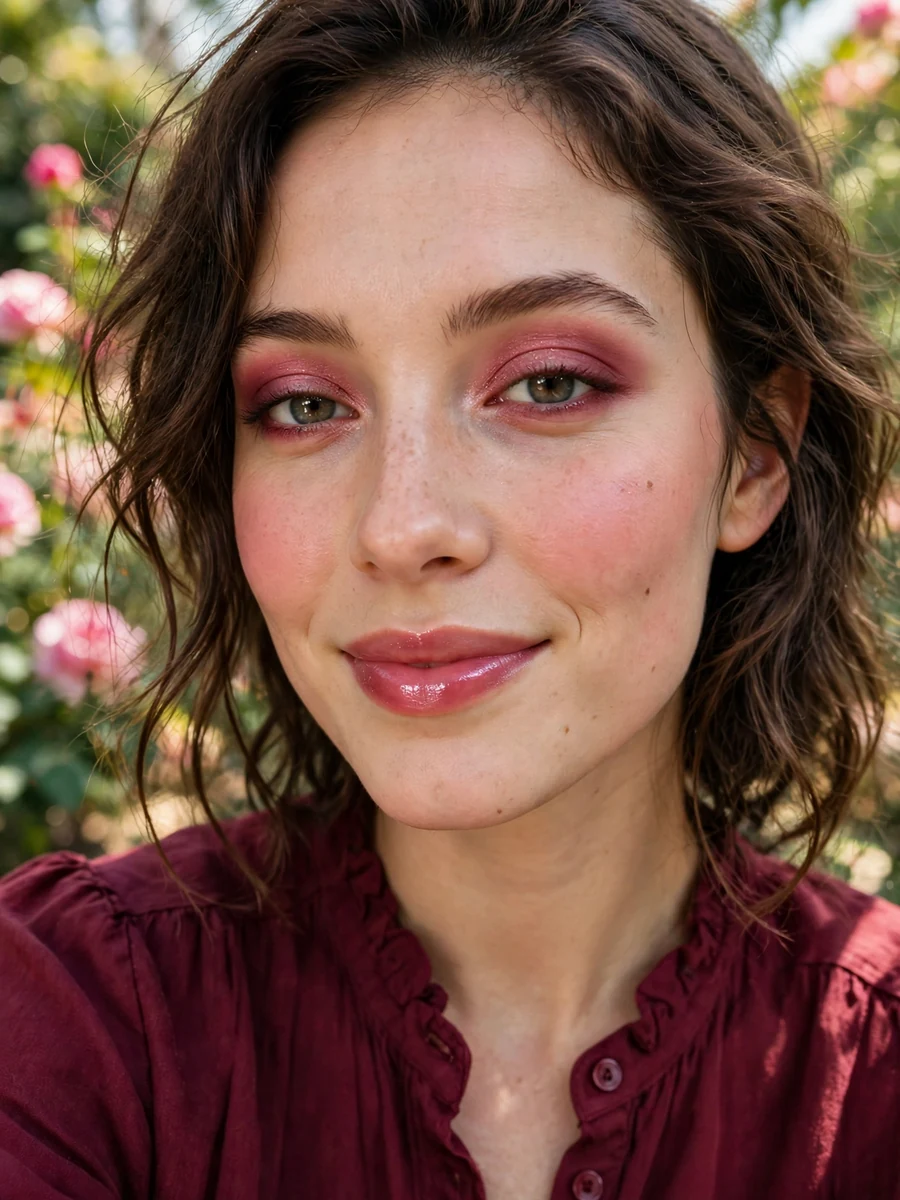
Deep rose and berry tones, romantic and grown-up. The rose fairy is the most evening-appropriate pastel-adjacent look, with enough depth to hold its own under artificial light.
Red, but sheer
Sheer out every red tone to half the intensity you think you want. Sheer berry reads romantic; opaque red on the eyes reads irritated. Build in thin layers and stop early.
12. Everyday Minimalist Fairy Makeup
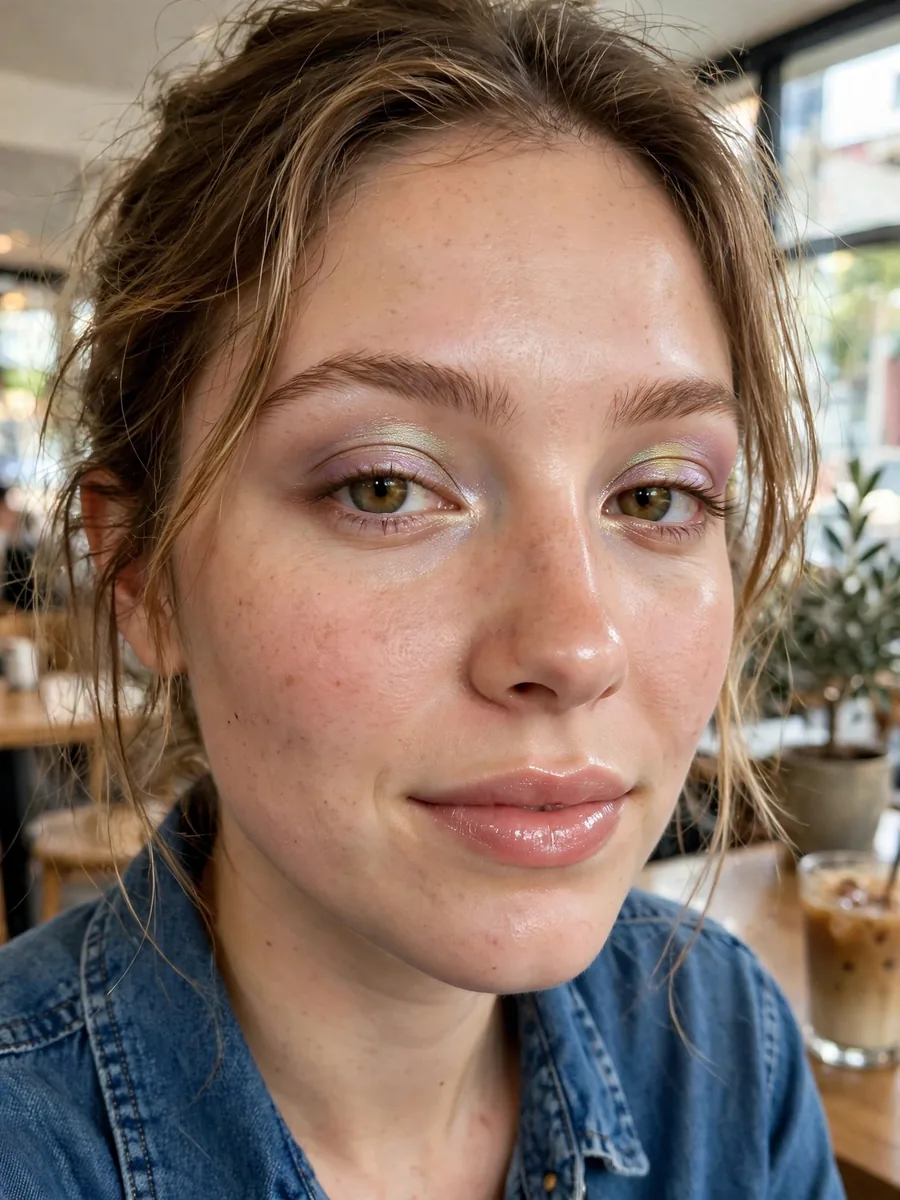
The ten-minute version you can actually wear to work: dewy skin, one shimmering shadow, brushed-up brows, glossy lips. Nobody will call it a costume, but the light will catch you differently all day.
The five-product kit
You only need dewy skin tint, cream blush, one duochrome eyeshadow, a brow gel, and lip gloss. Apply in that order, blend everything with your fingers, and you are done. For technique foundations that transfer here, these eye makeup ideas cover the basics well.
Step-by-Step Fairy Makeup Tutorial
This is the professional order of operations that works for every look above. The sequence matters more than the products: eyes before base whenever glitter, heavy shimmer, or dark shadow is involved, because fallout wipes off bare skin but grinds into finished foundation.
1. Prime the lids. Apply eyeshadow primer from lash line to brow bone. This single step prevents creasing and holds shimmer for hours. Skip it and even the best shadow fades by midday.
2. Lay down your color story. Choose one palette from the looks above and apply the lid color first, then deepen the outer V or crease with the darker tone. Blend until no edge is visible.
3. Add shimmer strategically. Press shimmer or glitter onto the center of the lid, inner corners, and brow bone with a fingertip or flat brush. Pressing packs on more pigment than sweeping, which just moves product around.
4. Set the sparkle. If you used loose glitter, dab glitter glue exactly where you want it before pressing glitter on. Powder applied over glitter dulls it, so keep powder away from sparkled areas.
5. Line and define. Draw your wing or liner shape now, while the eyes are still the focus. Brown liner keeps daytime looks soft; black suits the dark fairy and evening looks.
6. Lashes. Curl, mascara, then false lashes if you want them. Wispy, separated lashes suit fairy makeup better than dense dramatic ones, which can overpower the shimmer.
7. Clean up fallout. Sweep away any glitter fallout from the cheeks with a clean fluffy brush or a piece of tape pressed gently. Now the skin is a clean canvas.
8. Base, kept sheer. Apply a dewy skin tint or light foundation only where needed, not as a mask. Fairy skin looks like skin. Let freckles and natural texture show through.
9. Blush in the V. Apply cream blush in a V shape from temple to cheekbone, blending well. This lifts the face and ties the cheek color to the eye look.
10. Highlight the C. Sweep iridescent highlighter in a C shape from brow bone down to cheekbone. This is where the ethereal glow comes from.
11. Lips and set. Finish with a sheer glossy lip, never a heavy matte, which kills the dewy effect instantly. Mist with a dewy setting spray to melt everything together.
Technique essentials to remember:
- Eyes first, base second whenever glitter or dark shadow is in play.
- Press, do not sweep when applying shimmer or glitter.
- One color story per look. Two palettes on one face fight each other.
- Blend until edges disappear. Visible lines are the difference between fairy and costume.
- Fingers are tools. The warmth of your hands melts cream products into skin for a seamless finish.
Mistakes to Avoid
Starting with the base. Doing foundation first and glitter eyes second guarantees fallout trapped in your base. The order in the tutorial exists for this exact reason.
Using glitter without glue. Loose glitter over dry shadow migrates down your face within the hour and ends up everywhere except where you put it. Glitter glue or a tacky primer is not optional.
Going full-coverage matte. Heavy matte foundation plus heavy powder flattens every bit of glow you just built. Fairy makeup needs light to move across the skin, which matte finishes prevent.
Too many colors at once. Green lids, blue crease, purple liner, and pink glitter is not a look, it is a craft project. Commit to one palette and let it breathe.
Skipping lid primer. Without primer, shimmer creases and fades within hours, and you will blame the products instead of the missing step. This mistake is behind most “fairy makeup never lasts on me” complaints, and it also applies to the bolder evening styles like halloween makeup.
Frequently Asked Questions
How do I remove glitter without scrubbing my skin?
Press an oil-based cleanser or micellar water onto the glittered area and hold for thirty seconds before wiping. The oil dissolves the adhesive instead of dragging particles across your skin. Never scrub dry glitter, which micro-scratches. A second gentle cleanse takes care of the residue.
Does fairy makeup work on hooded eyes?
Yes, with one adjustment: place the shimmer slightly above the crease where it stays visible when your eyes are open. Color that sits only on the mobile lid disappears on hooded eyes. A soft wing pulled outward also opens the eye more effectively than inner-corner detail alone.
Can fairy makeup work on deeper skin tones?
Absolutely, and metallics often look richer on deeper skin. The adjustment is intensity: use more pigmented, saturated shades rather than sheer pastels, which can turn ashy. Gold, copper, bronze, and jewel tones glow beautifully; just build them to full opacity instead of sheering out.
How do I make it last through a whole festival day?
Layer in this order: primer, cream products, powder products, glitter glued on last, setting spray to finish. Carry blotting papers and a mini lip gloss for touch-ups, not more powder, which dulls shimmer. Press, never rub, when touching up.
Final Thoughts
Here is what separates fairy makeup that works from fairy makeup that photographs badly: it is a lighting trick more than a color trick. The looks that last all day and look good in every mirror are the ones where shimmer sits exactly where light hits the face, the skin looks like skin, and one clear color tells the whole story. Master the order of application, respect the glitter glue, and blend until your edges disappear. The magic was never in owning more products. It was in knowing where the light lands.