
Ear Piercing ideas work best when the placement, jewelry scale, and spacing all support the same visual plan. This guide covers 19 distinct ear piercings, from compact lobe clusters to bold upper-cartilage lines, so you can compare how each placement changes the shape of the ear. Each idea includes a practical tip and a placement note focused only on styling, visibility, and pairing.
1. Stacked Lobe Ear Piercing With Tiny Mixed Studs
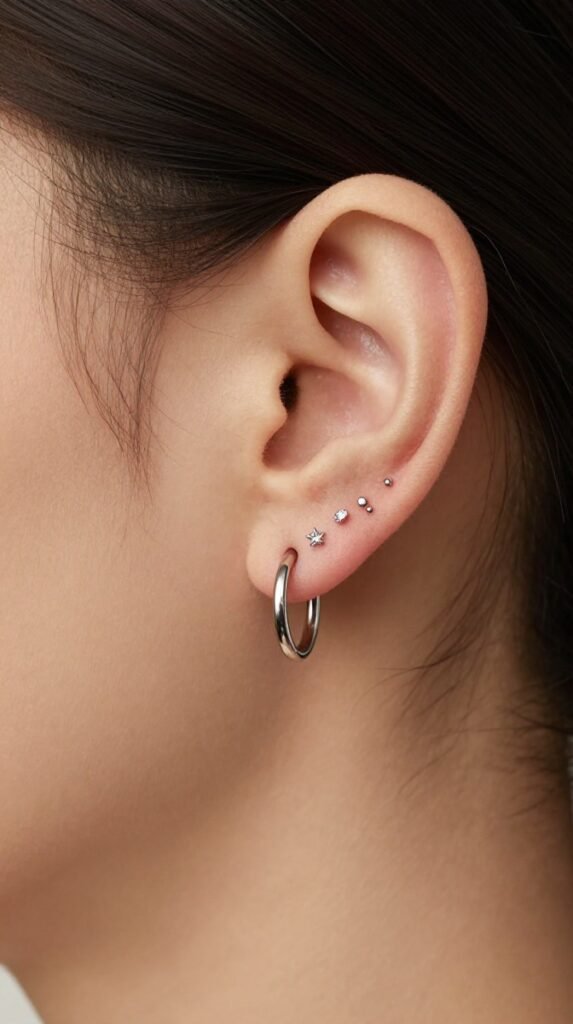
A stacked lobe setup places two or more piercings close together on the lower lobe instead of spacing them in a standard upward row. The design creates a compact cluster, especially when the jewelry includes tiny metal dots, mini gems, small stars, or mismatched micro studs. This Ear Piercing approach adds detail near the face without moving into cartilage placements.
The strength of a stacked lobe comes from controlled spacing. A small cluster can sit above a first-lobe hoop, beside a classic stud, or slightly diagonal across a fuller lobe. The piercings should look intentionally grouped, with enough space between each piece for the shapes to stay readable.
A stacked lobe differs from a simple second lobe because it uses placement as the design. Instead of continuing a neat row, it creates a tiny constellation effect on the soft lower ear. That makes it useful when your first piercing already holds a hoop and you want extra detail around it.
Tip
Ask for a stacked lobe rather than a standard second lobe if you want the piercings to sit close together. Bring a reference that shows the exact spacing, because a few millimeters can change the cluster from delicate to crowded.
Placement Note
Stacked lobes are visible with most hairstyles, but they still feel softer than upper-ear cartilage piercings. They pair naturally with first lobes, second lobes, and tiny huggie hoops.
2. Classic Double Lobe Ear Piercing With Matching Hoops
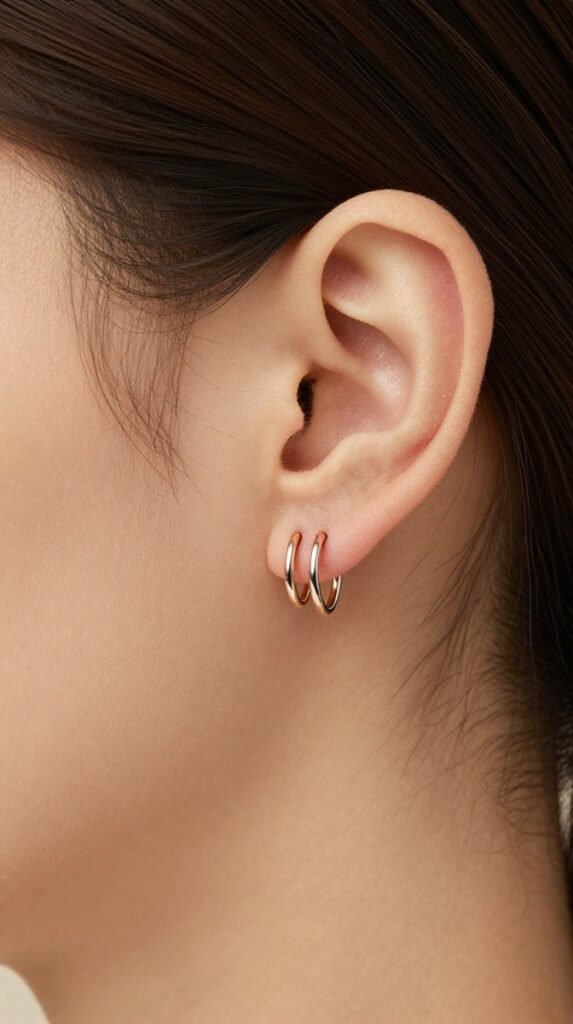
A double lobe piercing uses one standard first-lobe placement and one second-lobe placement just above it. The two piercings create a short vertical line along the lower ear, which makes the setup easy to style with matching hoops, matching studs, or one hoop with one tiny gem. This Ear Piercing idea works because the spacing stays simple and symmetrical.
Matching small hoops give the double lobe a clean, polished outline. If the hoops sit close to the lobe, they frame the bottom of the ear without competing with cartilage jewelry above. A slightly smaller hoop in the second lobe can also create a subtle stepped effect.
This is one of the most practical ear piercings for building a stack slowly. It gives you a clear lower-ear base before adding a helix, conch, tragus, or flat piercing. The look stays organized because both piercings follow the same lower-ear curve.
Tip
Ask your piercer to mark the second lobe while your first earring is in place. This helps the new placement work with the jewelry size and angle you already wear most often.
Placement Note
Double lobes sit on the lower ear, so they are visible day to day without becoming the main statement. They pair easily with helix, conch, tragus, flat, and high-lobe placements.
3. Triple Lobe Ear Piercing In A Soft Graduated Row
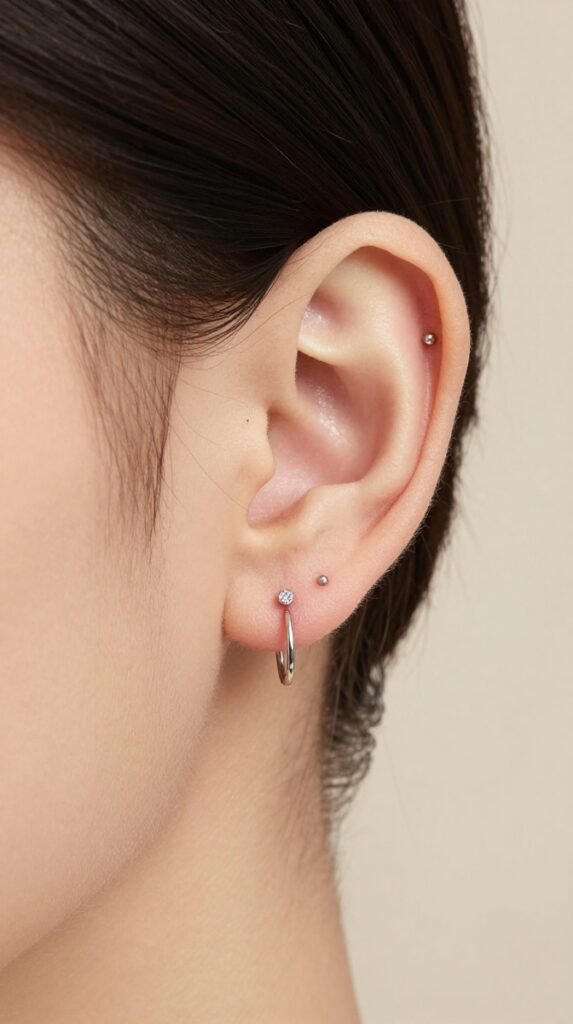
A triple lobe setup uses three piercings that climb from the lower lobe toward the upper lobe. The most balanced version uses jewelry that gets smaller as it moves upward, such as a small hoop in the first lobe, a tiny gem in the second, and a plain metal dot in the third. This Ear Piercing style creates a tapered line instead of placing three equal pieces beside each other.
The row can sit in a straight diagonal line or follow a softer curve. A straight diagonal looks crisp and graphic, while a curved row follows the natural roundness of the lobe. The curved version often works well when the lobe has a fuller shape and needs the jewelry to flow rather than march upward.
Triple lobes make the lower ear look complete before any cartilage pieces enter the stack. They also give you room to mix shapes while keeping the arrangement organized. For example, one smooth hoop, one round gem, and one tiny star can create variety without losing the row.
Tip
Ask whether a straight or curved triple-lobe line suits your ear shape better. The marks should be checked together so the row looks planned rather than added one hole at a time.
Placement Note
Triple lobes are highly visible when your hair is tucked back, but they still read as classic lower-ear styling. They pair well with a single helix hoop, a tiny flat stud, or a simple conch piece.
4. High Lobe Ear Piercing With A Single Sparkle Stud
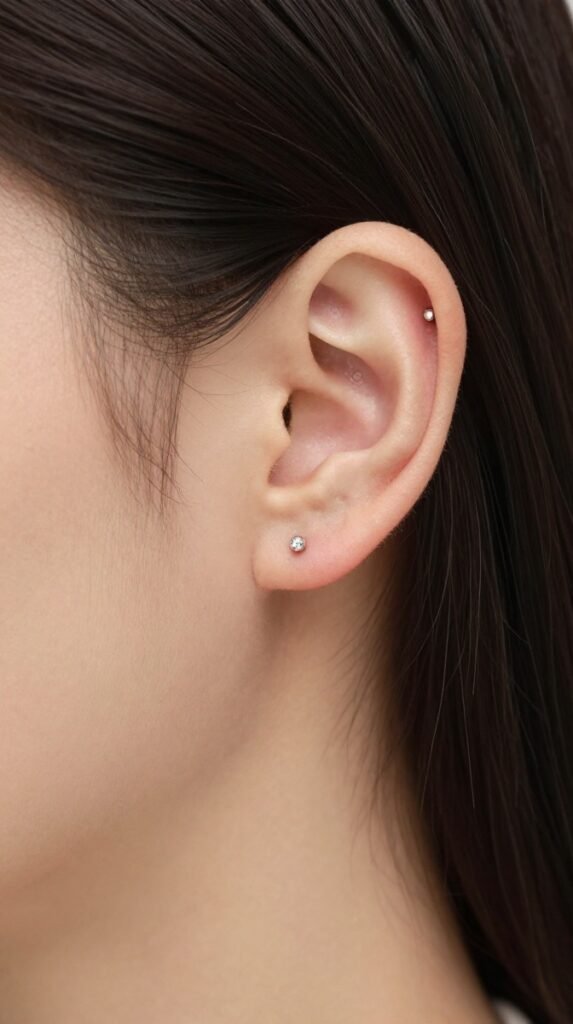
A high lobe piercing sits above the standard lobe area but below the upper cartilage. It fills the small blank zone between regular lobe jewelry and cartilage jewelry, which makes the whole ear look more connected. A single tiny crystal, pearl-style bead, or polished metal dot keeps the placement precise.
This is one of the most useful ear piercing names to know if you want a placement that feels different without looking heavy. The high lobe can echo the look of a low cartilage piercing while staying visually connected to the lobe stack. It works especially well on ears with a longer lobe shape or extra room above the first two piercings.
A high lobe also helps bridge a gap between lower and upper jewelry. If your lobes look finished but the top of your ear feels bare, this placement creates a middle step. It can make a simple double lobe look more intentional without adding a full cartilage layout.
Tip
Ask for the mark to be checked from the front and side before you approve it. A high lobe can look very different depending on whether it sits closer to the face or closer to the outer edge.
Placement Note
High lobes are visible with ponytails, buns, tucked hair, and short hairstyles. They pair well with stacked lobes, triple lobes, minimalist helix jewelry, and tiny flat studs.
5. Helix Ear Piercing With A Slim Outer Hoop
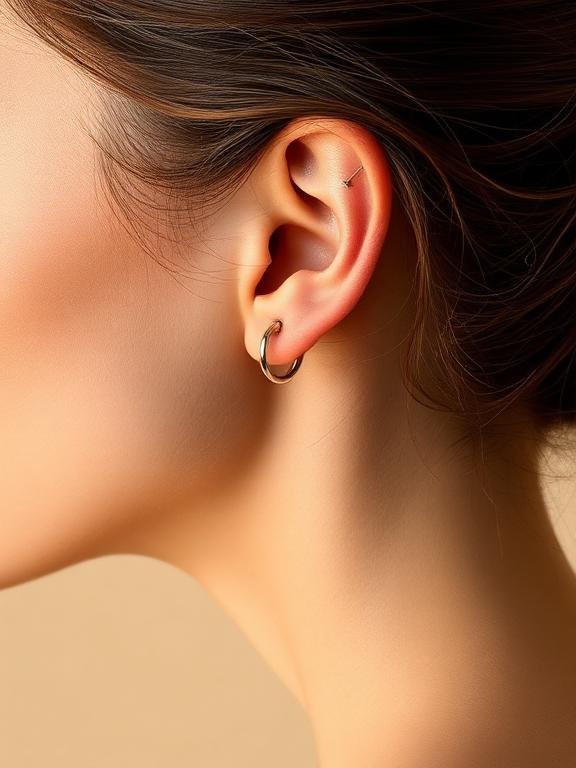
A helix piercing sits along the upper outer rim of the ear. A slim hoop follows that curve and creates a clean outline at the top of the stack. This Ear Piercing idea adds height without filling the inner ear, which keeps the overall layout open.
The hoop version looks different from a helix stud because it draws attention to the ear’s outer edge. A close-fitting hoop creates a small circular accent, while a slightly looser hoop gives the rim more movement. If your lower ear already has several studs, a slim helix hoop can balance the stack with one smooth curved shape.
The helix also works as a visual endpoint. It can finish a line that starts with lobe piercings and moves upward through a high lobe or auricle. Because the placement sits on the rim, it stays easy to notice from the side.
Tip
Ask for a helix placement that matches the hoop size you eventually want to wear. A mark that looks centered with a stud may not sit the same way with a close-fitting hoop.
Placement Note
Helix piercings are most visible from the side, especially when your hair is pulled back. They pair well with lobes, flat piercings, forward helix studs, and conch jewelry.
6. Double Helix Ear Piercing With Tiny Twin Hoops
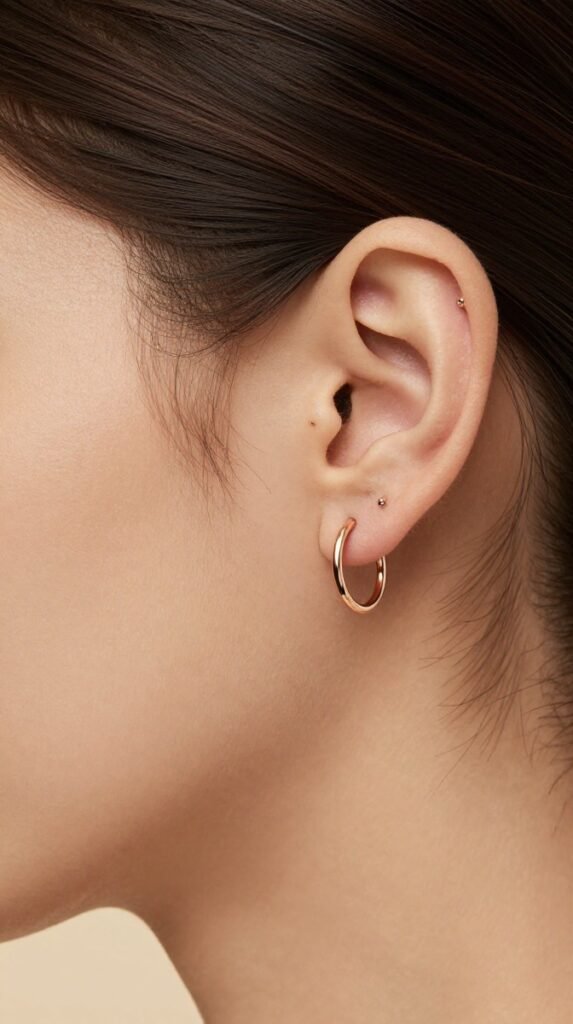
A double helix uses two piercings along the upper outer cartilage, usually placed close together along the rim. Twin tiny hoops create repeated curves, which gives the upper ear a clear rhythm. This Ear Piercing style feels more deliberate than a single helix because the pair becomes the design.
The spacing matters as much as the jewelry. If the hoops sit too far apart, they can look unrelated; if they sit too close, they can visually merge into one heavy detail. A small gap between the two rings keeps each curve visible.
A double helix works best when the lower ear uses calmer jewelry. Plain lobe hoops, tiny studs, or one central conch piece give the twin hoops enough space to stand out. The result is an upper-ear accent that feels sharp but still controlled.
Tip
Ask for the two marks to be planned as a matching set. Adding the second helix randomly later can make the pair look uneven or disconnected.
Placement Note
Double helix piercings are highly visible from the side and add strong detail to the upper ear. They pair best with simple lower-ear jewelry so the twin hoops remain the focus.
7. Forward Helix Ear Piercing With A Tiny Front Stud
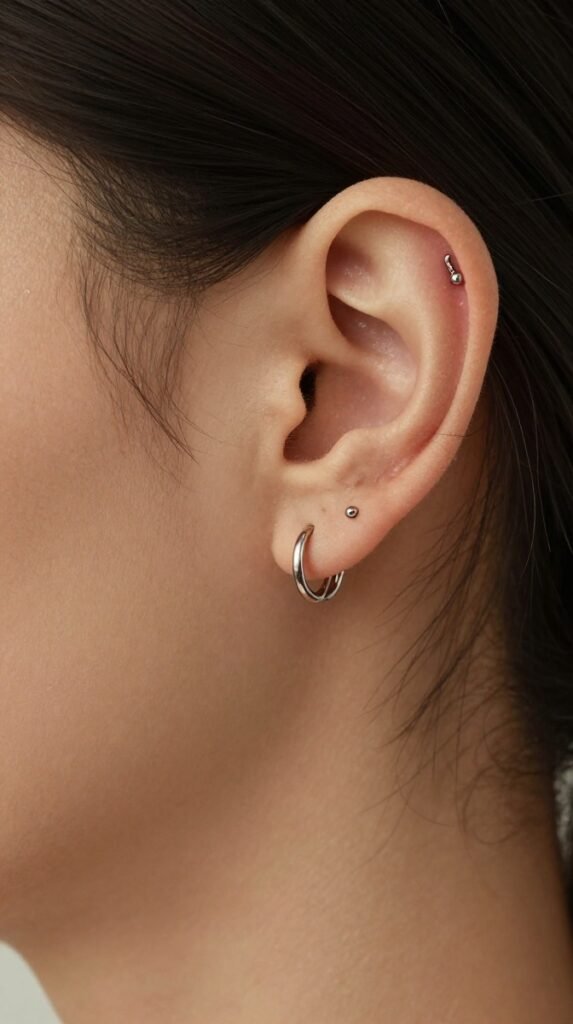
A forward helix piercing sits at the front upper rim of the ear, close to where the ear meets the face. Tiny jewelry usually looks best here because the placement is compact and forward-facing. A petite gem, plain dot, or small metal bead creates a bright accent near the hairline.
This Ear Piercing style changes the front outline of the ear rather than decorating the side rim. That makes it noticeably different from a classic helix, even though both sit in the upper-ear family. It works especially well when your everyday hairstyles leave the front edge of the ear visible.
The forward helix can also balance facial piercings or bold lobe jewelry because it places shine closer to the face. A single tiny stud keeps the detail clean, while two closely spaced front studs create a sharper mini stack. For this article, the single-stud version stands on its own because it uses one precise point instead of a repeated row.
Tip
Ask your piercer to show you the mark with your hair down and tucked back. The forward position can look hidden or prominent depending on your usual hairstyle.
Placement Note
Forward helix piercings are most visible from the front and three-quarter angle. They pair well with simple lobes, flat piercings, and delicate upper-ear stacks.
8. Triple Forward Helix Ear Piercing In A Dainty Vertical Line
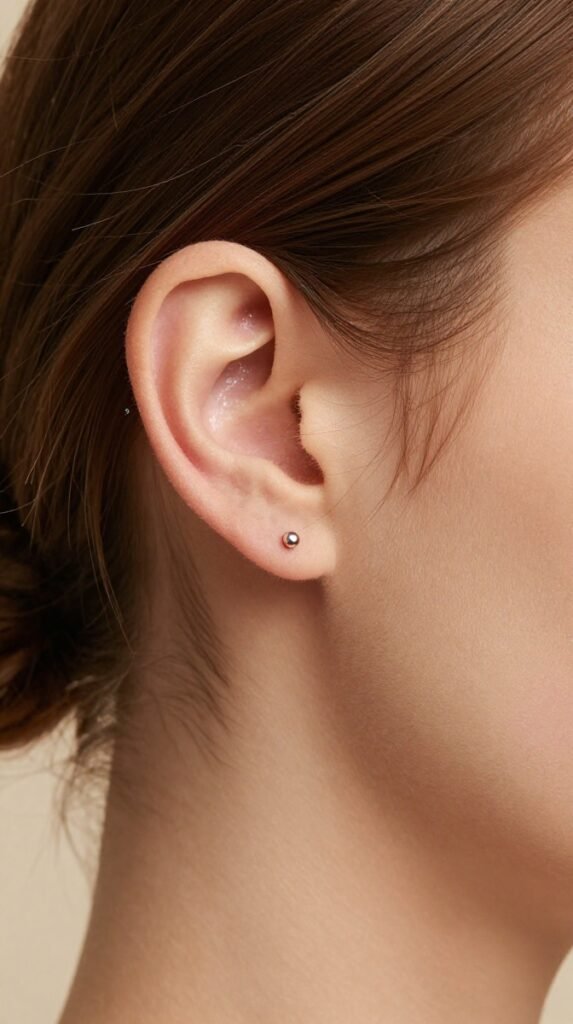
A triple forward helix uses three small piercings lined up along the front upper rim of the ear. The design looks like a tiny vertical trail of light near the face, especially when the jewelry uses matching gems or graduated metal dots. This Ear Piercing idea depends on repeated placement rather than one statement piece.
The line should follow the natural curve of the front rim. A straight, evenly spaced line can look too rigid if the ear curves sharply, while a softly curved line usually sits more naturally. Graduated jewelry can help the layout taper upward without making the front of the ear look crowded.
This placement is much more detailed than a single forward helix. It creates a front-facing stack that shows when your hair is tucked, pinned, or worn behind the ear. Because the design already has three points, the rest of the ear usually looks strongest with simpler jewelry.
Tip
Ask specifically for a triple forward helix layout, not just three separate front cartilage piercings. The marks should be planned together so the line follows the same curve.
Placement Note
Triple forward helix piercings are visible from the front, especially when the ear is uncovered. They pair best with minimal lobe jewelry and a clean upper-ear design.
9. Flat Ear Piercing With A Celestial Stud
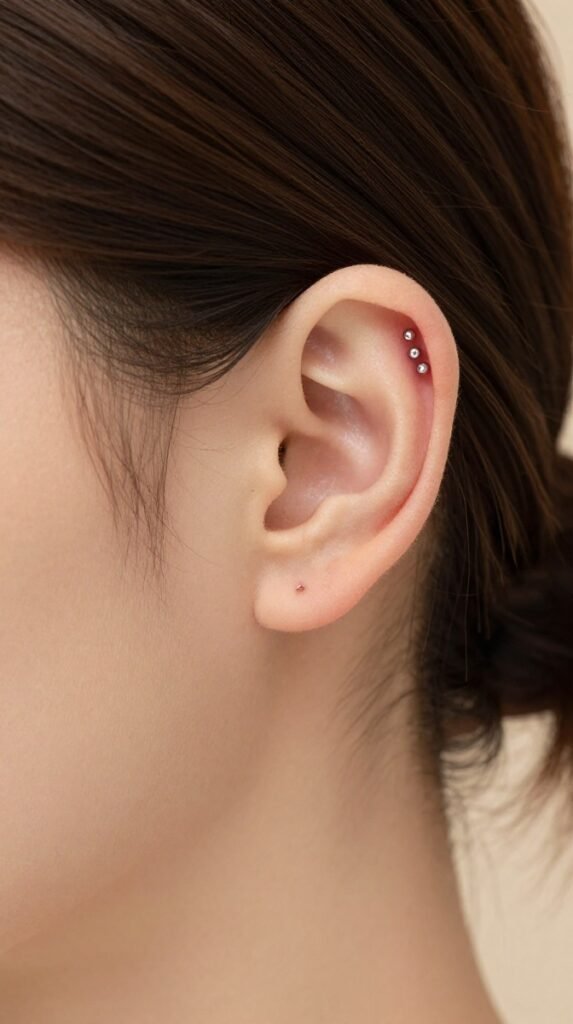
A flat piercing sits on the broad, flat area of cartilage in the upper ear. This placement gives shaped jewelry room to show, which is why stars, moons, sunbursts, flower studs, and tiny clusters work well here. Unlike a helix, it does not trace the outer rim; it sits like a small centerpiece inside the upper ear.
This Ear Piercing idea works when you want one decorative detail rather than several tiny piercings. A celestial stud can anchor the upper ear while simple lobe jewelry sits below it. The flat area also lets the outline of a shaped stud stay visible instead of disappearing into a curved edge.
A flat piercing adds a different kind of structure to an ear stack. It fills a broad space rather than following a line, so it can break up rows of hoops and dots. That makes it useful when the lobe and rim already have jewelry, but the upper center still looks empty.
Tip
Bring a jewelry reference when asking for a flat piercing because the shape of the stud affects the best placement. A starburst or cluster usually needs more centered space than a tiny round stud.
Placement Note
Flat piercings are visible from the side and sometimes from the front, depending on your ear shape. They pair with lobe stacks, helix hoops, and small conch studs.
10. Conch Ear Piercing With A Statement Inner Stud
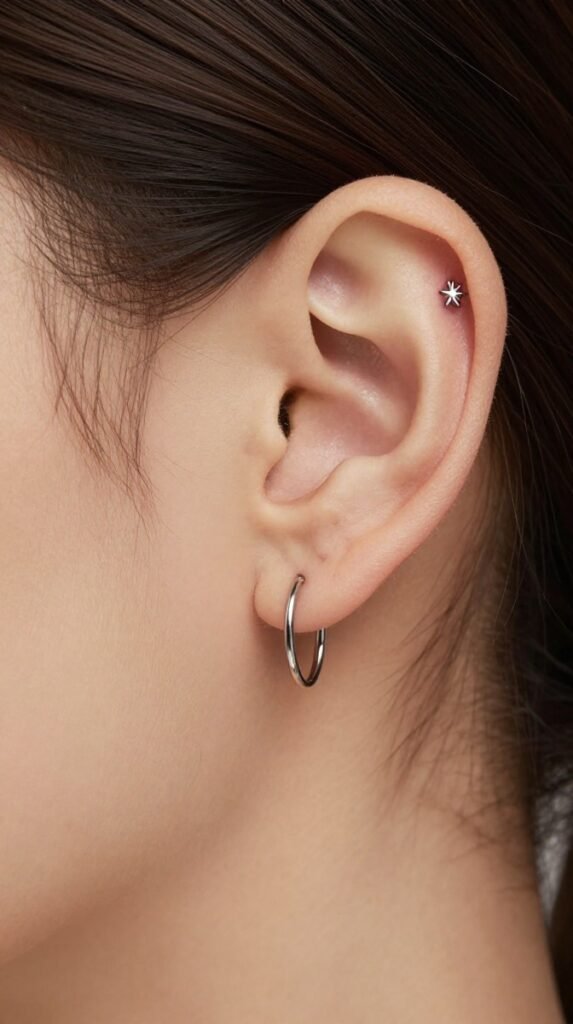
A conch piercing sits in the inner shell of the ear, creating a focal point in the middle of the ear. A statement stud, such as a pearl-style bead, opal-look stone, or small gem cluster, can make the placement feel intentional without needing extra piercings around it. Because the jewelry sits inside the ear’s bowl-like shape, it gets a naturally framed effect.
This Ear Piercing look anchors the stack from the center. It balances lower lobe jewelry and upper cartilage placements because it sits between them. A single conch stud can also make a minimal ear look finished when the jewelry has a clear shape, size, or texture.
The conch is distinct from a flat piercing because it sits deeper and lower in the inner ear. It does not decorate a broad upper panel or the outer rim. Instead, it creates a central point that the rest of the jewelry can visually orbit.
Tip
Ask whether your conch mark is being placed for a stud-focused look or a hoop-focused look. The exact position can affect how the jewelry appears from the side.
Placement Note
Conch piercings are visible from the side and become more noticeable with larger decorative studs. They pair well with helix hoops, stacked lobes, and flat piercings.
11. Auricle Ear Piercing With A Tiny Mid-Rim Hoop
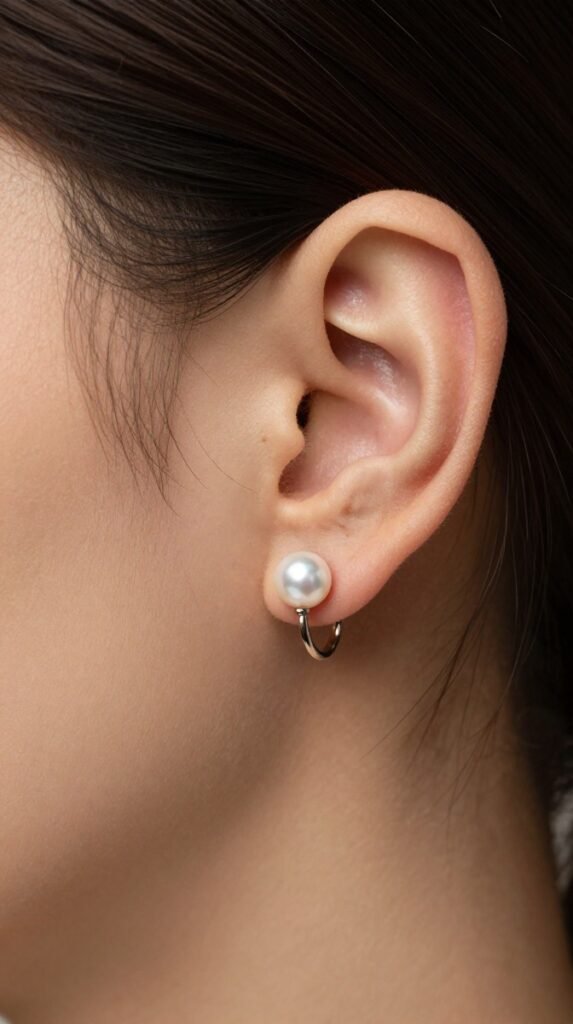
An auricle piercing sits on the outer rim of the ear between the lobe and the upper helix. It is often treated as a middle-cartilage placement because it lands along the side edge rather than the top edge. This Ear Piercing idea adds a visible accent exactly where many stacks have empty space.
A tiny hoop gives the auricle a cuff-like effect along the mid-rim. A small stud creates a quieter dot, but the hoop version emphasizes the curve of the side ear. This makes it distinct from an outer conch, which sits farther inside the ear rather than on the rim.
The auricle works well when you want the ear to feel connected from bottom to top. It can bridge triple lobes and a helix without adding a large central stud. The placement also helps balance a stack that has heavy lower-ear jewelry but little detail along the side.
Tip
Ask for an auricle or mid-rim placement and point to the side edge of the ear in your reference photo. The name can vary by studio, so the marked position matters more than the label alone.
Placement Note
Auricle piercings are visible from the side and add detail between the lower and upper ear. They pair well with triple lobes, helix hoops, and tiny conch studs.
12. Tragus Ear Piercing With A Tiny Bezel Stud
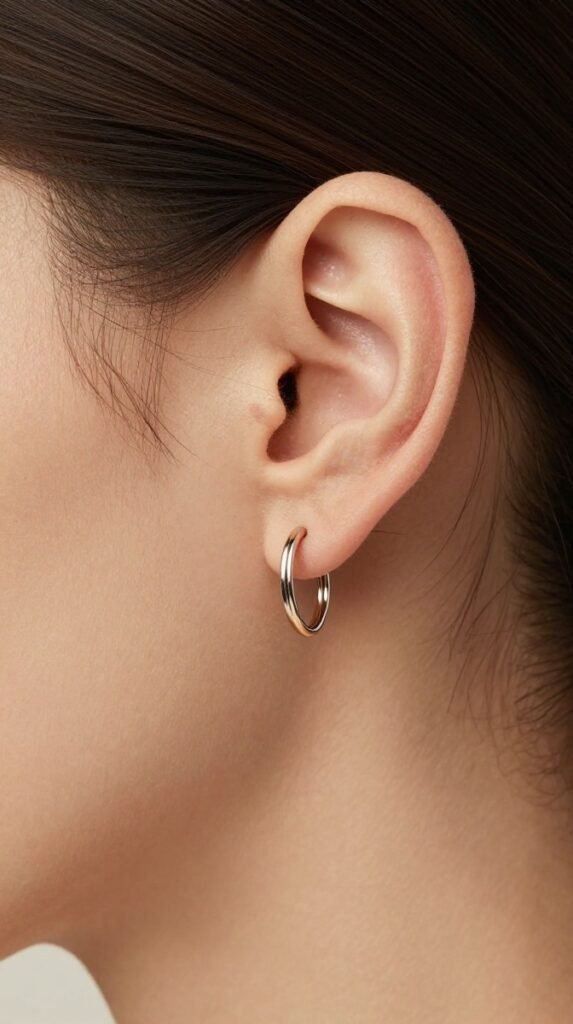
A tragus piercing sits on the small cartilage flap in front of the ear canal. Because the area is compact, tiny jewelry usually looks the cleanest. A bezel-style stone, plain metal dot, or tiny heart shape can add a precise front-facing detail.
This is one of the most recognizable ear piercing names because it changes the view closest to the face. Unlike a helix or auricle, the tragus does not sit on the outer rim. It adds shine at the front of the ear, which can make simple lobe hoops look more styled.
The tragus also creates contrast in a stack that mostly sits around the edge of the ear. If your lobes and helix already form an outer curve, a tragus stud pulls one point inward toward the face. That small shift makes the layout feel more dimensional.
Tip
Ask for jewelry that looks flat, neat, and proportionate against the tragus. Oversized shapes can make this small placement look crowded rather than refined.
Placement Note
Tragus piercings are visible from the front and side, especially when hair is pulled away from the face. They pair well with conch piercings, lobe stacks, and minimal helix jewelry.
13. Anti-Tragus Ear Piercing With A Petite Curved Bar
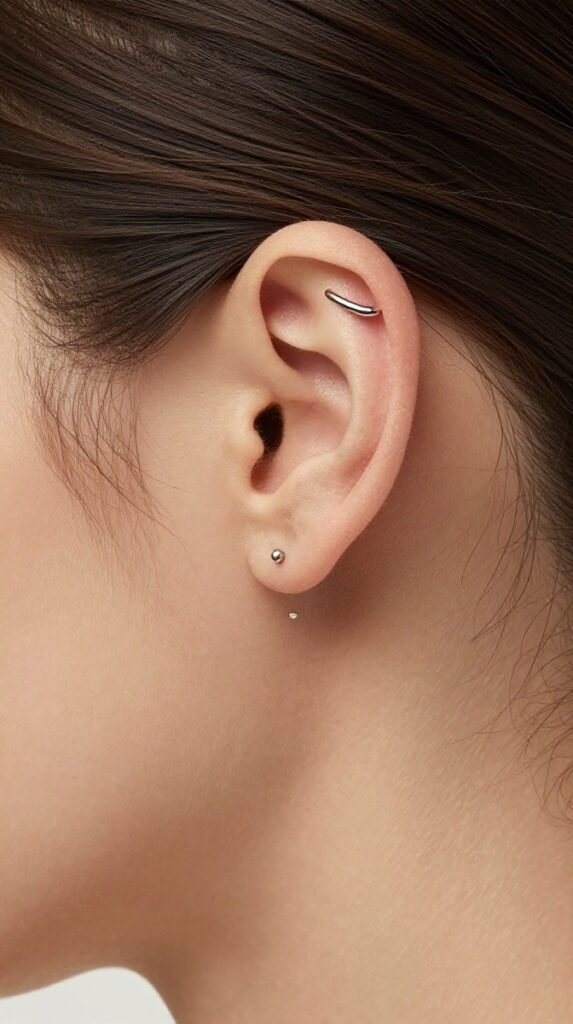
An anti-tragus piercing sits on the small raised cartilage area above the lobe and opposite the tragus. It has an unexpected look because it lives between the lower and middle ear instead of on the outer rim. This Ear Piercing idea creates a sculptural accent just above the lobe.
A petite curved bar or tiny bead detail works well because the placement already has a defined shape. The jewelry should echo that small ridge rather than overpower it. When styled with simple lobe earrings, the anti-tragus becomes a sharp little detail instead of blending into the lower-ear stack.
This placement is distinct from a high lobe because it sits on a raised cartilage fold, not on the lobe itself. It also differs from a tragus because it points from the lower inner side rather than the front flap. That makes it a strong option when you want a less common placement with visible structure.
Tip
Ask for the anti-tragus to be marked while you are wearing your usual lobe jewelry. This lets you see whether the new placement complements or crowds your everyday earrings.
Placement Note
Anti-tragus piercings are visible from the side and add detail just above the lobe. They pair best with simple lobe jewelry, a conch stud, or a clean helix hoop.
14. Rook Ear Piercing With A Delicate Curved Barbell
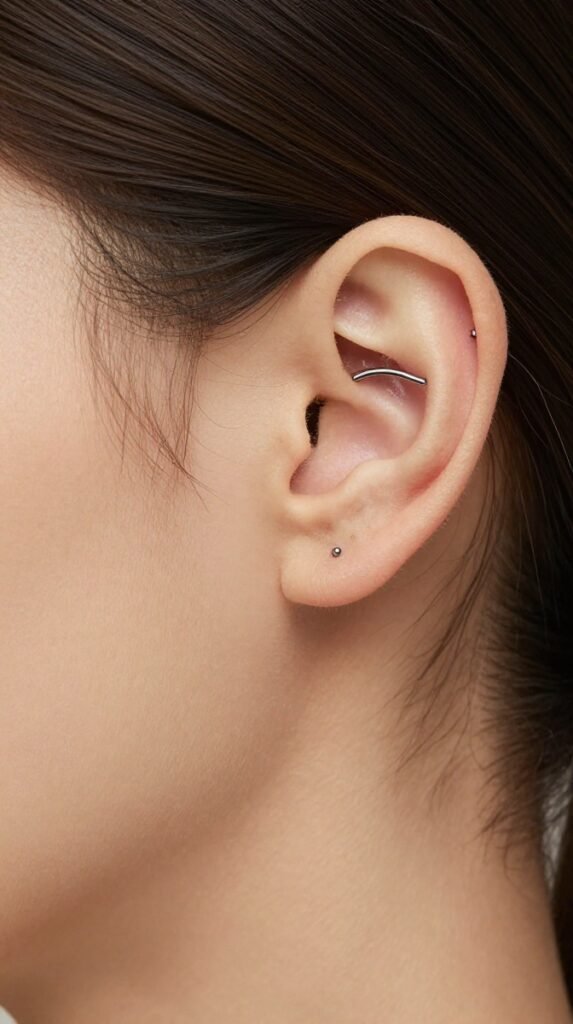
A rook piercing sits on the inner ridge of cartilage above the tragus area. The jewelry usually appears as two small ends peeking from the fold, which gives it a tucked-in, dimensional look. This Ear Piercing style adds depth rather than decorating the outer rim.
A delicate curved barbell keeps the placement refined because the jewelry follows the ridge instead of covering it. The visible ends can be plain metal, tiny gems, or small beads, depending on how much contrast you want. Since the rook sits inside a fold, it often looks more subtle than a helix hoop but more dimensional than a flat stud.
The rook works well in a curated stack because it occupies an inner ridge that many placements leave empty. It can balance a conch stud below or a helix hoop above. The result is a layered ear layout where the jewelry does not all sit on one edge.
Tip
Ask whether your inner ridge is defined enough for the rook look you want. The best version should sit clearly in the fold instead of disappearing behind nearby cartilage.
Placement Note
Rook piercings are moderately visible, with more impact from the side than from the front. They pair well with conch studs, stacked lobes, and simple helix jewelry.
15. Daith Ear Piercing With A Small Inner Hoop
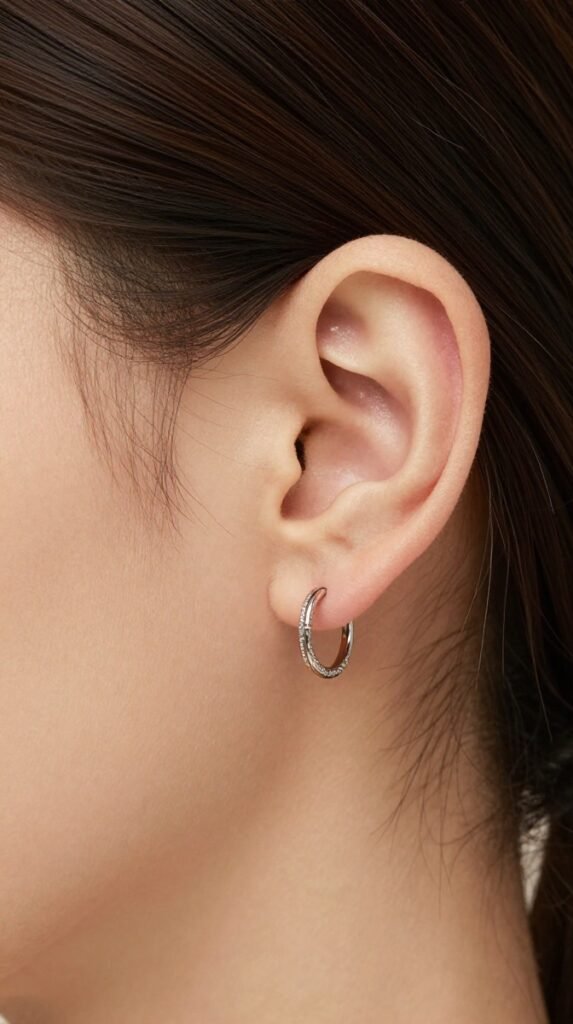
A daith piercing sits in the inner fold of cartilage above the ear canal. It is usually styled with a small hoop or curved decorative ring that follows the fold’s shape. This Ear Piercing idea creates an ornamental curve inside the ear rather than along the outer edge.
The daith looks different from the rook because the hoop forms a rounded inner frame. A small ring can look clean and minimal, while a more decorative ring creates a stronger focal point. The placement draws attention inward, which can balance stacks that already have several lobe and rim piercings.
A daith also works well when you want the center of the ear to feel styled without using a conch stud. The hoop gives the area a curved shape instead of a single dot. That makes it useful for people who prefer rings over studs but still want an inner-ear placement.
Tip
Ask to compare ring diameters before choosing the look you want to reference. A daith can look delicate or dramatic depending on how much space the hoop takes up.
Placement Note
Daith piercings are visible from the side and front when the ear is uncovered. They pair well with lobe stacks, conch studs, and minimal outer cartilage piercings.
16. Snug Ear Piercing With A Sleek Horizontal Bar
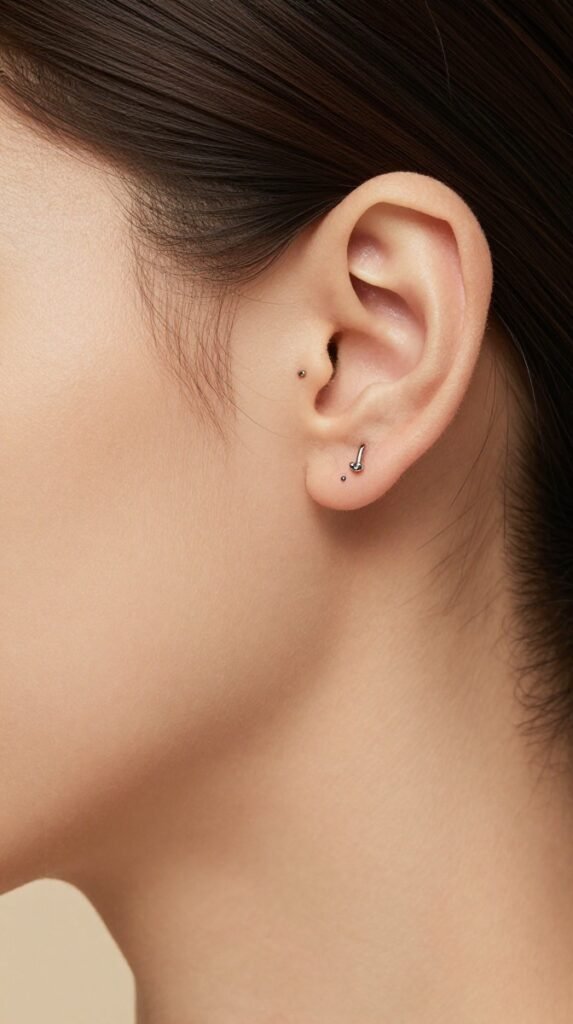
A snug piercing sits through the inner cartilage ridge partway across the ear, creating a horizontal or slightly angled jewelry line. It has a distinctive look because it crosses the ear visually instead of appearing as a dot, hoop, or edge detail. This Ear Piercing style adds a graphic line through the middle of the ear.
A sleek curved bar keeps the placement clean and architectural. The visible ends sit on either side of the ridge, so the jewelry reads as a short bar across the ear’s structure. That makes the snug one of the most placement-driven ear piercing types in a curated stack.
The snug should not be confused with a rook or daith because it sits across a different ridge and creates a different direction. Rook jewelry tucks into an upper fold, while daith jewelry curves inside the ear. A snug creates a compact cross-ear line, which gives it a more angular look.
Tip
Ask for the snug to be marked from multiple angles so you can see how visible the bar will be. The look depends on the ridge shape and how clearly the jewelry line shows.
Placement Note
Snug piercings are side-facing and can look bold even with minimal jewelry. They pair best with understated lobes or a single helix detail so the center ridge remains the focus.
17. Industrial Ear Piercing With A Slim Straight Bar
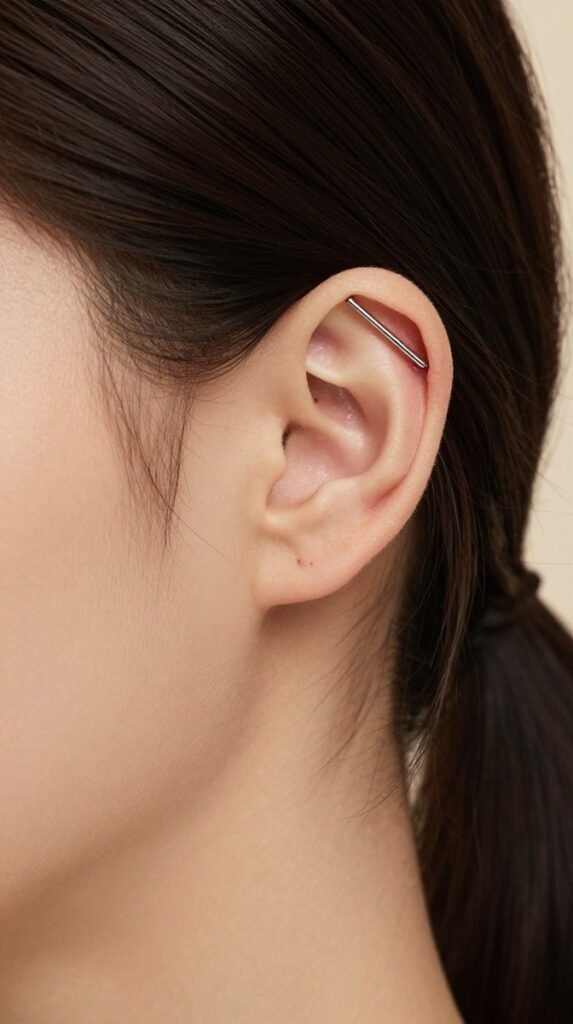
An industrial piercing usually connects two upper cartilage piercings with one straight bar. The jewelry creates a strong diagonal line across the top of the ear, making it one of the boldest placements in the list. This Ear Piercing idea uses structure and angle as the main visual feature.
A slim bar keeps the line sharp without making the upper ear look weighed down. Small decorative ends can soften the look, but the diagonal shape still stays dominant. Because the bar crosses open space, it reads more graphic than a helix, flat, or forward helix piercing.
The industrial stands apart because it links two points into one visible design. Most piercings create isolated dots, hoops, or clusters, but this one creates a single line across the ear. That makes it best suited to a stack where the other jewelry stays relatively simple.
Tip
Ask for the full bar placement to be mapped before focusing on jewelry style. The two piercing points and the angle should be planned as one connected design.
Placement Note
Industrial piercings are highly visible from the side and create a bold upper-ear statement. They pair best with simpler lobe jewelry so the diagonal bar remains the main feature.
18. Orbital Lobe Ear Piercing With One Tiny Hoop Through Two Holes
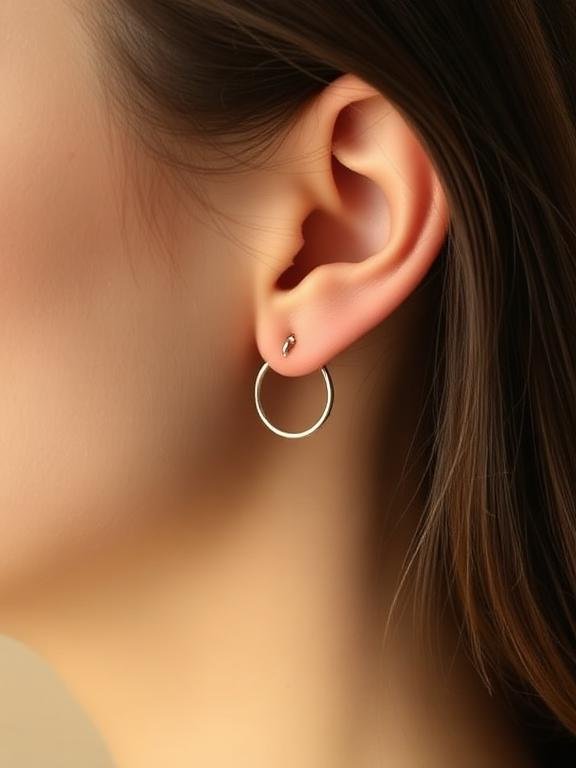
An orbital lobe piercing uses one small hoop that passes through two separate lobe piercings. Instead of wearing two earrings, the single ring connects both holes and creates a looped effect. This Ear Piercing style turns the lower lobe into a linked design rather than a row.
The orbital differs from a double lobe because the jewelry relationship matters as much as the placement. The two holes need spacing that allows one hoop to sit smoothly through both. When the ring sits close to the lobe, it creates a neat oval shape that looks intentional from the front and side.
This is a strong choice if you like unusual jewelry geometry but do not want a cartilage-heavy stack. It gives the lower ear movement and shape while keeping the design compact. A plain hoop lets the linked structure stay clear, while extra decorative shapes can make the area look busy.
Tip
Ask for an orbital layout specifically if your goal is one hoop through two piercings. The spacing needs to be planned for the ring, not treated like two ordinary lobe piercings.
Placement Note
Orbital lobe piercings are visible from the front and side, especially with short hair or tucked hair. They pair well with a simple first-lobe stud, a high lobe, or a minimal helix.
19. Constellation Ear Piercing With Scattered Tiny Stars
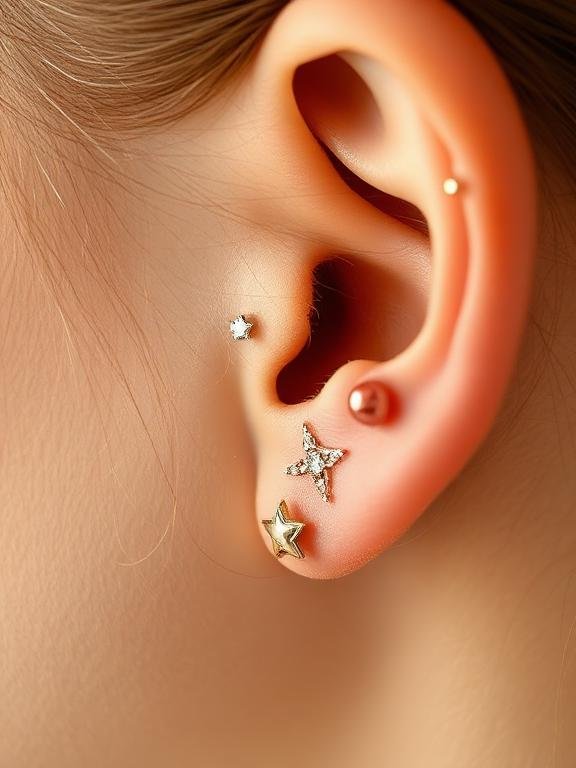
A constellation piercing setup uses several small piercings arranged like a scattered star pattern, most often across the lobe and lower cartilage area. Instead of forming a straight line, the dots vary in height, spacing, and direction. This Ear Piercing idea relies on asymmetry, but the spacing still needs a clear visual rhythm.
Tiny stars, crystals, and plain metal studs help the arrangement look intentional rather than random. One slightly larger piece can act as the anchor, while smaller studs fill the surrounding space. The layout works best when it follows the natural open areas of your ear instead of copying someone else’s exact pattern.
Constellation styling is distinct from stacked lobes because it usually spreads farther and uses more negative space. A stacked lobe stays compact near the lower lobe, while a constellation can travel upward or outward. The scattered arrangement creates a softer, more custom-looking map across the ear.
Tip
Ask for a constellation piercing plan and bring two or three reference photos that show the spacing you like. Your piercer can adapt the arrangement to your lobe shape instead of placing every dot in the same spots.
Placement Note
Constellation piercings are usually very visible because they often sit across the lobe and lower ear. They pair well with tiny studs, celestial jewelry, and a single simple hoop.
Frequently Asked Questions
What are the most popular ear piercing types for beginners?
Lobe, second lobe, high lobe, and simple helix piercings are common starting points. They create clear styling options without filling the whole ear.
What ear piercing names should I know first?
Start with lobe, helix, forward helix, flat, conch, tragus, rook, daith, snug, and industrial. These names describe the main placement zones.
How do I choose an Ear Piercing that suits my ear shape?
Look for open space on your ear and choose a placement that balances your existing jewelry. A marked placement preview helps compare the shape.
What should I search for when looking up ear piercing near me?
Search “ear piercing near me” with terms like placement portfolio, curated ear, professional piercer, and finished examples. Photos show how the studio handles spacing.
Can I mix metals in an Ear Piercing stack?
Yes, mixed metals can look intentional when each tone appears more than once. Repeat one silver detail and one gold detail so the mix feels balanced.
The Takeaway
The best Ear Piercing idea is the one that works with your ear shape, your usual hairstyle, and the jewelry scale you actually like. Start with the placement that fills a clear visual gap, such as a stacked lobe for lower-ear detail, a conch stud for the center, or a helix hoop for the upper rim. Once that first placement has a clear role, the rest of the stack becomes easier to plan.

Ali Hamza Lali is the founder and content lead behind GlowVibesSpot. Every article is personally researched, tested, and published by Ali. I am covering makeup, hairstyle, nail, piercing, and tattoo inspiration you can actually trust.