
Every fall, one nail pattern quietly takes over salons and Pinterest boards: the warm, marbled swirl of tortoiseshell. Known as the carey effect in nail art circles, it turns simple polish layering into something that looks expensive and hand-crafted. These 13 carey nail ideas cover the full range, from the classic almond set to matte, gold-leaf, and jewel-toned twists, and each one includes the real technique detail you need to ask for it or recreate it.
Carey Nails at a Glance
Quick answer: carey nails are a tortoiseshell-inspired manicure built by layering translucent amber, caramel, and dark brown polish with irregular black accents to mimic the mottled pattern of real tortoiseshell. The organic pattern forgives chips and growth lines, works on short and long nails, and reads as a polished neutral that pairs with nearly any outfit. This article shares 13 distinct variations, the exact marbling method, and how to avoid the muddy look.
1. The Classic Carey Nails Set
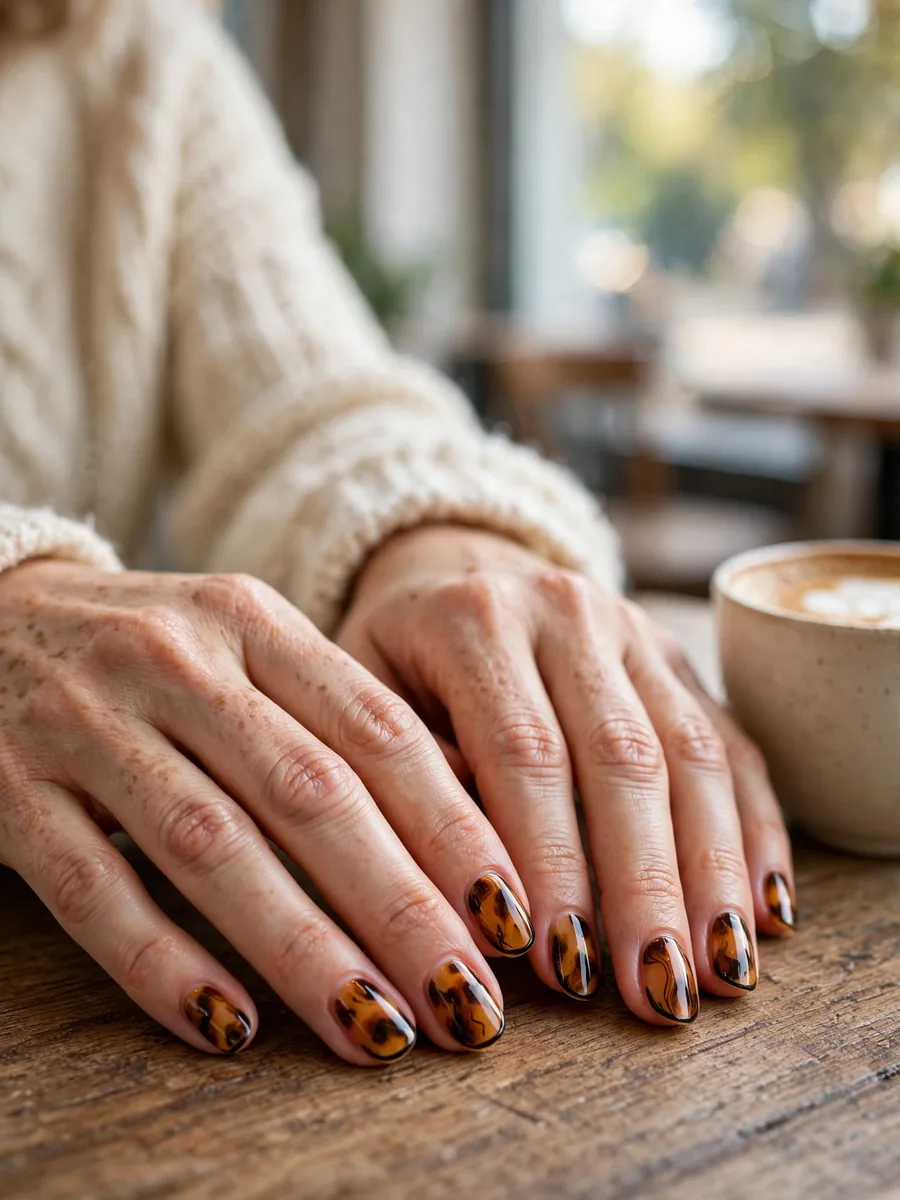
This is the look that made the trend: full tortoiseshell print across every nail, layered over a sheer caramel base, with irregular dark brown patches and thin black strokes for definition. The medium almond shape is the ideal canvas because its curved edges echo the organic flow of the marbling, letting the pattern wrap the nail naturally. Ask your technician for translucent layers rather than opaque color, since the glass-like depth is what separates real carey nails from flat brown polish. On your own, build the effect with a striping brush and a damp cleanup brush to soften the edges while the polish is still wet.
Layering order that works
Sheer amber base first, then irregular dark brown patches, then the black defining strokes last. Reversing the order buries the dark detail under the brown.
Shape pairing
Almond flatters the pattern most, but oval is a close second. For more on the shape itself, browse these almond nail ideas.
2. Micro Tortoiseshell on Short Squoval Nails

Short nails wear tortoiseshell beautifully, as long as the pattern shrinks to fit the canvas. Micro-carey uses smaller, finer marbling with tighter spacing so the design reads clearly instead of collapsing into one brown blur. Keep the patches delicate and leave breathing room between the dark strokes, which keeps short squoval nails looking neat rather than crowded. This is also the most forgiving version for beginners, because small irregular marks hide mistakes better than bold sweeps do. A high-shine top coat adds the illusion of length by catching the light.
Scale is everything
If the pattern looks muddy, the patches are too big for the nail bed. Halve their size and the design snaps back into focus.
3. Tortoiseshell French Fade
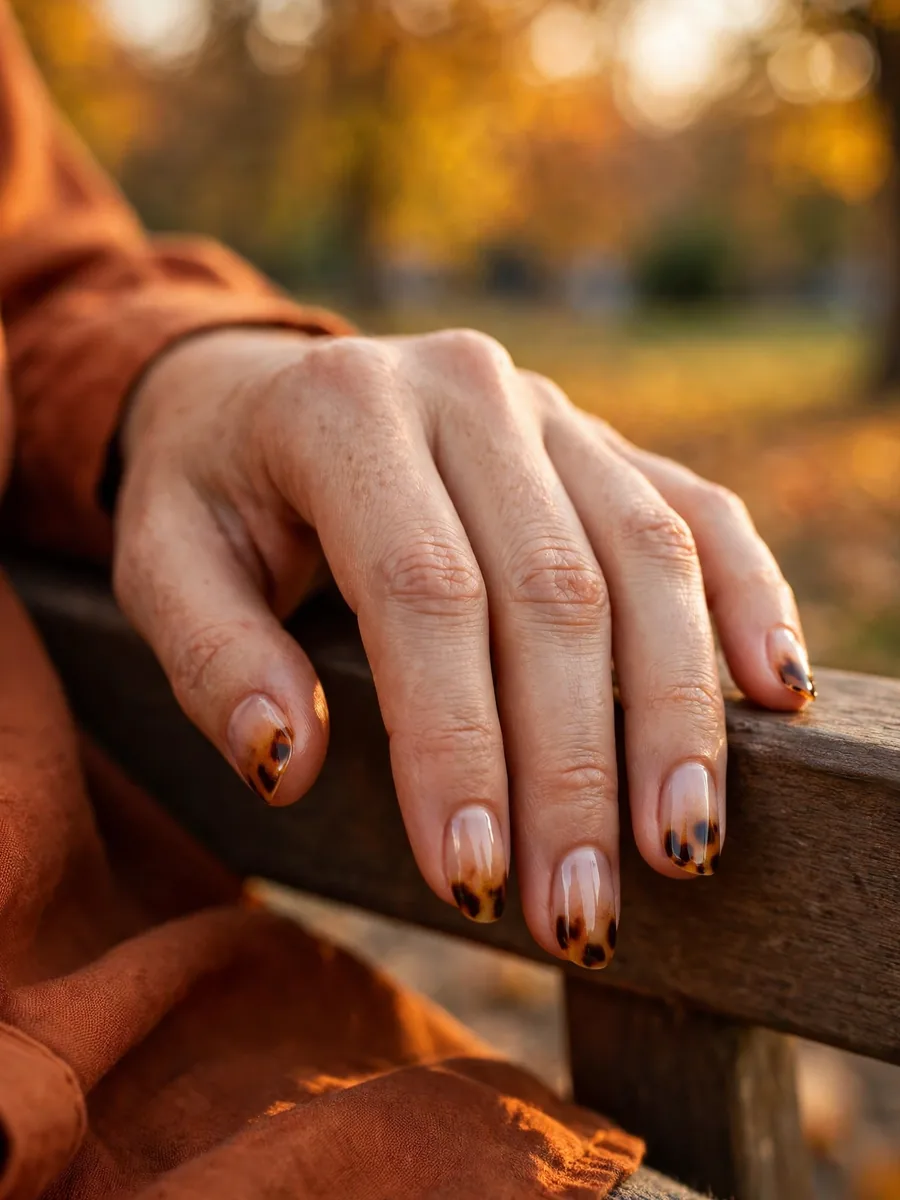
Instead of a hard smile line, this version fades the tortoiseshell pattern gradually from the tip into a sheer nude base, so the transition looks airbrushed rather than drawn on. It keeps the elegance of a French manicure while borrowing the warmth of the carey effect, which makes it one of the most office-friendly designs on this list. The fade is achieved by sponging the marbled colors onto the tips and blending downward before sealing. A steady hand helps, but this detailed walkthrough of the layering method makes the technique far less intimidating than it looks.
Getting the fade right
Two thin sponged layers beat one heavy one. Build the color slowly so the base stays sheer near the cuticle.
When to choose this one
Pick the fade when you want the trend without committing every nail to full pattern. It reads subtle from a distance and interesting up close.
4. Burnt Caramel Ombré Carey
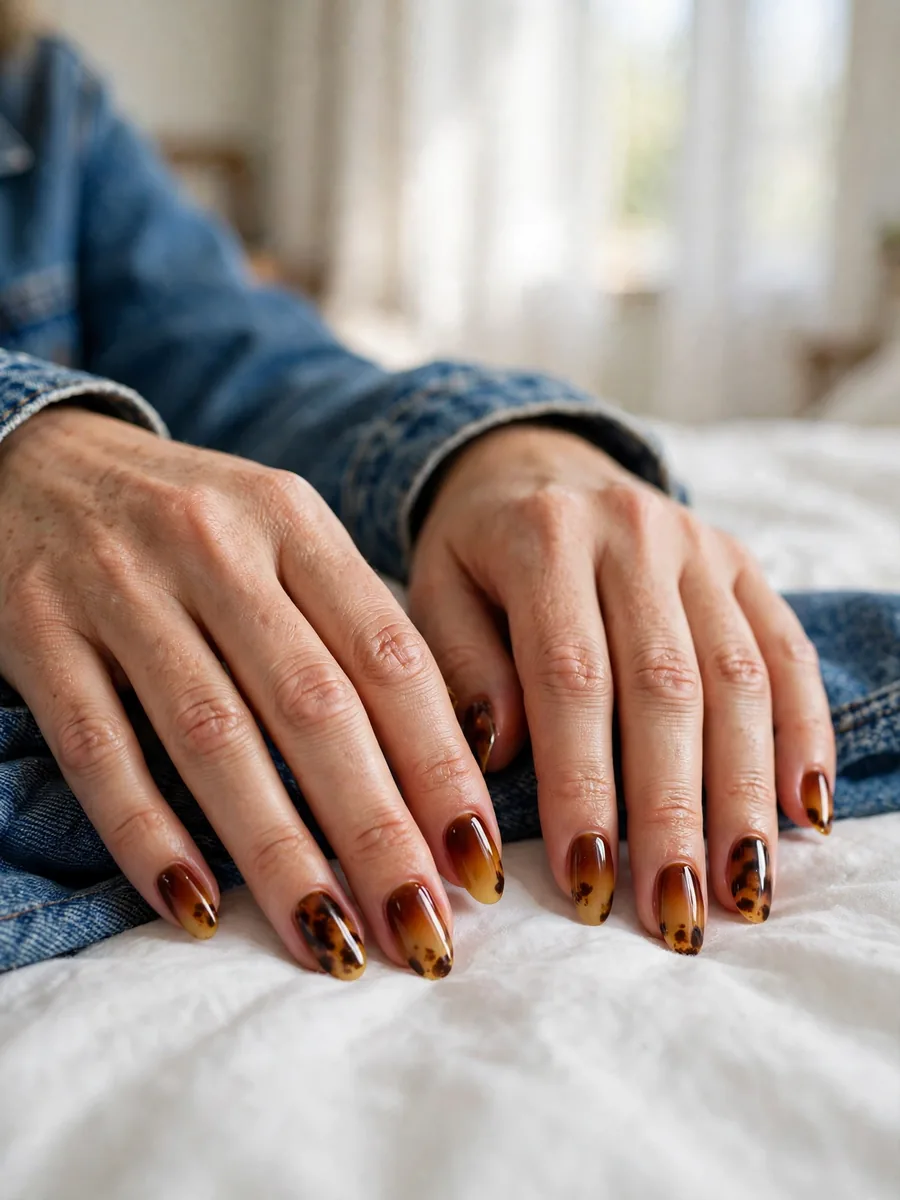
Here the base itself becomes part of the design: a burnt caramel ombré that runs from deep amber at the cuticle to a lighter honey tone at the free edge, with the tortoiseshell marbling layered over the top. The gradient underneath adds movement and makes the dark patches look like they are floating in warm light, which gives this version more depth than the standard set. Apply the ombré with a sponge in two passes, letting the first dry fully so the colors do not drag into each other. This is my pick for anyone who wants the classic look with one extra dimension.
Why the gradient matters
Flat bases make tortoiseshell look stamped on. A gradient underneath sells the illusion that the pattern sits inside the nail, not on top of it.
Color temperature
Keep every layer warm. One cool brown sneaking in is the fastest way to make the whole set look muddy instead of rich.
5. Negative-Space Half Moons
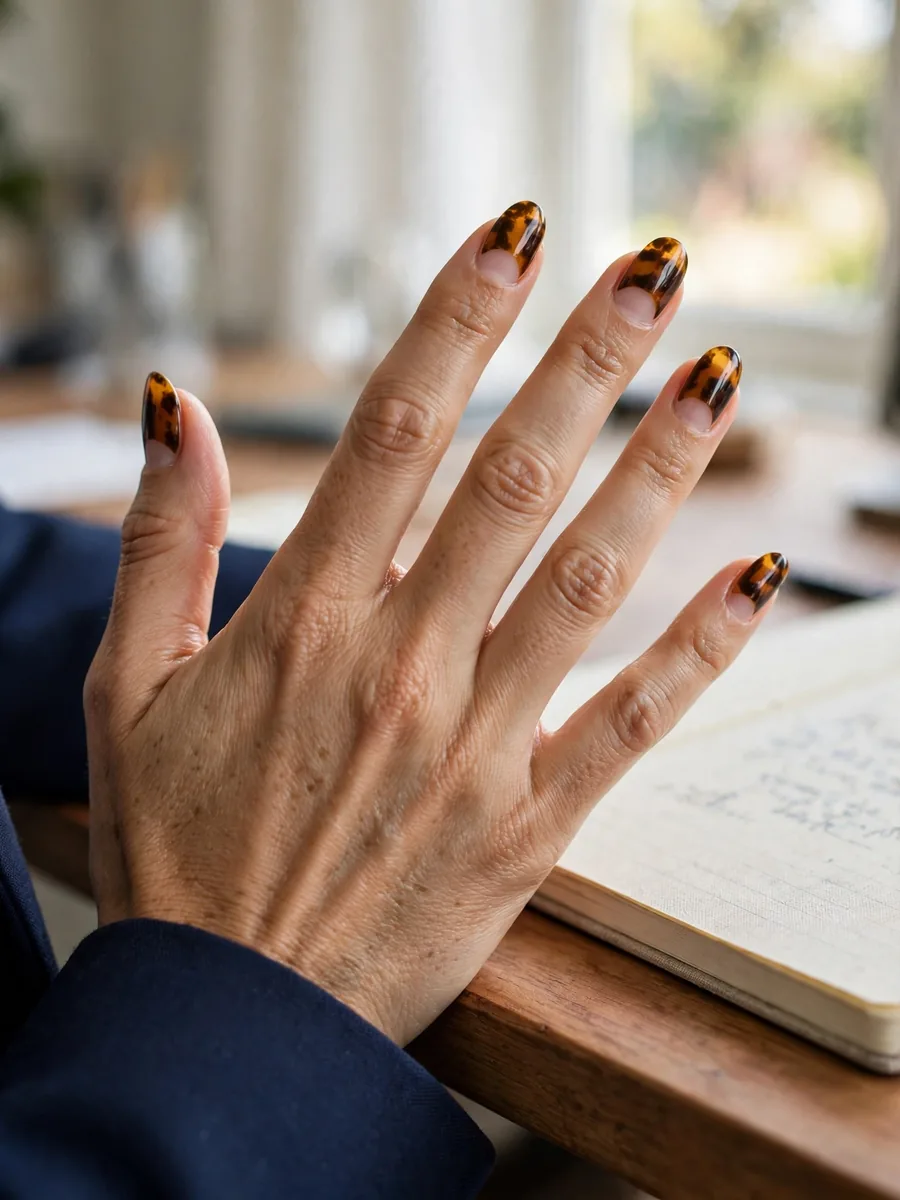
Leave the half-moon area near the cuticle completely bare and concentrate the carey pattern across the rest of the nail. The untouched negative space creates a crisp boundary that makes the marbling pop harder, and the bare crescent also disguises regrowth, so the manicure stays presentable longer between appointments. Paint the pattern first, then clean the half moon with a flat brush dipped in remover for a sharp edge. This design suits longer nail beds best, where the bare crescent has room to read as a deliberate shape rather than a gap.
The cleanest edge trick
Do not try to paint around the crescent. Paint over it, then carve the bare shape back out. The edge comes out far sharper.
6. Matte Velvet Finish
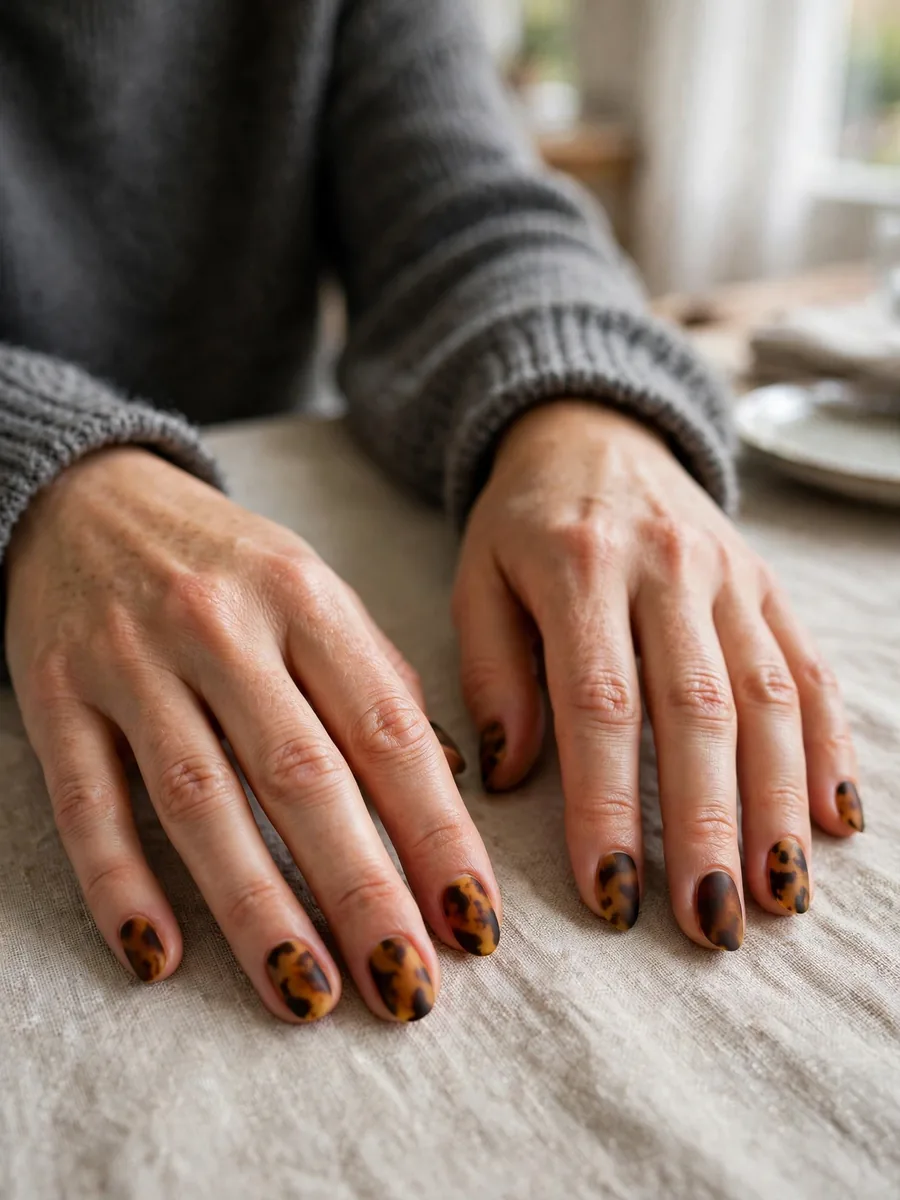
Swap the usual glassy top coat for a matte one and the whole personality of carey nails changes. The pattern turns soft and velvety, like suede, and the amber tones read deeper and more sophisticated without the shine competing for attention. Matte finishes show smudges and oils more readily, so seal the free edge carefully and refresh the matte layer every few days to keep it even. This version photographs beautifully in natural light and suits anyone whose style leans minimal rather than glossy.
Matte changes the colors
Expect the ambers to look one shade darker under matte. Compensate by choosing a slightly lighter caramel base than you would for the glossy version.
Pairing note
Matte carey pairs well with matte lip looks and soft knitwear, while glossy carey suits evening shine. Match the finish to the season you are dressing for.
7. Cognac and Gold-Leaf Flecks
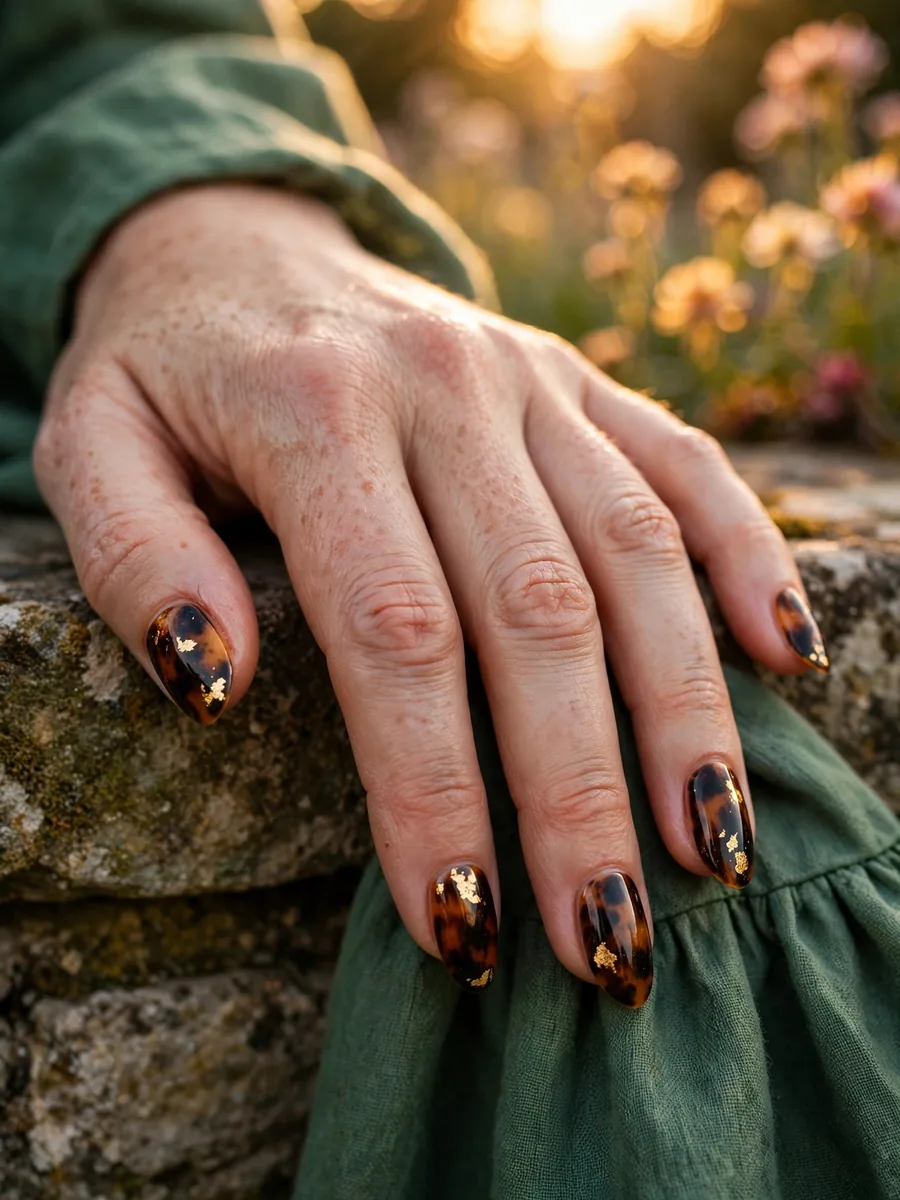
A cognac-toned tortoiseshell base gets tiny flecks of gold leaf pressed into the wet dark patches, catching light as the hand moves. Unlike studs or dots, gold leaf has irregular edges that blend into the organic pattern instead of sitting on top of it, so the luxury reads as part of the design rather than decoration added after. Place the flecks sparingly and asymmetrically, two or three per nail at most, and seal with two layers of top coat so the edges lie flat. This is the celebration version of the trend: same warmth, dressed up.
Gold leaf, not glitter
Glitter sits on the surface and reads crafty. Gold leaf sinks into the wet polish and reads expensive. The difference is in how it bonds with the layer beneath.
Placement logic
Press flecks where the dark patches are thickest. They disappear against the sheer amber areas and need the contrast of the brown to glow.
8. Blonde Espresso Tortoiseshell
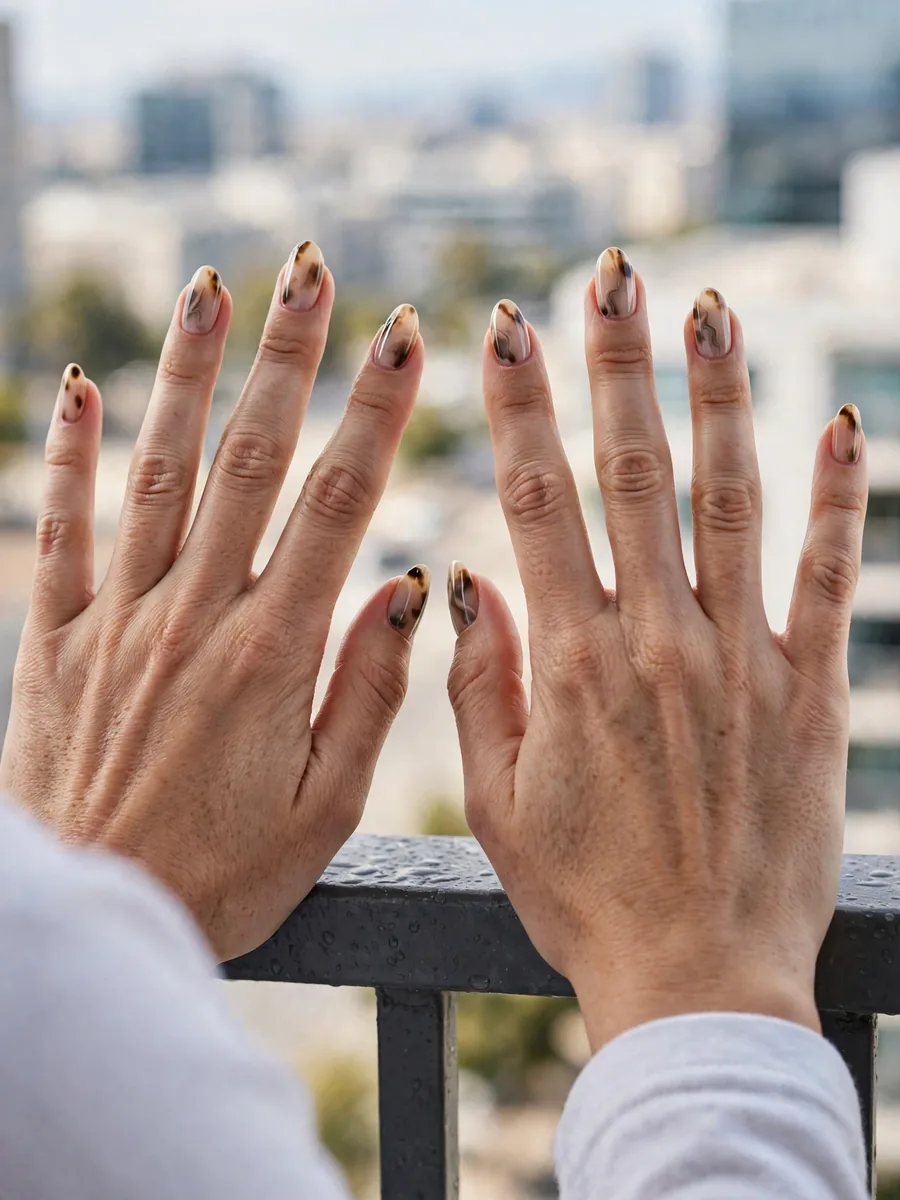
Trade the deep ambers for a blonde palette: creamy beige, soft taupe, and smoky espresso layered over a sheer milky base. The result is tortoiseshell at half volume, lighter and more modern, and it flatters very fair skin tones that can find the classic version too heavy. Because the contrast is lower, the marbling needs to be slightly bolder than feels natural, or the pattern washes out entirely. Tiny silver accents or a single fine metallic line can add definition without breaking the softness of the palette.
Who this palette suits
Fair to light skin tones, neutral wardrobes, and anyone who loves the trend but finds the classic amber too bold for daily wear.
Contrast warning
Low-contrast palettes blur at a distance. Step back from your hand mid-application; if the pattern vanishes, deepen the espresso patches.
9. The Single-Accent Nail
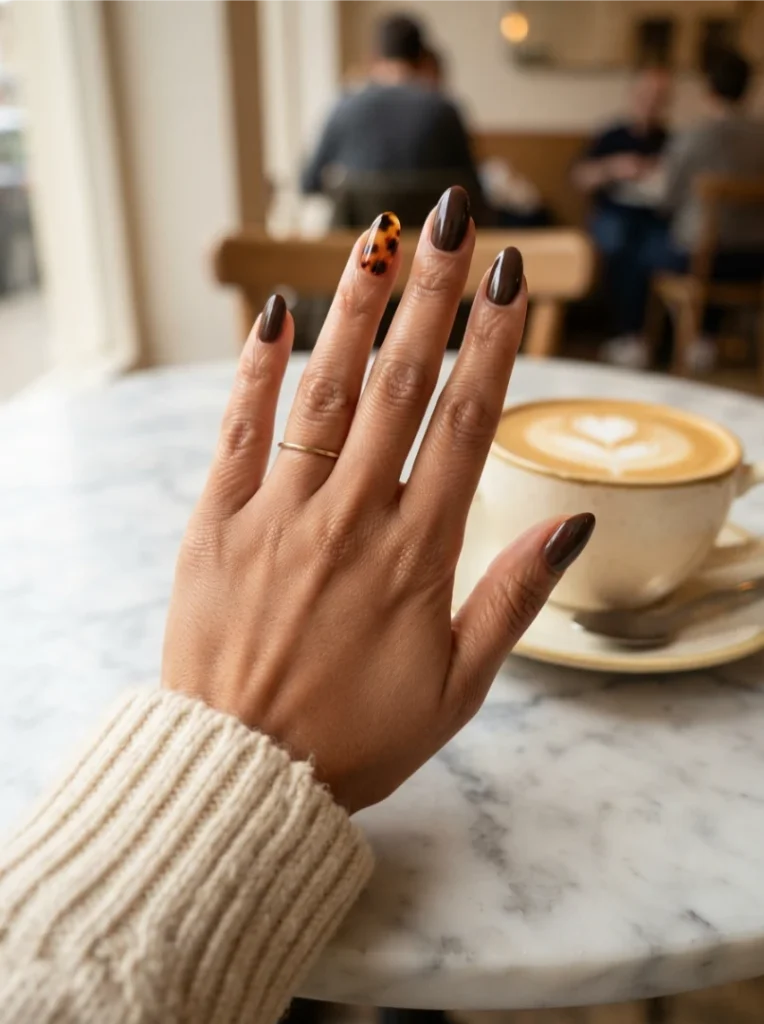
Commit to the trend on exactly one nail per hand, usually the ring finger, and keep the rest in a solid shade pulled from the pattern, like deep chocolate or warm caramel. This is the lowest-risk entry point: you get the tortoiseshell moment without a full set, and the solid nails make the accent look intentional rather than unfinished. On acrylic nails the accent can be sculpted slightly longer than the rest for extra emphasis. Keep the solid color in the same warm family as the pattern, or the accent looks disconnected.
Which finger and why
The ring finger is traditional, but the middle finger gives the pattern more visual real estate. Either works; symmetry between hands matters more than the choice.
10. Double-Tip Chocolate and Carey
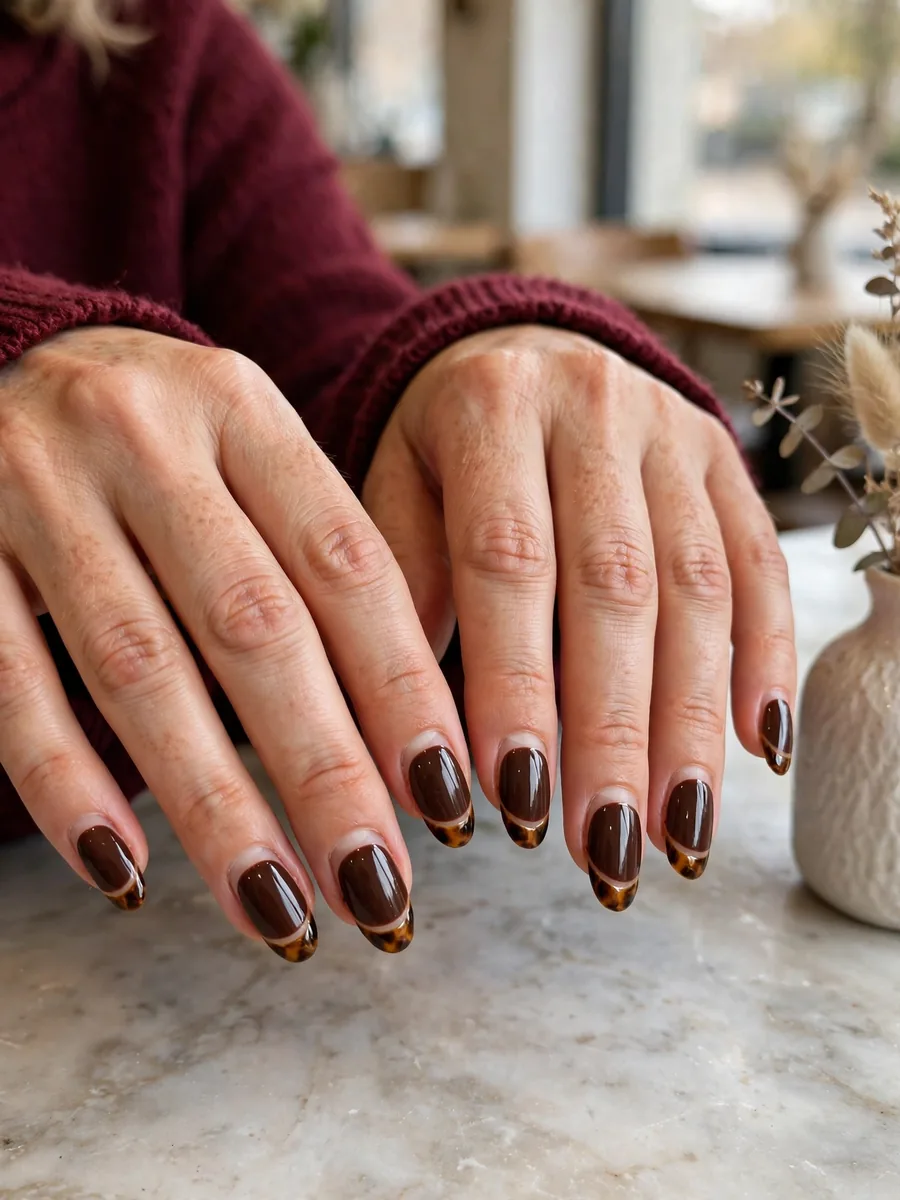
Paint the nail in solid deep chocolate, then add a second, thinner tip line in the tortoiseshell pattern sitting just inside the chocolate edge. The double tip creates a framed effect that looks intricate while using only two techniques, and the dark chocolate base makes the amber marbling glow by contrast. The trick is leaving a hairline gap between the two tips so each layer reads separately instead of bleeding together. This design suits medium to long nails, where the doubled detail has room to breathe.
The gap is the design
Without the slim negative gap between tips, this collapses into one thick brown edge. Paint the chocolate tip first, let it dry, then add the carey line.
Shape suggestion
Coffin and almond both carry the double line well. For coffin inspiration, see these coffin shape nail ideas.
11. Cherry Cola Swirl

Swap the amber family for deep cherry reds and cola browns, marbled with near-black strokes over a translucent oxblood base. The pattern logic is identical to classic carey, but the red undertone gives it a moodier, autumn-evening feel that pairs beautifully with burgundy wardrobes. Red pigments can stain, so double up on the base coat before starting the marbling. This is the version to choose when brown alone feels too safe but you still want the tortoiseshell structure.
Red done right
Keep the reds deep and translucent. Bright, opaque reds fight the pattern and turn the design into plain red nails with brown smudges.
Seasonal fit
This is peak fall and holiday-party territory. If you like seasonal nail looks, these halloween nail ideas share the same moody palette.
12. Cat-Eye Shimmer Over Tortoise
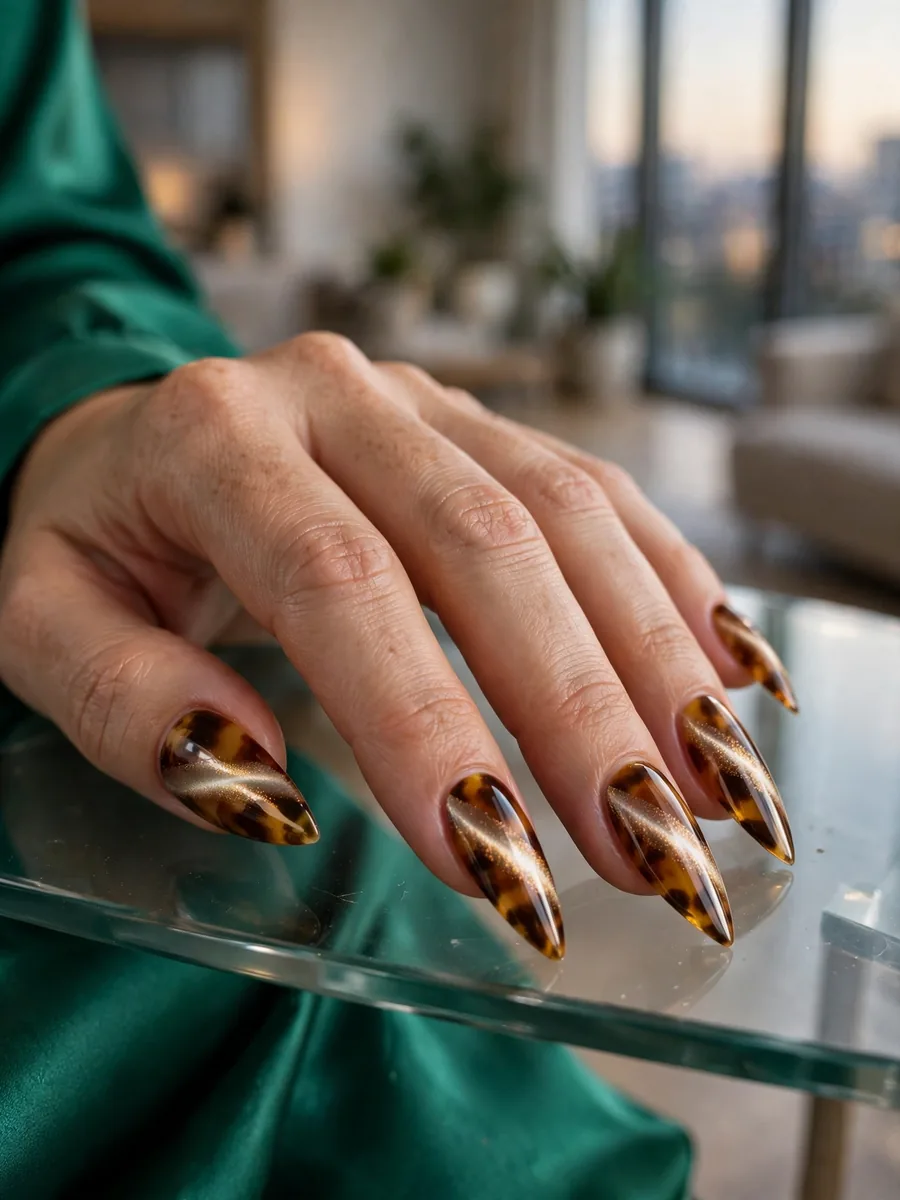
Layer a sheer magnetic cat-eye polish over the finished tortoiseshell pattern and pull the shimmer into a soft diagonal band with a magnet before sealing. The glassy shimmer floats above the marbling like light through amber, adding dimension without hiding the pattern beneath. The key is keeping the magnetic layer sheer; a dense cat-eye coat buries the tortoiseshell completely and wastes the work underneath. This works best on longer nails, where the shimmer band has space to sweep across the pattern. Stiletto shapes amplify the effect dramatically.
Sheerness is non-negotiable
One thin magnetic layer, held magnet for a few seconds, then sealed. If you cannot see the marbling clearly through it, wipe it back and go thinner.
Shape pairing
Long stiletto nails turn this into a statement. See how the shape carries bold designs in these stiletto nail ideas.
13. Emerald-Tinted Carey Nails
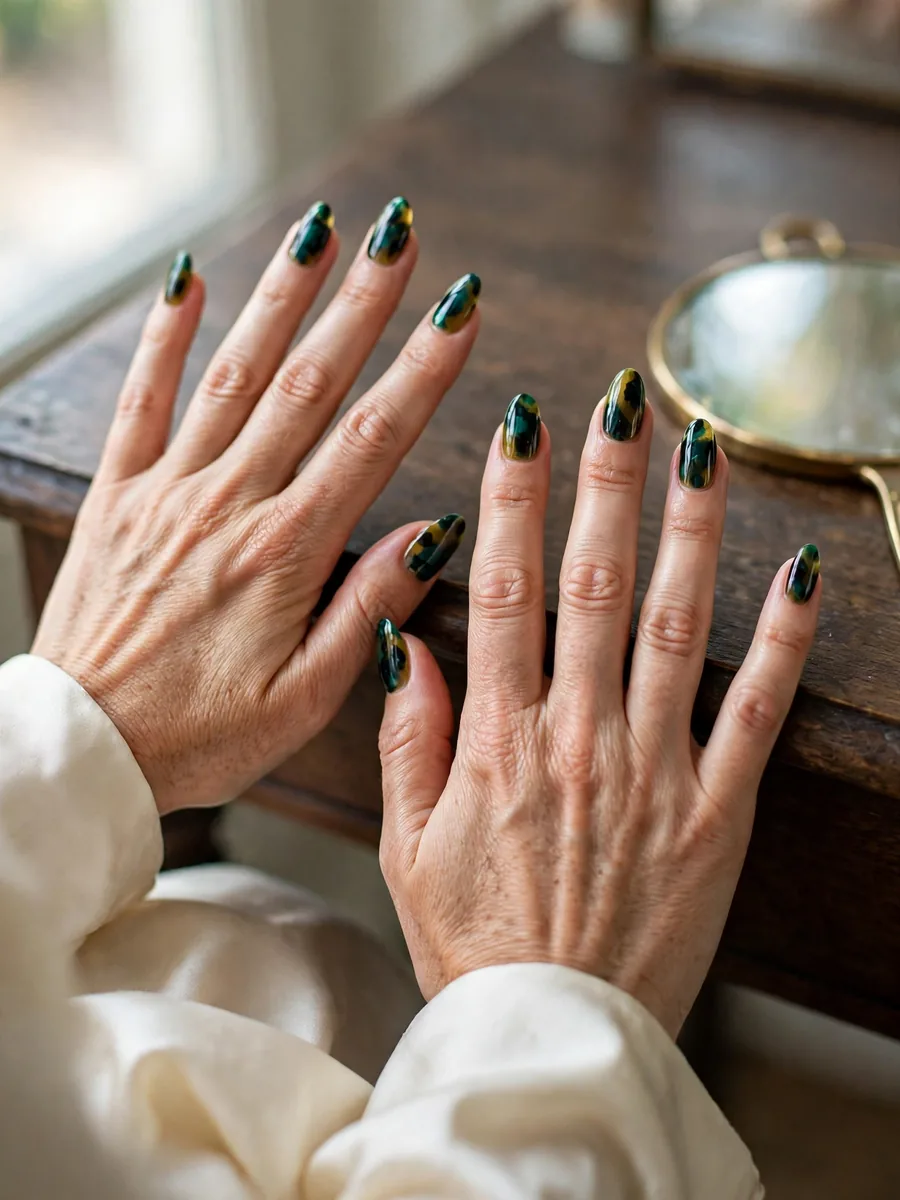
The most unexpected version on this list: tortoiseshell marbled in deep emerald green, dark teal, and black over a translucent olive-gold base. The technique is unchanged, only the palette shifts, and the result reads jewel-toned and luxurious while keeping the organic mottled structure that makes carey nails work. Green-on-green marbling needs strong value contrast, so pair the deepest green with a genuinely light gold base, or the pattern disappears. This is the idea for anyone who has worn classic carey before and wants the trend to feel new again.
Why green works
Tortoiseshell is about warm depth, not specifically brown. Emerald keeps the warmth through the gold base while the greens supply the depth. The structure survives the color swap.
How the Carey Effect Actually Works
The marbled look comes from wet-on-wet layering: translucent colors are dabbed onto a still-tacky base so the edges bleed into each other naturally. Start with a sheer amber or caramel base coat and let it go tacky, not fully dry. Dab irregular patches of dark brown with a small brush, then draw thin black strokes through and around them while everything is still workable.
A clean, dry brush dragged lightly across the boundaries softens them into the signature mottled blend. Seal with a glossy top coat, which melts the layers visually into one smooth, glassy surface. The whole method takes practice on one nail before you commit to ten, and that single test nail will teach you more than any tutorial.
Mistakes to Avoid
Working on a dry base. If the base is fully dry, the patches sit on top as separate blobs instead of melting together. Tacky is the window you want.
Using opaque browns. Opaque color kills the translucent depth that makes tortoiseshell look like tortoiseshell. Every layer except the black strokes should let light through.
Overblending into mud. Three or four softening strokes are enough. Keep brushing and the distinct patches dissolve into one flat brown.
Skipping the black. The thin black defining strokes are what give the pattern its characteristic depth. Without them, the design reads as vague brown marbling.
Forgetting the free edge. Cap the tip with top coat, since the layered edges at the free edge are the first place chipping starts.
Choosing Your Finish
| Finish | Look | Best For |
|---|---|---|
| High-gloss | Glass-like depth, colors at their richest | The classic look; evenings and photos |
| Matte | Soft, velvety, colors read one shade deeper | Minimal style; natural daylight wear |
| Satin glaze | Middle ground: soft sheen without full shine | Office wear; anyone torn between the two |
Frequently Asked Questions
Are carey nails still in style?
Yes. The tortoiseshell pattern resurfaces every fall and has stayed in rotation for years because it functions as a neutral. It is a trend with unusual staying power rather than a one-season novelty, which makes it a safe choice if you want fashionable nails that will not look dated in photos.
Can beginners do carey nails at home?
Genuinely, yes. The organic, irregular pattern is one of the most forgiving nail art techniques because there is no correct shape to replicate. Start with the micro-carey version on short nails, work one nail at a time while the polish stays tacky, and expect your third or fourth nail to look noticeably better than your first.
Which nail shape suits tortoiseshell best?
Almond and oval flatter the organic flow of the marbling most naturally. Square and squoval work well too, especially with the micro-carey scale. Very long stiletto nails can carry the pattern, but the design needs bolder patches to avoid looking lost on the extra length.
Do I need gel polish for the carey effect?
No. Regular polish works because the wet-on-wet blending actually benefits from slower drying times. Gel gives a harder, longer-wearing result and deeper gloss, but the technique itself is polish-agnostic. Choose based on how long you want the manicure to last, not on the pattern.
Final Thoughts
Here is what I keep coming back to with carey nails: the pattern is honest. It does not pretend to be precise, and that looseness is exactly why it works on real hands living real lives. If you are new to the trend, start with the classic almond set or the single accent nail and let the marbling teach you its rhythm. If you have worn it before, the emerald or cherry cola versions are proof the technique has more range than its reputation suggests. Either way, keep the layers translucent, respect the tacky window, and let the black strokes do their quiet work.