Bunny makeup is soft colour, rosy cheeks, bright eyes, and one small playful detail. Done well, it looks cute and polished, not like a last minute costume. This guide gives you a full bunny makeup tutorial with an image for every step, plus 7 elegant bunny makeup ideas you can wear to parties, photos, and evenings out.
Bunny Makeup at a Glance
Bunny makeup combines a dewy base, rosy blush, bright eyes, a small nose detail, and soft lips. It suits most face shapes, works for parties and photos, and takes 20 to 40 minutes depending on the version. Start with soft colour, add one bunny detail, and keep the finish fresh rather than heavy.
Bunny Makeup Tutorial: Step by Step
Follow these seven steps in order. Each step builds on the last, so the bunny details sit on a smooth, finished base instead of bare skin.
Step 1: Soft Even Base

Start with clean skin and a light layer of primer. Apply foundation in a thin layer and blend outward, then tap concealer only where you need it, such as under the eyes and around the nose.
- Keep coverage light. A heavy base makes bunny makeup look like stage makeup.
- Blend around the nose and mouth with care. The nose detail goes here later.
- Set lightly with powder on the T-zone only, so cheeks stay dewy.
Who it suits: every skin type. If your skin is dry, skip powder on the cheeks. If it is oily, press powder into the centre of the face and leave the outer cheeks glowing.
Step 2: Rosy Blush Placement
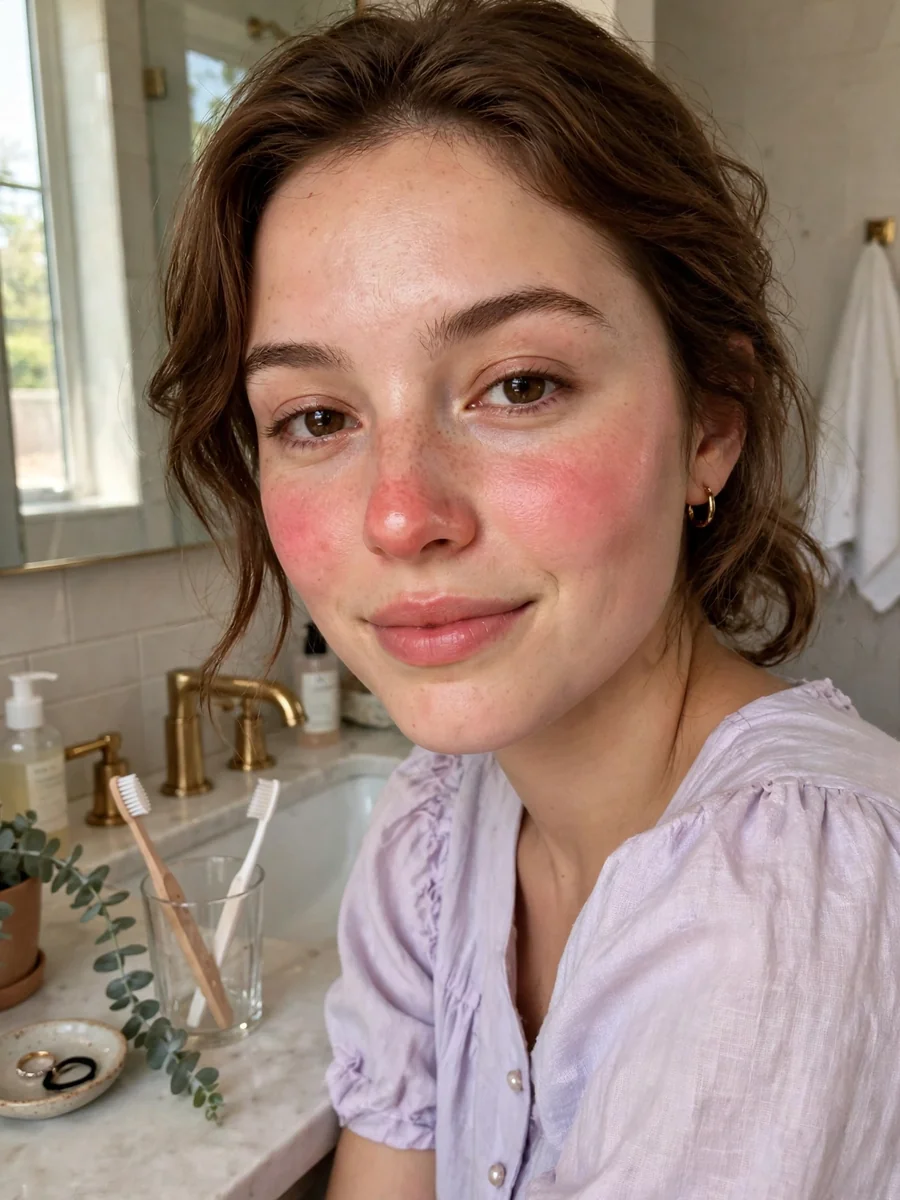
Blush is the heart of bunny makeup. Smile lightly and tap cream blush on the apples of the cheeks, then sweep the leftover colour across the bridge of the nose.
- Place blush slightly higher than usual for a lifted, youthful flush.
- Blend the edges well. Harsh blush lines break the soft bunny effect.
- Add a second light layer if you want a stronger flush for photos.
On deeper skin tones, choose a rich berry or warm rose cream blush so the colour shows up true instead of fading to grey.
Step 3: Bright Wide Eyes

Wash a soft pink or neutral shadow over the lids, then add a slightly deeper shade in the crease. Line the upper lash line with a thin wing, and brighten the waterline with a nude or white pencil.
- Keep the wing short. A small flick lifts the eye without turning the look dramatic.
- Focus mascara on the centre lashes for a rounder, wide-eyed shape.
- Add false lashes only if you want extra lift, and choose a wispy style.
For hooded eyes, place the crease shade slightly above your natural crease so it stays visible when your eyes are open.
Step 4: Bunny Nose

Draw a small shape on the tip of your nose with eyeliner or a lip pencil. A soft pink triangle or tiny heart reads cuter and more wearable than a harsh black triangle.
- Map the shape first with a light dot, then fill it in.
- Blur the outer edges with a fingertip so it looks soft, not painted on.
- Add a tiny dot of highlighter on the very tip for a fresh finish.
If your nose is narrow, keep the shape small and centred. If it is wider, a slightly wider shape balances better.
Step 5: Delicate Whiskers and Freckles
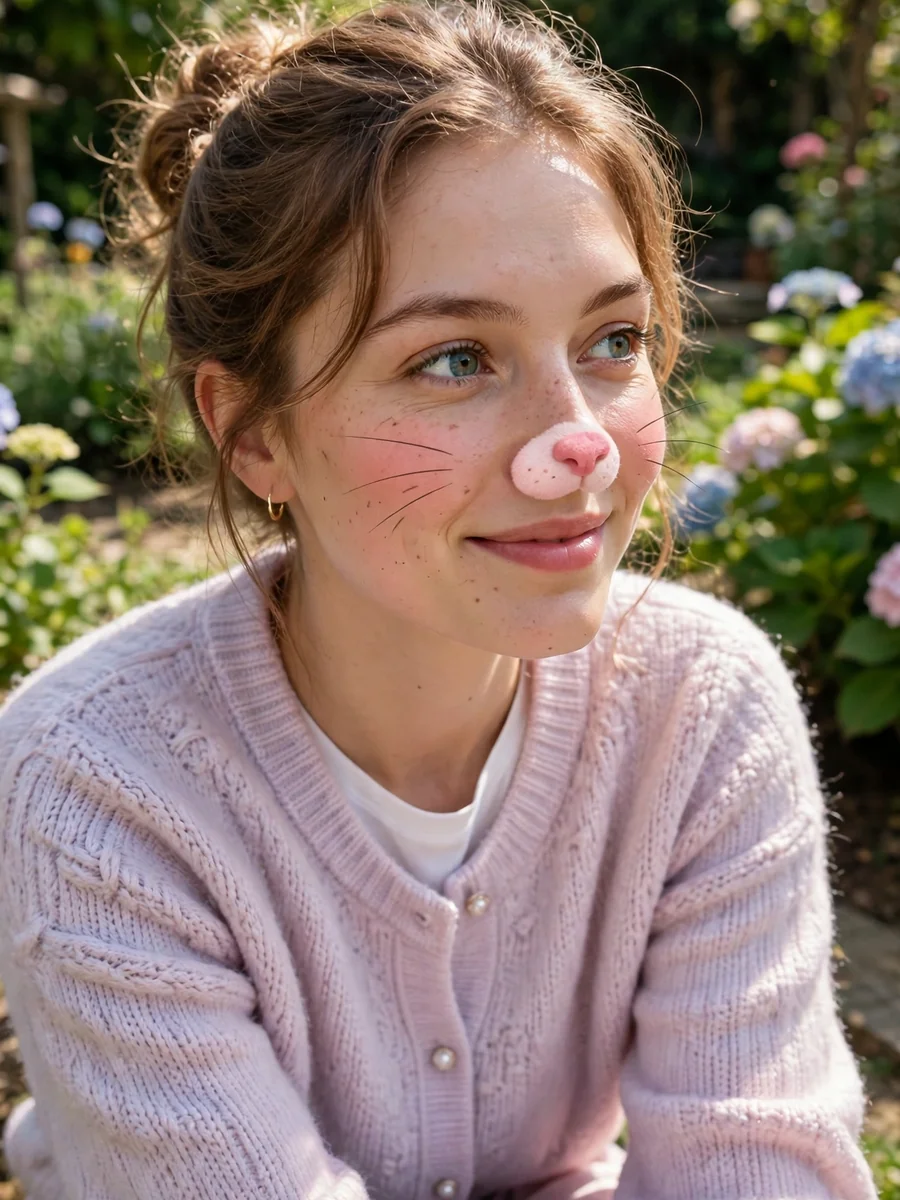
Draw three fine whiskers on each cheek with a fine-tipped eyeliner, flicking outward from the nose area. Add a few tiny freckles across the nose and cheeks with a brow pencil.
- Fade each whisker from soft at the centre to crisp at the tip.
- Keep whiskers short. Long lines look costume heavy.
- Blur freckles lightly with a fingertip so they look natural.
Skip whiskers entirely if you want a daytime version. The nose and blush already read as bunny on their own.
Step 6: Soft Pink Lips

Choose a soft pink lip tint or gloss and press it into the lips with a fingertip for a blurred edge. A sharp lip line fights the soft bunny mood.
- Blot once, then add a second light layer for colour that stays.
- Add gloss only in the centre for a plump, fresh finish.
- Match the lip shade to your blush family, pink with pink, peach with peach.
Step 7: Set and Finish
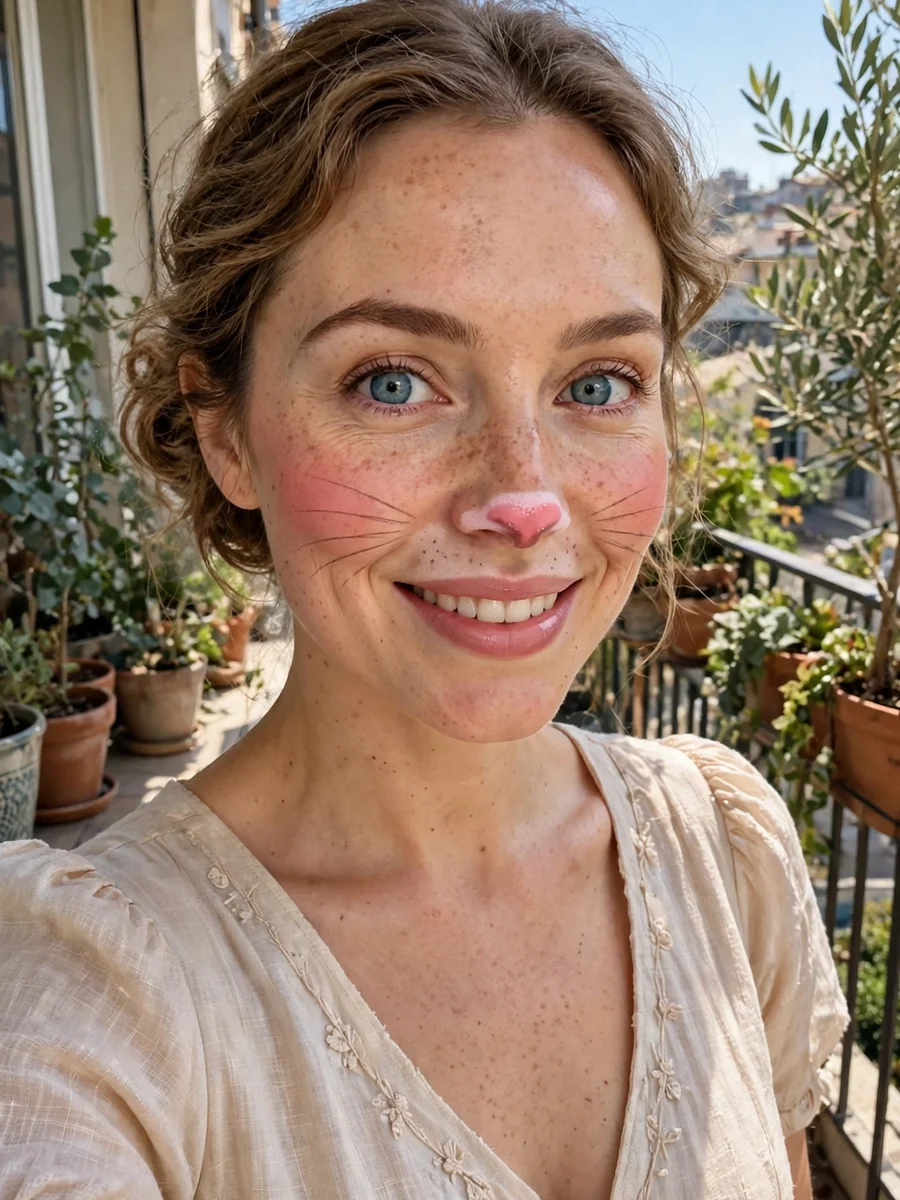
Mist setting spray over the face from a short distance and let it dry without touching your face. Check the nose detail and whiskers in a mirror and deepen them slightly if they faded under the mist.
- Carry blotting paper and your blush for quick touch ups.
- Re-tap blush before photos, since cheeks fade first.
- Add bunny ears last, so they do not disturb the makeup while you work.
1. Soft Blush Daytime Bunny
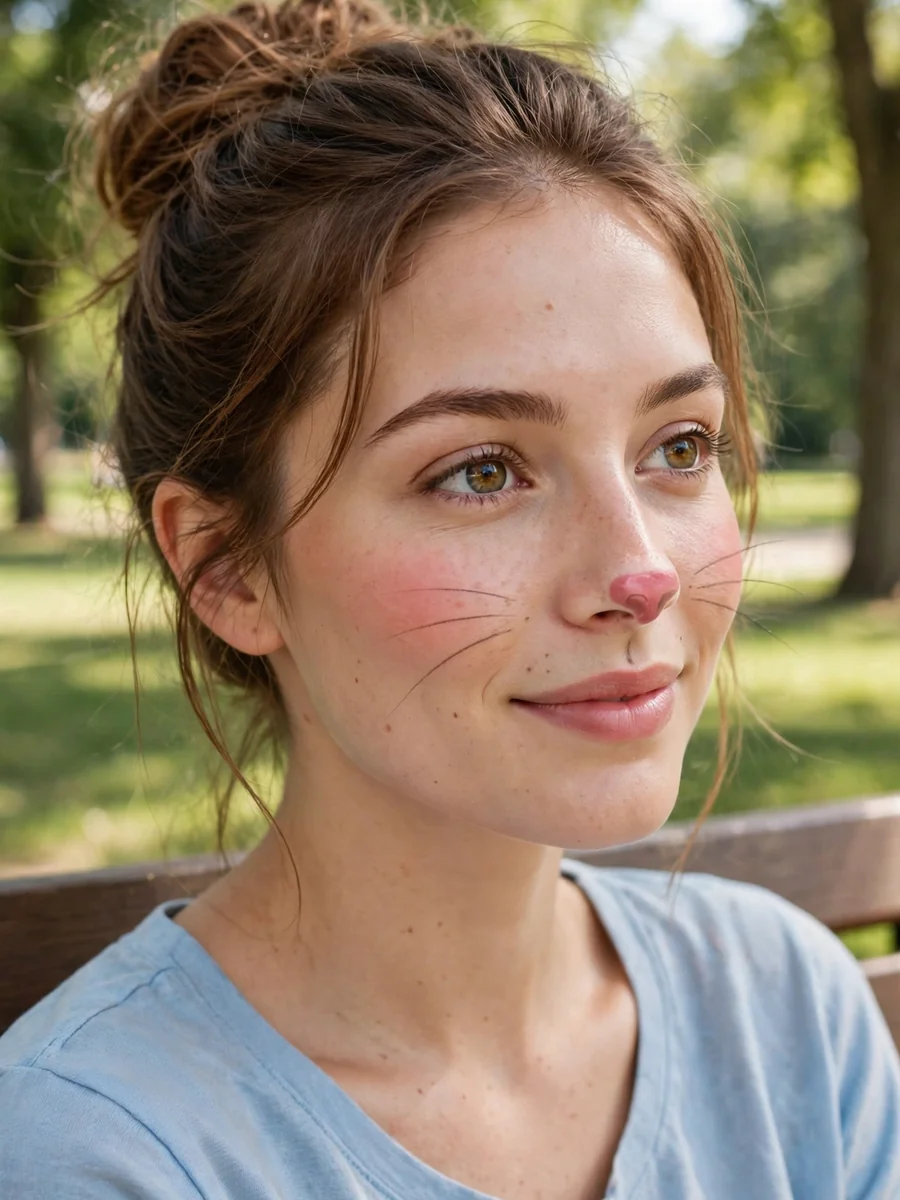
This is the most wearable bunny look on the list. It is mostly pretty everyday makeup with a whisper of bunny, so it works for brunch, daytime parties, and photos.
Start with a dewy base, tap cream blush high on the cheeks and across the nose, and wash a soft rosy tone over the lids. Finish with a blurred pink lip and one dot of highlighter on the nose tip.
How to Style It
- Keep whiskers off for daytime. The blush and nose tip carry the theme.
- Use a thin brown wing instead of black for a softer eye.
- Brush brows upward for a fresh, youthful frame.
Who It Suits
Best for beginners and minimal makeup lovers. It takes about 15 minutes and needs no special skill. For more soft pink inspiration, see these pink makeup ideas.
2. Lavender Mist Bunny
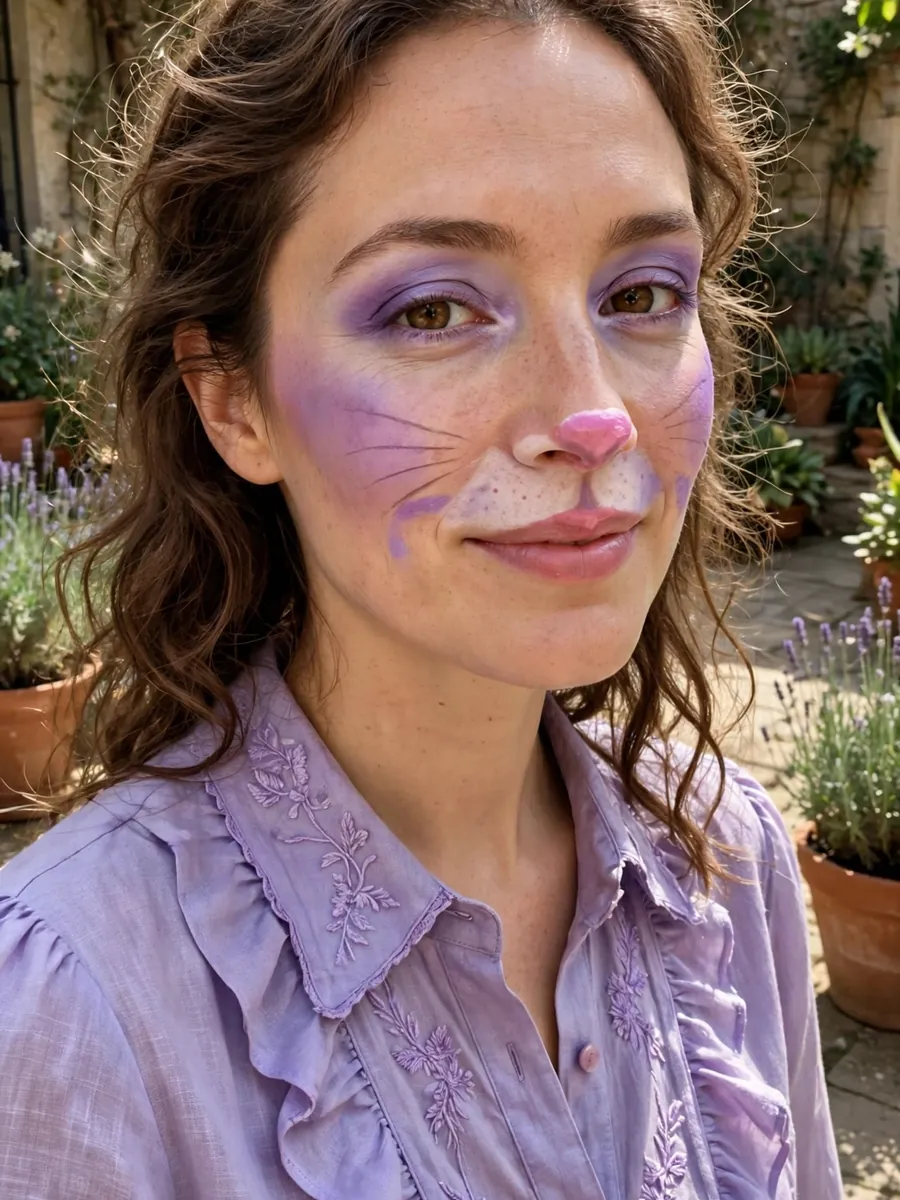
Lavender lids with a soft lilac flush turn bunny makeup dreamy and cool toned. The colour stays gentle, so the look feels elegant rather than loud.
Sweep lavender cream shadow over the lids and blend a peach blush high on the cheeks so the two tones meet softly. Keep lips pale pink and brows feathered.
Blending the Colour
- Layer cream shadow over primer so the lavender grips and stays vivid.
- Blend the outer edge with a clean brush to avoid a hard line.
- Add a white pencil in the waterline to open the eyes further.
Best Eye Shapes
Works well on deep set and almond eyes, since the light lavender brings the lids forward. On deeper skin tones, use a pigment rich cream shadow so the lavender shows up true. For more eye focused looks, browse these eye makeup ideas.
3. Peach Glow Bunny Makeup with Freckles
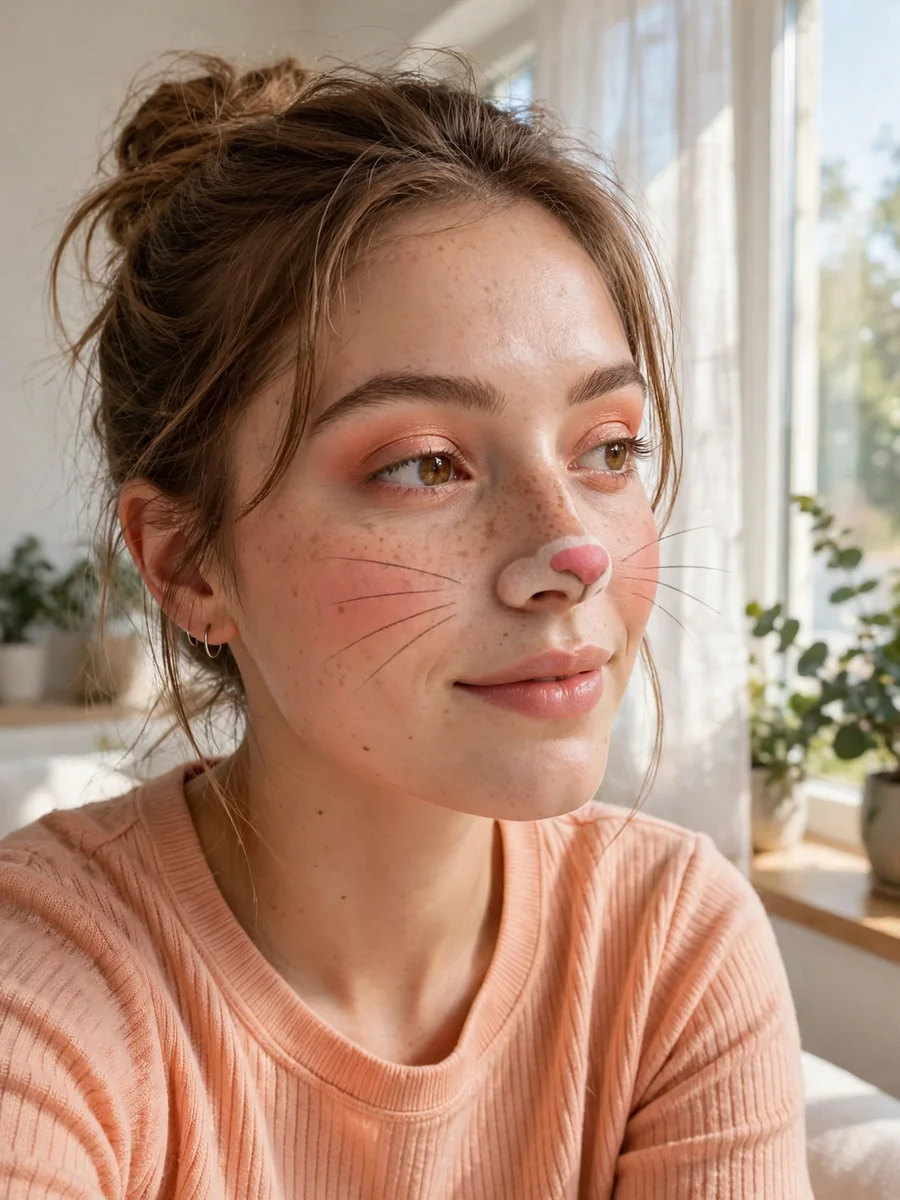
Peach blush, warm lids, and soft faux freckles give a sun-kissed field bunny feel. It is warm, outdoorsy, and flattering on almost everyone.
Tap peach cream blush high on the cheeks and across the nose, flick tiny freckles with a brow pencil, and blur them lightly. Finish with taupe liner, fluttery lashes, and a soft peach lip.
Placing the Freckles
- Dot freckles across the nose bridge and upper cheeks only.
- Vary the size slightly so they look natural, not stamped on.
- Set with a light mist so they do not smudge.
Skin Tones
Peach works across light, medium, and deep skin tones when you pick the right depth, pale peach for fair skin, warm coral peach for medium skin, and rich apricot for deep skin. Bunny makeup has inspired many published looks, and you can browse a wide gallery of them in this bunny makeup inspiration from Cosmopolitan.
4. Golden Hour Bunny
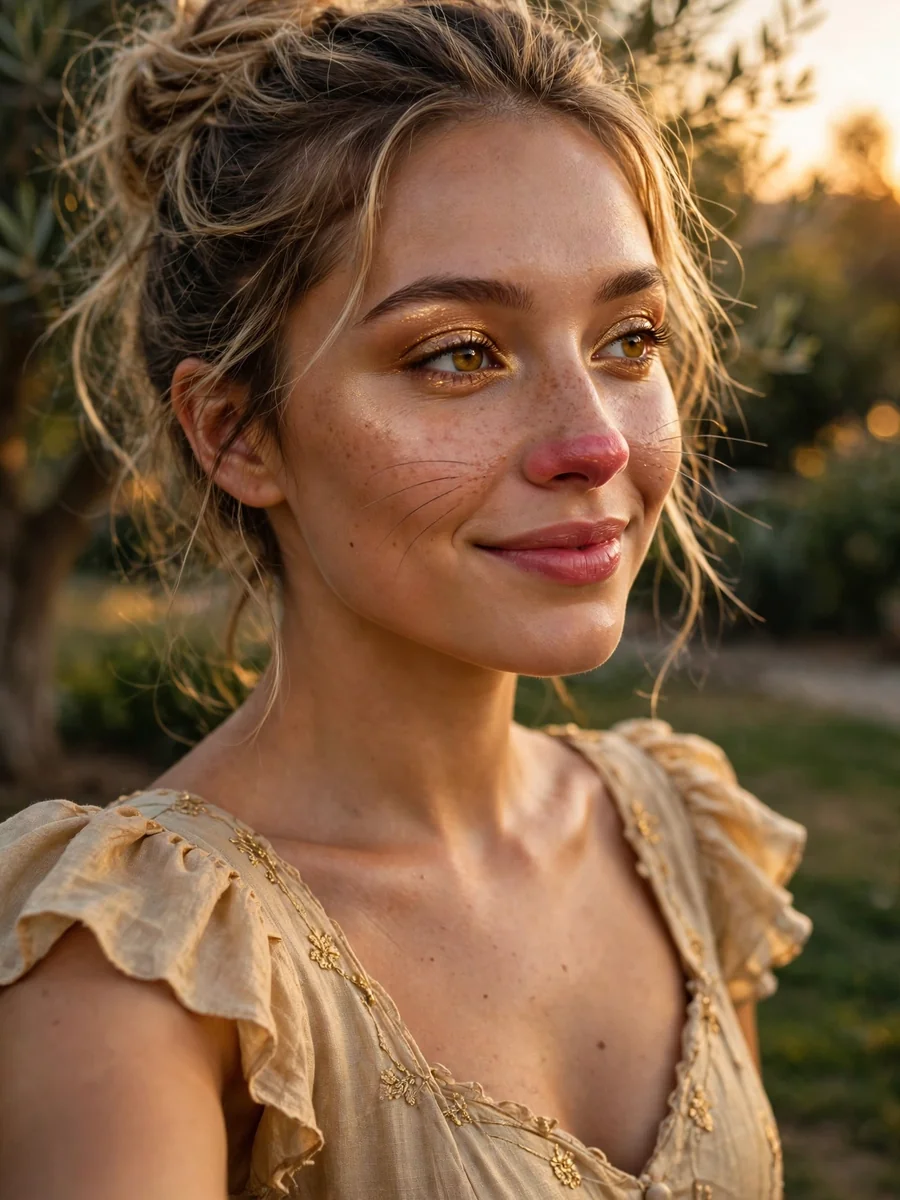
Warm gold shimmer on the lids and high points turns bunny makeup into an evening look. It glows in warm light and photographs beautifully.
Press gold shimmer shadow on the lids, tap gold highlighter on the cheekbones and nose bridge, and keep the bunny nose soft pink so the gold stays the star.
Building the Glow
- Use a sticky base under shimmer so it grips and does not fall out.
- Keep gold off the lower lash line to avoid a tired look.
- Pair with a warm nude lip so the face stays balanced.
When to Wear It
Best for evenings, dinners, and parties under warm lighting. It also pairs well with a full costume, and if you are planning a themed night, these Halloween makeup ideas can help you build the rest of the outfit.
5. Pearl Light Bunny
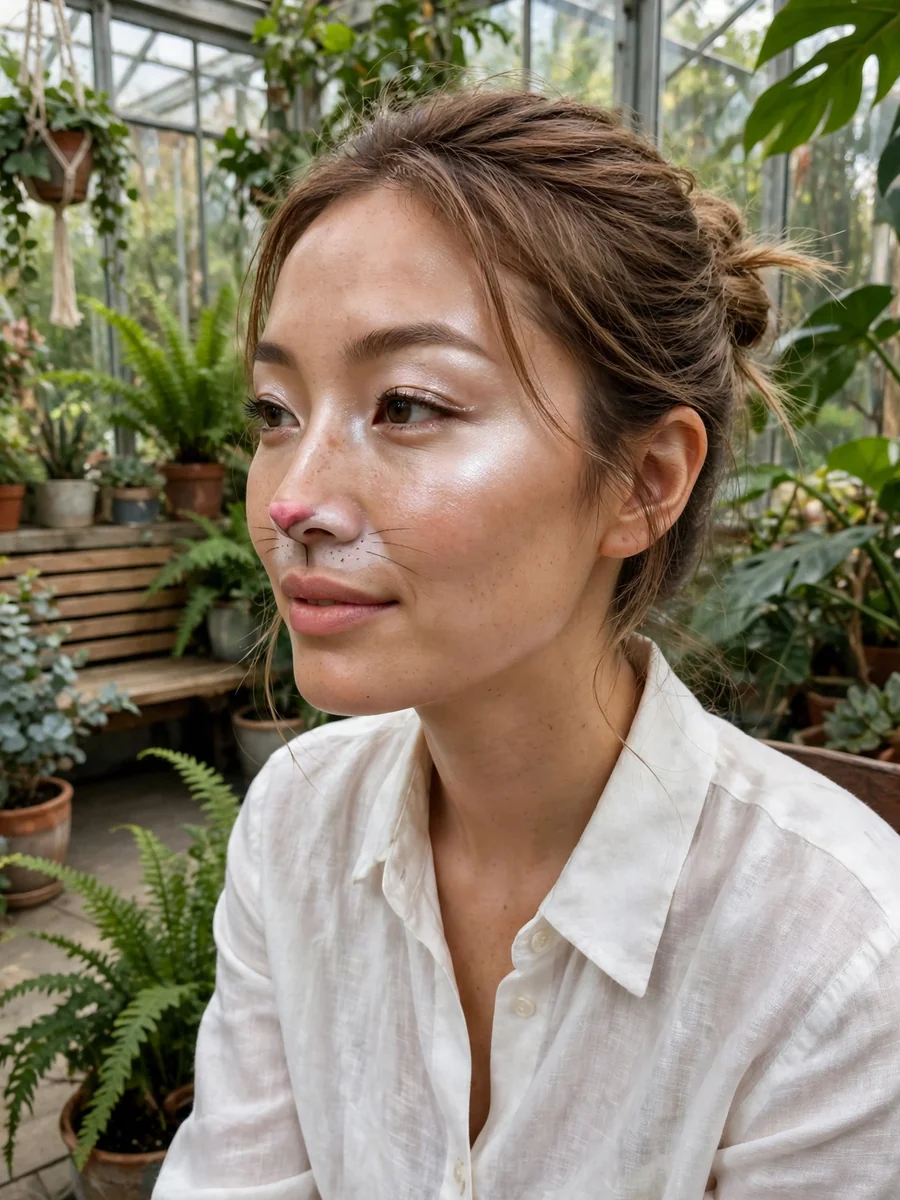
Pearl highlight on the high points gives a lit from within glow with almost no colour. It is the most polished and bridal friendly bunny look here.
Tap liquid pearl highlighter on the cheekbones, brow bones, and nose bridge, add pearly shimmer in the inner corners, and finish with glossy lips and feathered brows.
Placing the Pearl
- Use a warm gold or rose gold pearl on deeper skin, so it lights the skin instead of flashing grey.
- Keep the nose detail to a tiny heart, since the glow is the focus.
- Skip heavy lashes here. A light mascara keeps the look airy.
Keep It Elegant
Restraint is the whole trick. One glowing element done well beats three competing ones, and this look proves it. For a similarly polished occasion look, see this soft glam bridal makeup guide.
6. Rosewood Evening Bunny
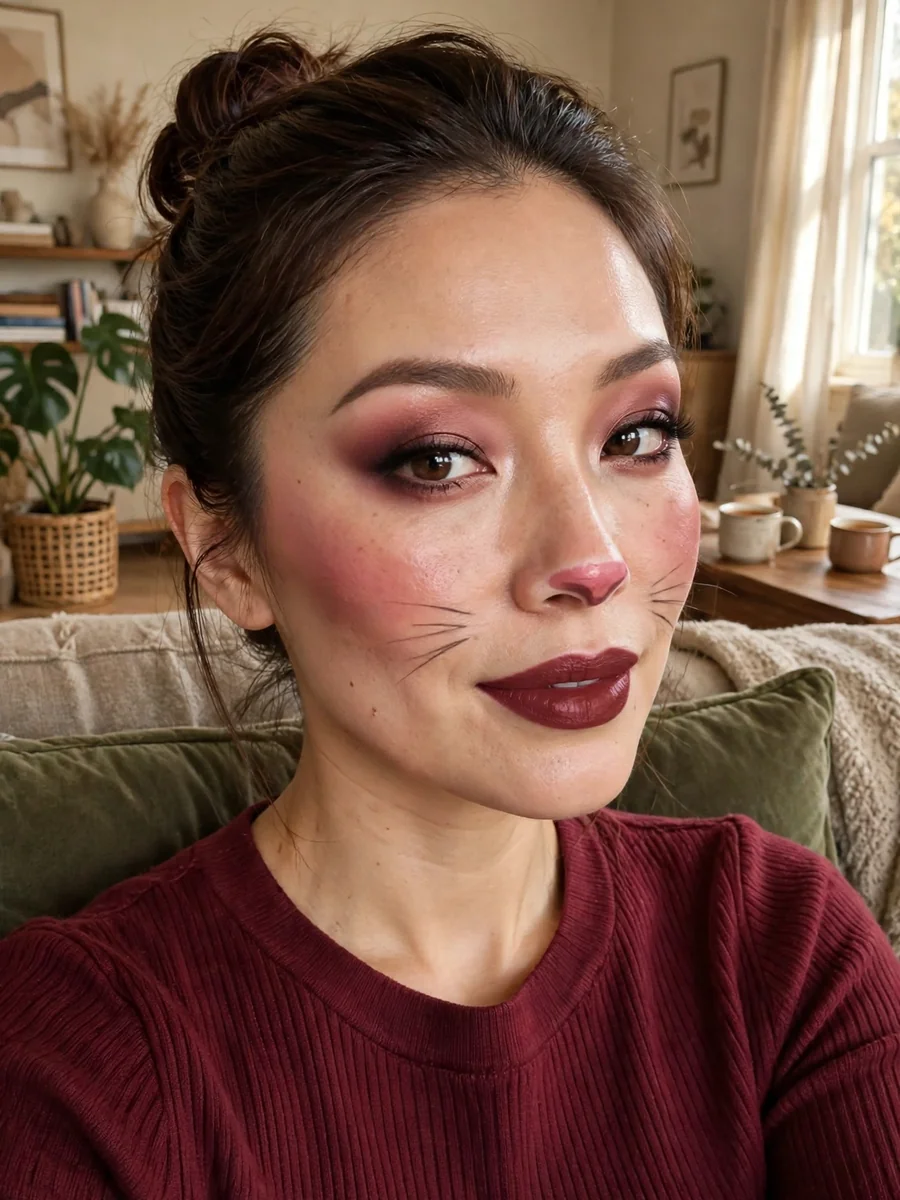
Deeper rose and mauve tones make bunny makeup feel grown up and evening ready. It keeps the cute shapes but swaps pastel sweetness for depth.
Blend rosewood shadow through the crease, use a muted rose blush, and finish with a satin mauve lip. Keep the nose small and the whiskers fine so the look stays refined.
How to Style It
- Smoke the lower lash line lightly with the same rosewood shade.
- Keep brows defined but not harsh, to frame the deeper tones.
- Choose a satin lip over gloss for a more formal finish.
Pairing It Right
Best with dark or jewel toned outfits and simple jewellery. The deeper palette already carries the evening mood, so accessories can stay quiet.
7. Doe Lash Bunny
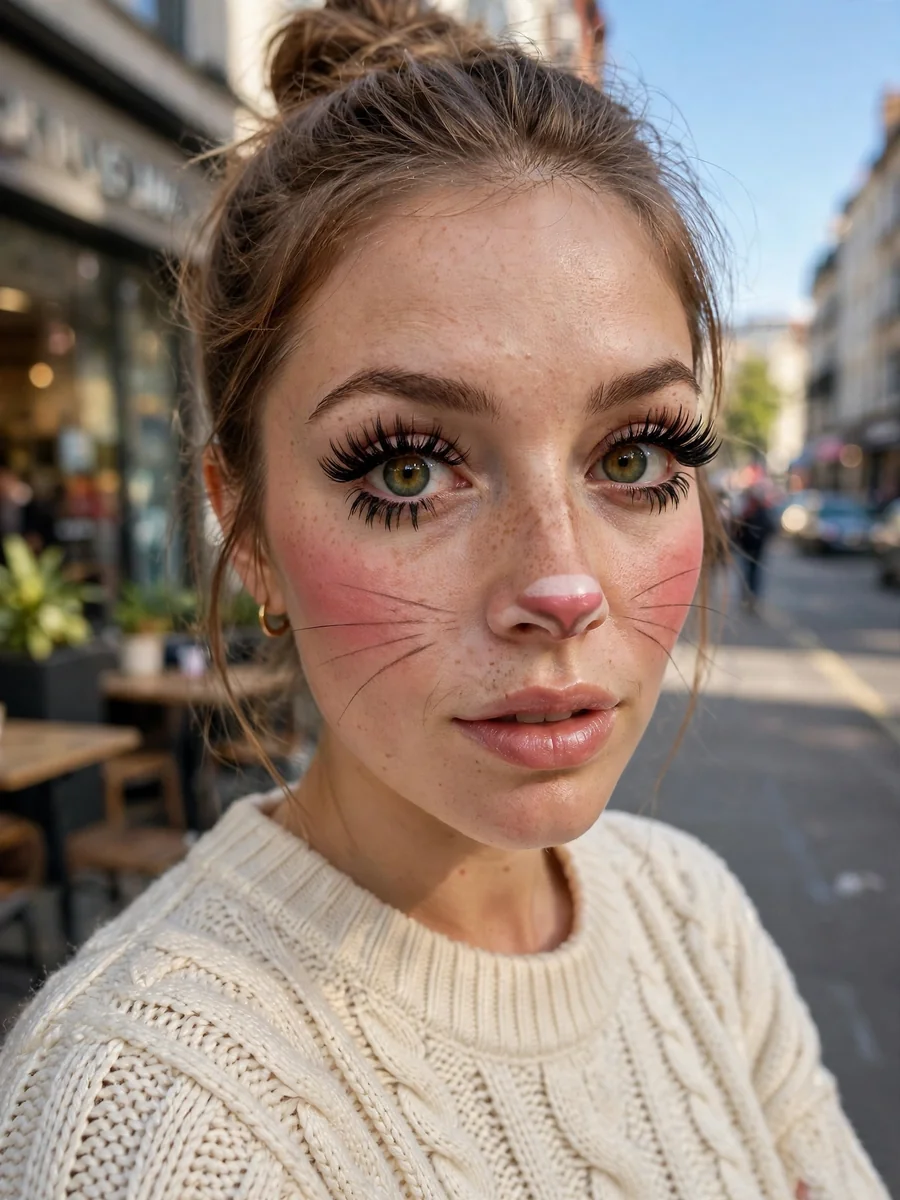
Sometimes the lashes are the whole look. Wispy, lifted lashes give a gentle doe-eyed bunny feeling with almost no other detail needed.
Stack light feathery lash clusters, weighting longer pieces toward the outer corner for a soft upward lift. Keep mascara to a tint and comb through so nothing clumps.
Building the Lashes
- Place the longest clusters at the outer corner, shorter ones toward the centre.
- Let lash glue go tacky for a few seconds before pressing, so clusters hold.
- Pair with a pastel pink lid wash and a blurred lip to finish.
Who It Suits
Best for small or close set eyes, since the lift opens the eye shape. It also suits anyone who wants bunny makeup without drawing a nose or whiskers at all.
How to Choose Your Bunny Look
Start with your occasion, then your comfort level. Daytime and beginners suit the soft blush or doe lash looks. Evenings suit golden hour or rosewood. Photos suit pearl light, since glow reads well on camera.
Then pick one bunny detail as your focus. A nose, whiskers, freckles, or lashes each signal bunny on their own. Two details still work, but three or more push the look toward costume.
- Under 20 minutes: soft blush daytime, doe lash
- 20 to 30 minutes: lavender mist, peach glow, pearl light
- 30 to 40 minutes: golden hour, rosewood evening
Mistakes to Avoid
Drawing a harsh black triangle nose. A soft pink heart or blurred tip looks far cuter and more wearable.
Skipping the base. Bunny details drawn on bare or uneven skin look messy. A smooth base first makes every detail sit better.
Overloading details. Nose plus whiskers plus freckles plus rhinestones plus ears reads cluttered. Pick one or two and let the makeup itself do the rest.
Going too matte. Bunny makeup needs a dewy, fresh finish. A flat matte base makes the whole look read as stage makeup.
Bunny Makeup Compared
| Look | Best For | Time |
|---|---|---|
| Soft Blush Daytime Bunny | Daytime, beginners | 15 minutes |
| Lavender Mist Bunny | Cool tones, photos | 25 minutes |
| Peach Glow Bunny with Freckles | Warm tones, outdoors | 25 minutes |
| Golden Hour Bunny | Evenings, parties | 30 minutes |
| Pearl Light Bunny | Bridal, polished events | 25 minutes |
| Rosewood Evening Bunny | Formal evenings | 35 minutes |
| Doe Lash Bunny | Small eyes, minimal looks | 20 minutes |
Frequently Asked Questions
Can I wear bunny makeup without bunny ears?
Yes. The blush, nose detail, and bright eyes already read as bunny on their own. Ears help for a costume, but the makeup stands alone for parties and photos.
Does bunny makeup work with glasses?
Yes, with one change. Keep whiskers shorter so frames do not cover them, and place blush slightly higher so it stays visible above the frames. Skip heavy lashes if your frames sit close to your eyes.
How do I remove glitter and lash glue safely?
Dissolve glitter and adhesive with a balm or oil based cleanser first, then wash normally. Avoid scrubbing around the eyes, since that skin is delicate and the glue will lift once it is dissolved.
Will bunny makeup suit deep skin tones?
Yes. The key is colour depth. Choose rich cream blushes and pigment rich shadows in berry, apricot, and rose gold, and avoid pale pastels that can turn ashy. Cream formulas hold their colour better than dry powders on deeper skin.
What should I carry for touch ups?
Blotting paper, your blush, and a cotton swab. Blush fades first, so a quick re-tap before photos keeps the look fresh. A swab tidies any smudged liner or nose detail without redoing the whole face.
Final Thoughts
The difference between bunny makeup that looks cute and bunny makeup that looks like a costume is softness. Soft colour, a dewy base, and one playful detail beat a face full of hard lines every time. Learn the seven tutorial steps once, and every one of the seven ideas becomes a small variation on a base you already know. That is what makes bunny makeup worth learning properly instead of rushing it once a year.