A conch piercing sits in the shell-shaped hollow at the center of the ear and can hold anything from a single stud to a full hoop. These 20 ideas for 2026 range from a single opal cluster to a bold segment ring, covering every jewelry style and budget. Best for anyone who wants a piercing that reads as delicate up close but still shows up in a full ear photo.
Scrolling past the same single silver stud on repeat gets old fast, and a conch piercing can honestly carry a lot more personality than that. The ear has become its own canvas, and the conch, sitting right in the middle, is the anchor piece everything else gets built around. This list also covers real range in conch piercing jewelry, from a single quiet stud to something built for a fully curated ear.
It’s worth saying upfront too that a conch piercing at home isn’t something to attempt yourself, since this specific cartilage placement needs a professional piercer working with sterile, single-use needles to heal safely. Here’s a real range of ways to wear it, from something you could get done tomorrow to something worth planning your whole ear around.
1. Opal Trio Cluster Conch Piercing
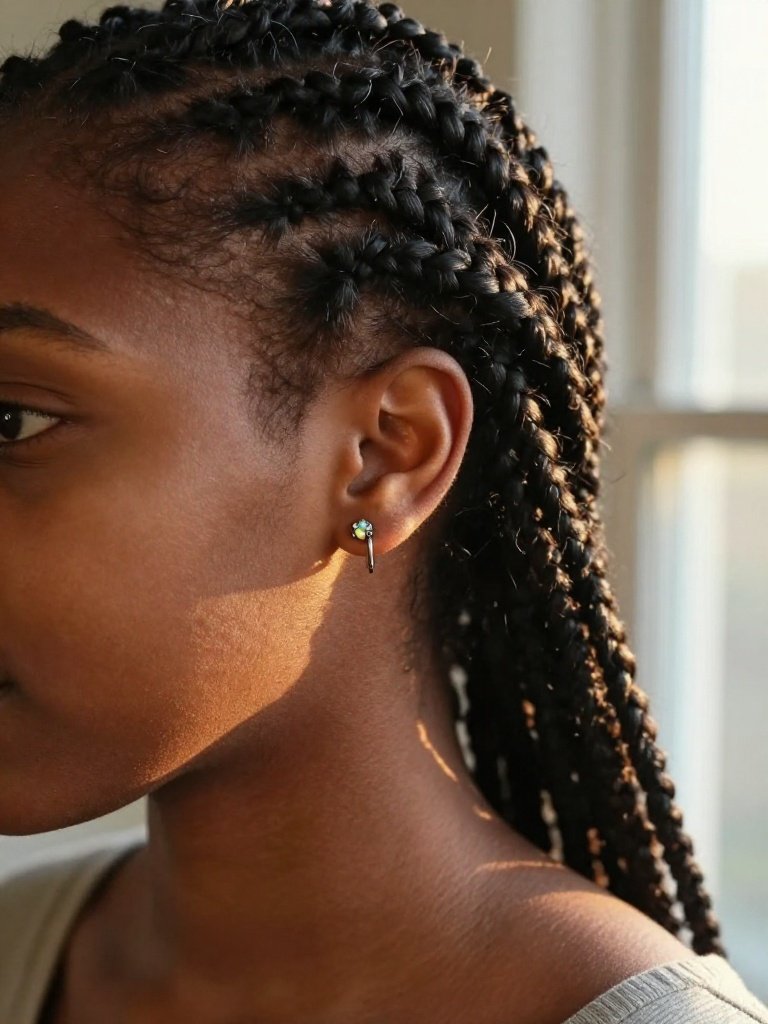
A cluster of three small opal-look stones set in a trefoil shape sits low on the inner conch, catching light without reading as a single loud stone. The stones are usually set in a bezel rather than prong-mounted, since a flat-back bezel setting sits closer to the ear and is less likely to snag on hair or a phone.
This spot is generally considered one of the more tolerable cartilage piercing spots since the conch cartilage is thick but not as dense as the helix piercing area just above it, and most people are healed somewhere between three and nine months. It photographs well from the front, which is part of why it shows up so often in ear stacking sets.
Tip
- Ask your piercer for a titanium flat-back with a bezel-set cluster rather than a prong setting, since prongs catch more on brushes and headphones.
- Request the cluster be angled slightly toward the ear canal rather than straight up, so it sits flush instead of sticking out.
- Skip a hoop as your first piece of jewelry here. A cluster stud needs a fixed anchor to look clean, and a hoop in this exact spot tends to twist.
- Avoid touching or twisting the cluster in the first few weeks. Repeated contact with a multi-stone piece is one of the more common reasons this specific style gets irritated.
Styling Note
This one stays visible from the front but disappears when hair is down, and it pairs naturally with a helix hoop above it without competing for attention.
2. Minimalist Single Ball Conch Stud

Restraint is the whole idea behind this one. A single small ball or flower-shaped stud, no cluster, no hoop, sits in the lower conch and does exactly one job: adding a quiet point of light without pulling focus from anything else in the ear. It’s the piece you’d pick if your ear already has a few statement pieces and needs one thing that isn’t asking for attention.
Healing for a single flat-back stud in this placement tends to run on the shorter end of the cartilage healing range, often close to three to six months, since there’s less jewelry weight tugging at the site while it settles. One of the underrated conch piercing benefits is exactly this low-maintenance profile, which makes it a realistic starting point even for someone who’s never had cartilage pierced before.
Tip
- Choose a 3mm or smaller ball end for a first piece, since anything larger reads as a statement stud rather than a minimal accent.
- Tell your piercer you want room to size down once swelling resolves, since initial jewelry is deliberately a touch longer.
- A titanium or implant-grade steel post is worth asking for by name, since it’s less reactive than standard surgical steel during the first few months, and niobium is worth asking about too if you know your skin runs sensitive.
Styling Note
This barely registers day to day and works as a quiet base layer under a stack of hoops elsewhere on the ear, or completely on its own for someone who wants one piercing, not five.
3. Botanical Rose Charm Conch
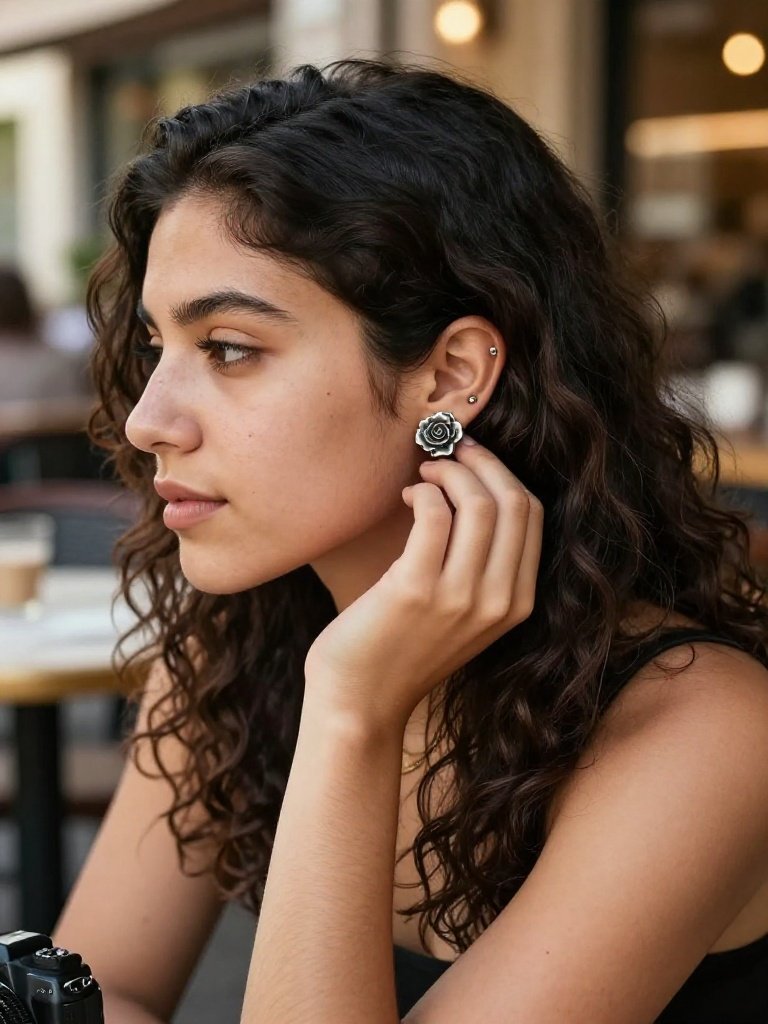
A three-dimensional rose, rendered in oxidized or antiqued silver rather than polished, sits as a single charm stud in the outer conch. Instead of a flat gem, the metal itself is sculpted, which gives it more depth and a slightly gothic, vintage edge compared to a standard gem stud.
Because the piece has more surface detail than a flat stud, expect a slightly longer settling period, generally in the six-month range, mostly because a raised design is a little more likely to catch on fabric while it’s still fresh.
Tip
- Ask specifically for an oxidized or antiqued finish rather than bright polished silver. The contrast is what makes the rose read as sculptural instead of flat.
- Avoid sleeping on that side for the first several weeks, since a raised charm has more surface area to press against a pillow.
- Pair it with plain hoops elsewhere on the ear rather than other detailed charms, so the rose stays the clear focal point.
- Ask whether the rose is cast as one solid piece or assembled from separate soldered petals, since a multi-piece charm has more crevices that trap product during cleaning.
- If you want the look without the full charm’s visual weight, ask about a smaller, flatter rose silhouette instead of the dimensional version described here.
Styling Note
This is a full-ear statement piece that draws the eye even in a side profile photo, and it earns its keep on an ear map that already includes a rook piercing or another cartilage point, since the rose gives those flatter spots something to build toward.
4. Spiral Wrap Conch Ring
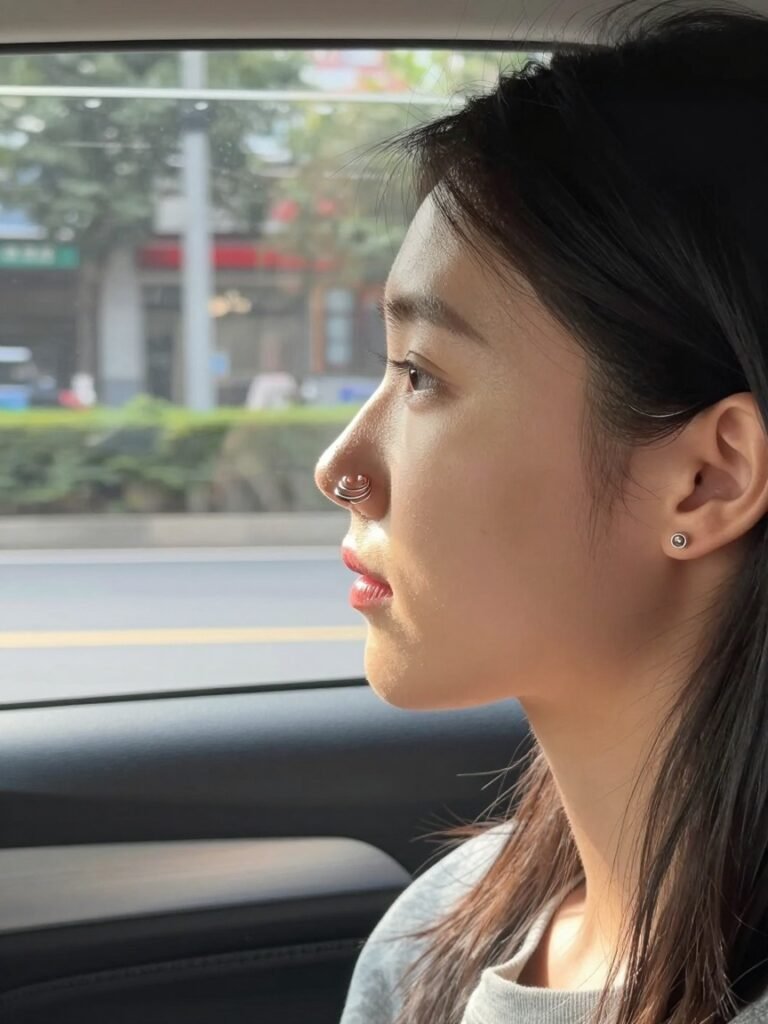
Instead of a closed hoop, this jewelry style is a single continuous wire that spirals around the ear cartilage two or three times, giving the visual weight of a stack of rings without the piercing count of one. It’s a single piercing wearing multiple loops of wire, which is the whole trick.
Because it’s one seamless piece rather than several separate rings, it sits securely without shifting, though it does need to be fitted to your specific ear shape rather than bought as a generic size.
Tip
- Have this piece sized and fitted in person rather than ordering online, since the spiral has to follow your ear’s exact curve to sit flat.
- Ask your piercer whether they carry seamless spiral wire specifically designed for conch placement, since some spiral designs are made for the helix and won’t sit right here.
- Expect a slightly longer break-in period than a standard stud, since a curved wire takes more careful cleaning around each loop, and ask whether it’s offered in a threaded post version if you want it removable down the line.
Styling Note
It reads as three or four rings at a glance, which makes it a strong standalone statement if you don’t want to commit to multiple actual piercings.
5. Chunky Silver Hoop Conch Piercing
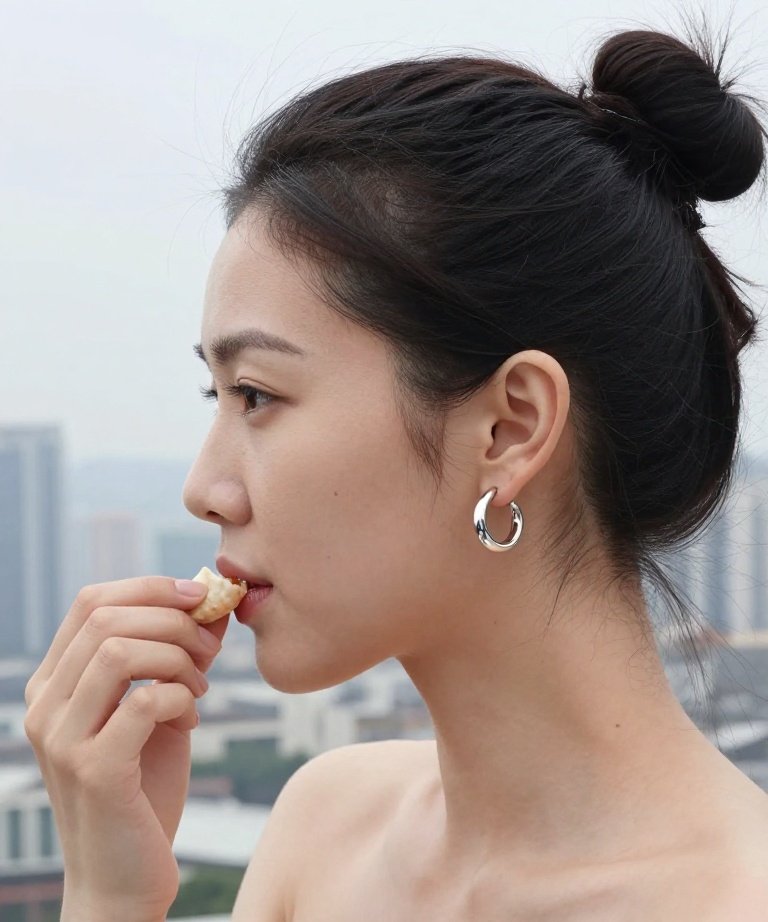
Go bold or skip this one entirely: a thick-gauge, high-polish silver hoop, noticeably heavier than a standard cartilage ring, sits in the conch and reads as bold rather than delicate. This is the piece for someone who wants it to actually be the first thing people notice about their ear, not a subtle detail.
A thicker hoop means a wider healing channel, so this one often takes closer to nine months to fully settle, and the initial ring is sized larger to leave room for post-piercing swelling.
Tip
- Ask for a hinged segment ring rather than a captive bead ring for your first piece, since a hinged clasp is far easier to open and close yourself once healed.
- Go one gauge thicker than you think you want if you’re set on the bold look, since a thin hoop in this style tends to look accidental rather than intentional.
- Avoid sleeping on your side in the first few months, since a heavier hoop puts more pressure on a healing piercing than a flat stud does.
- Ask to hold the exact hoop before it’s inserted rather than judging from a photo, since online images of chunky hoops routinely understate how large 8mm or bigger actually reads on a real ear.
Styling Note
This is visible from across a room, which is either exactly the point or a reason to size down later, and it tends to work best as the single boldest piece in the ear rather than paired with other large hoops nearby.
6. Orbital Conch Piercing
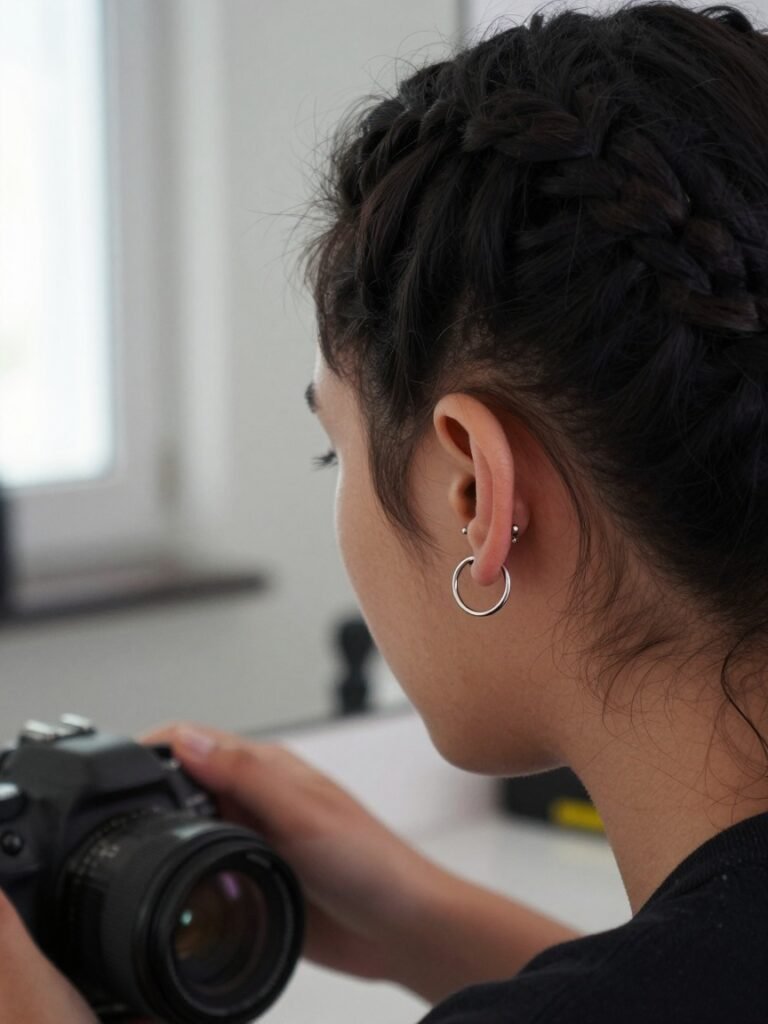
This is technically two separate piercings, placed a short distance apart within the conch, joined by one continuous ring that loops through both. The result looks like a single dramatic hoop but is structurally more secure than it looks, since it’s anchored at two points instead of one.
Because it involves two piercing sites healing together under one shared ring, this one tends to run longer than a single stud, often eight to twelve months before it’s fully settled, and most piercers won’t do both holes in the same session with a needle rather than a piercing gun, which they’ll typically insist on for cartilage anyway.
Tip
- Ask your piercer whether they recommend piercing both points in one visit or spacing them a few weeks apart, since ear anatomy varies on how well this heals as a pair.
- Request a properly sized captive ring rather than a generic hoop, since the ring has to be exact enough to pass cleanly through both holes without tension.
- Don’t attempt to change the jewelry yourself until a piercer confirms it’s fully healed, since threading a ring through two points is easy to get wrong on your own ear.
Styling Note
It’s one of the more dramatic conch looks available and reads as a single sculptural piece rather than two separate piercings, which makes it a strong option if you want maximum visual impact from one design.
7. Double Conch Piercing With Matching Studs
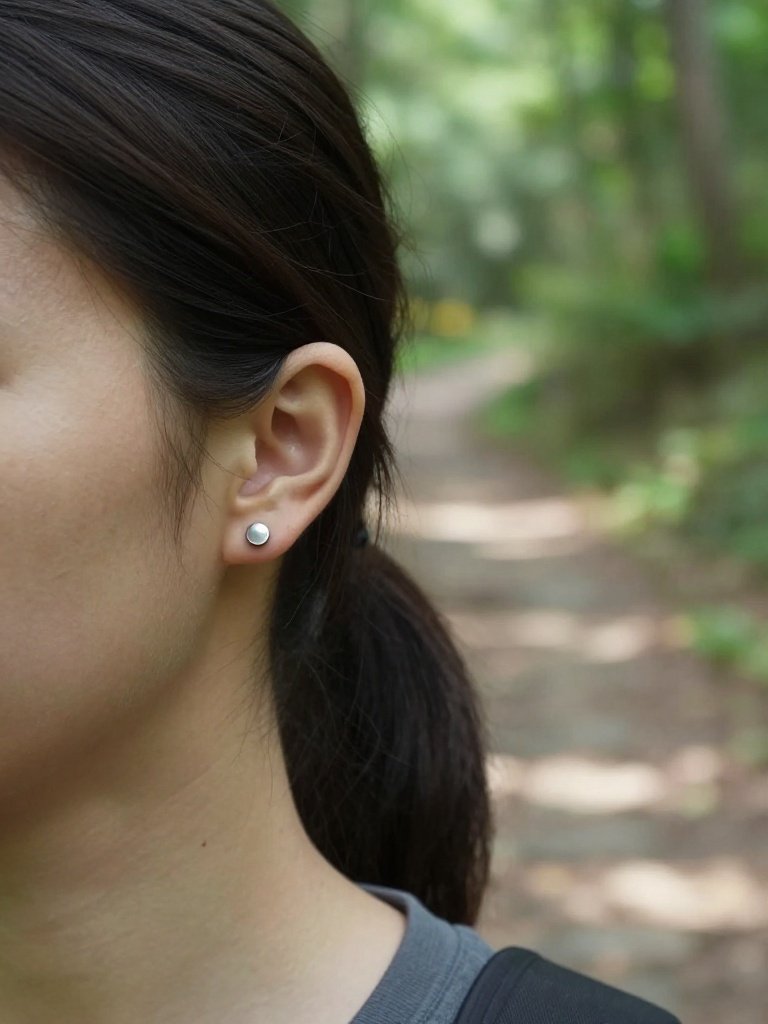
Two separate flat-back studs sit side by side or stacked vertically within the conch, each an independent piercing rather than one connected by jewelry. Unlike the orbital look, there’s no shared ring here, just two clean points of metal that read as intentional repetition.
Since these are two distinct piercing sites rather than one, expect to manage two separate healing timelines at once, generally in the same three-to-nine-month range each, though they don’t have to be done on the same day.
Tip
- Space the two piercings with your piercer’s guidance rather than eyeballing it, since too close together increases irritation risk and too far apart starts to look like two unrelated piercings.
- Match the metal finish exactly between the two studs. A slight mismatch in tone is one of the fastest ways this look starts to seem unintentional.
- Consider getting them a few weeks apart rather than the same day, so you’re only managing one fresh piercing site at a time.
- Ask your piercer to mark both dots and check the spacing with you in a mirror before piercing, since even a couple of millimeters off can throw off the symmetry this look depends on.
- If one side heals slower than the other, which happens more often than people expect with two separate sites, resist swapping jewelry in the slower one just to force them to match.
Styling Note
This reads as deliberate and architectural rather than random, and it’s a strong choice for someone who wants symmetry in the ear without going as large as a full hoop.
See Also: 23 Flawless Septum Piercing Ideas With Practical Tips
8. Celestial Star and Moon Cluster Conch

A crescent moon and a small star, set as two connected charms rather than one single shape, sit together in the conch as one cohesive piece. The asymmetry between the two shapes is what keeps it from reading as a generic single stud, since the eye reads it as a tiny scene rather than a single point of sparkle.
Multi-shape flat-back pieces like this tend to heal in a fairly standard window for the conch, usually four to eight months, since the combined piece is still relatively lightweight even with two shapes joined.
Tip
- Ask specifically for a threaded flat-back design where the charm screws onto the post, rather than a fixed charm, so the piece can be swapped later without a new piercing.
- Request the moon-and-star combo be oriented so the crescent faces outward toward the ear rim rather than inward, which reads more intentional in photos.
- Keep surrounding jewelry simple. A celestial cluster this detailed gets visually crowded fast if paired with more than one other statement piece nearby.
Styling Note
It’s a soft, whimsical focal point that photographs especially well from a slight downward angle, and it suits an ear where most of the other pieces are plain hoops or studs.
9. Birthstone Bezel Conch Stud

Your actual birth month gets represented here, set as a single gemstone in a low bezel rather than a prong mount, sitting in the conch as a small but personal detail. The bezel setting matters here specifically because it keeps the stone flush against the ear, which is both more comfortable and less likely to catch than a raised prong setting would be.
A single bezel-set stone tends to heal on the faster end for this placement, usually settling within three to six months, since there’s minimal added weight or surface area compared to a cluster or charm piece.
Tip
- Bring your exact birthstone color reference rather than relying on a general description, since lab-grown stones vary noticeably in saturation between suppliers.
- Ask for genuine or lab-grown, hypoallergenic stone options rather than glass or acrylic, since glass tends to cloud and scratch faster with regular cleaning.
- If you want it to feel personal rather than decorative, request the stone size stay small, closer to 3mm, so it reads as a detail rather than a statement.
- If your birthstone comes in a shade you don’t love, ask your piercer whether a nearby alternative gemstone is available, since traditional birthstone charts list more than one accepted stone for several months.
Styling Note
This one is easy to overlook at a glance and works well as a quiet, meaningful piece rather than the loudest thing in the ear, which makes it a good pick for a first conch piece.
10. Geometric Triangle Conch Stud
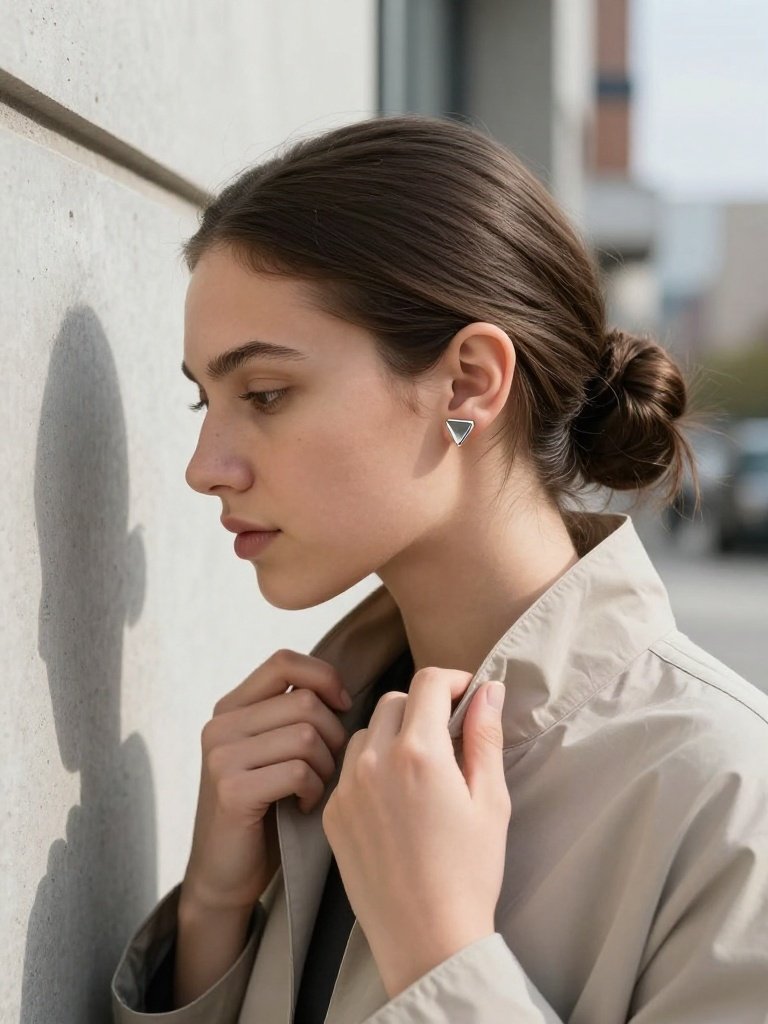
A small solid triangle, flat-set rather than dimensional, sits in the conch as a sharp, architectural counterpoint to the rounder shapes most conch jewelry defaults to. The straight edges are the whole appeal, since a triangle catches light differently than a ball or gem does and reads as more modern.
A flat geometric piece like this heals similarly to a standard stud, generally in the three-to-six-month range, since there’s no raised surface or cluster to complicate the site while it settles.
Tip
- Ask your piercer if they stock geometric flat-back designs specifically, since a lot of standard cartilage inventory skews toward round shapes and this one is easier to special-order than to find on a wall display.
- Request the triangle be set with one point facing down toward the earlobe rather than up, since that orientation tends to look more deliberate.
- Pair this with other angular pieces, like a bar or a small rectangle elsewhere on the ear, rather than round studs, to keep the geometric theme reading as intentional.
Styling Note
It suits an ear that’s already leaning modern or minimalist over romantic, and it’s a strong choice if most of your other jewelry is also clean-lined rather than ornate.
11. Vintage Pearl Conch Stud
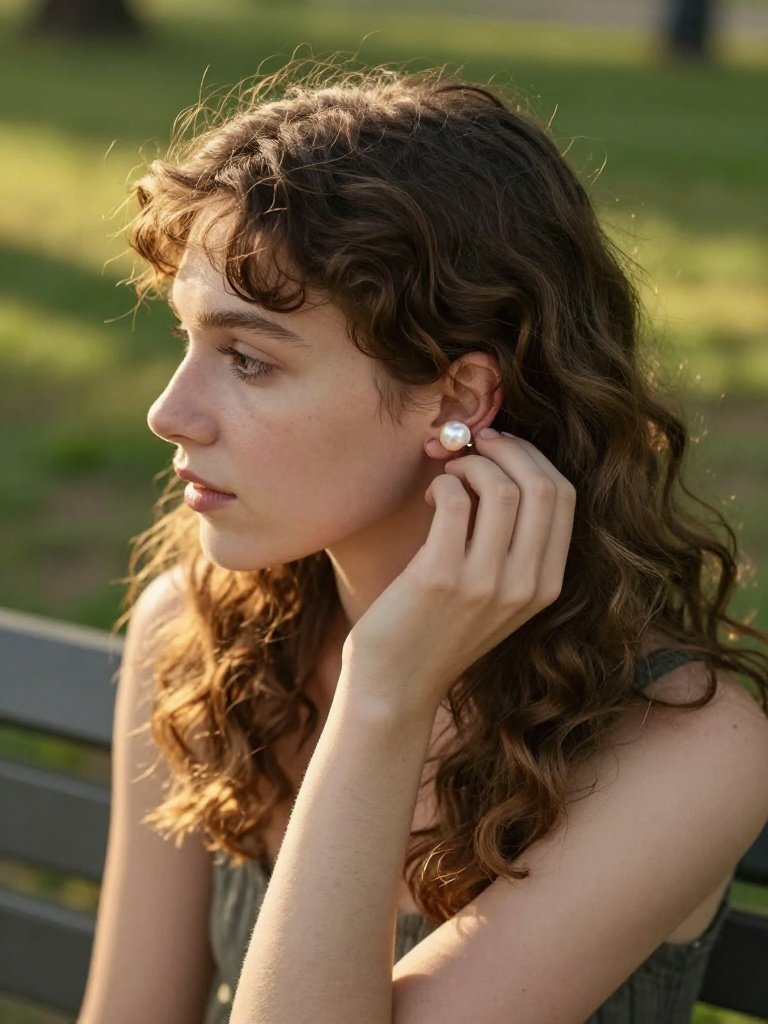
Texture does the work in this one. A single small freshwater pearl, set on a short flat-back post, sits in the conch with a softer, warmer look than a metal or gem stud. The texture of a real pearl, slightly irregular and matte rather than high-shine, is what separates this from a plain white bead and gives it that vintage, heirloom feel.
Pearl studs are lightweight, so healing tends to track close to a standard flat-back timeline, usually three to six months, though the pearl surface itself needs gentler cleaning than metal since it’s more porous.
Tip
- Ask specifically for a genuine freshwater pearl rather than a glass or shell-core imitation, since the surface texture is what makes this look read as intentionally vintage rather than accidentally plain.
- Choose an off-white or cream pearl over stark white if you want it to look aged rather than costume-jewelry bright.
- Keep the pearl on the smaller side, around 3 to 4mm, since a larger pearl in this exact spot starts to look heavy rather than delicate.
Styling Note
This pairs beautifully with gold hoops elsewhere on the ear and suits someone going for a soft, old-money aesthetic rather than an edgy one.
12. Constellation Multi-Stud Conch

Instead of one piece of jewelry, this look uses three or four separate tiny flat-back studs scattered across the conch in an asymmetrical, star-map pattern rather than a straight line or cluster. Each stud is its own piercing, which is what makes this the most involved option on this list.
Because it’s several small piercings healing at once in close proximity, expect a longer overall process than a single stud, often closer to nine to twelve months before every point is fully settled, and most piercers will space the sessions out rather than doing all points in one sitting.
Tip
- Map out the exact placement with your piercer using a marker before any needle touches your ear, since this look lives or dies on the spacing looking natural rather than gridlike.
- Plan for multiple appointments spaced weeks apart rather than one long session, both for healing and for your own pain tolerance in one sitting.
- Keep each stud genuinely tiny, closer to 1.5mm, so the cluster reads as a scattered constellation rather than a crowded cluster of full-size studs.
- Photograph the placement plan from a few angles before the first session, since a pattern that looks balanced straight-on can look uneven from the side once every point is in.
- Budget for this as a multi-month project rather than one appointment, both financially and in terms of ear real estate, since a fully filled constellation typically means three or four separate piercer visits.
Styling Note
This is the most committed, highest-visibility option here, and it’s worth being honest that it takes real planning and multiple healing cycles rather than being a quick weekend decision.
13. Snake Wrap Conch Ring
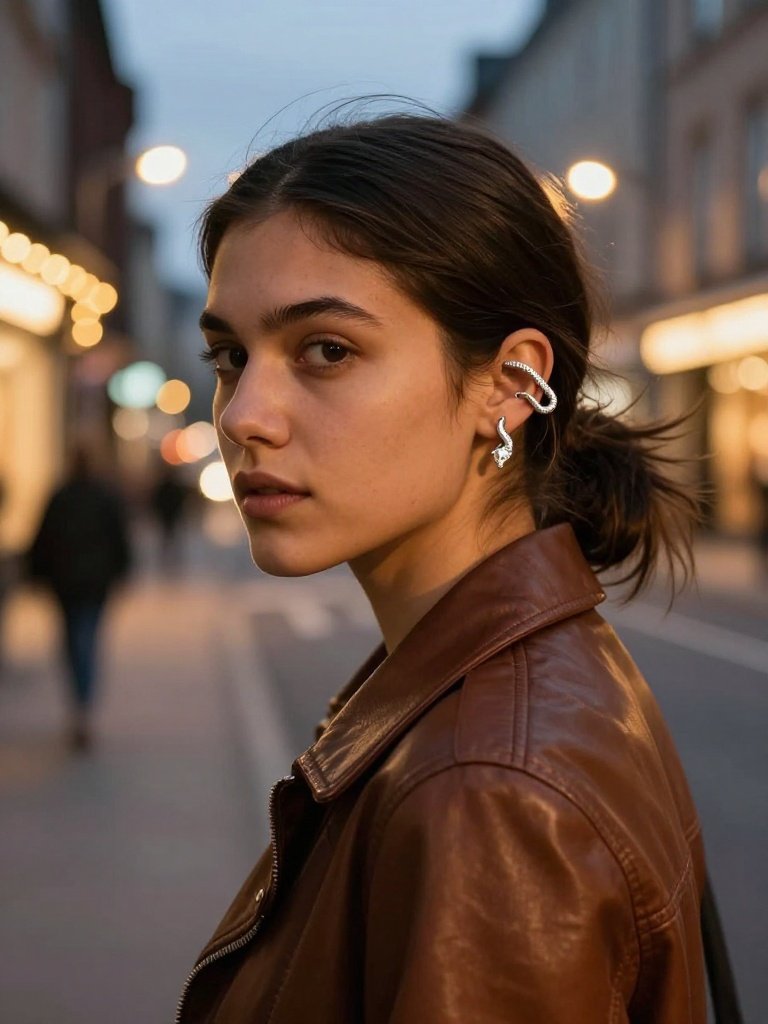
A slim wire, shaped and textured to resemble a coiling snake, wraps once around the conch cartilage with a small carved head detail where the ends meet. Unlike the spiral wrap, which is about repetition, this one is about a single deliberate shape with a clear front and back.
As a single continuous piece rather than a cluster, healing tracks close to a standard ring timeline, generally six to nine months, and the detailed head end needs a little extra care during cleaning since texture holds onto product residue more than a smooth surface would.
Tip
- Ask your piercer to orient the snake’s head toward the front of the ear rather than tucked toward the back, since the head is the detail that makes the design read clearly.
- Request a properly fitted gauge for your ear rather than a loose generic ring, since a snake wrap that shifts loses its coiled shape fast.
- Clean gently around the textured head section specifically, since raised detail traps more residue than a plain smooth band.
Styling Note
This is a stronger, more alternative look than a plain hoop and suits an ear that already leans toward edgier pieces like a septum ring or a heavier helix stack.
14. Two-Tone Metal Stack Conch

This look pairs a small gold stud with a slim silver or white gold hoop, both placed within the conch, riding the mixed-metal trend rather than matching everything to one tone. The contrast is the point. A perfectly matched metal set can look a little flat, while two tones read as more collected and less like a matched jewelry set bought together.
Since this uses two separate pieces of jewelry rather than two piercings, it doesn’t require any additional healing beyond what a standard single stud would need, generally settling within four to eight months for the one site.
Tip
- Choose metals with genuinely different tones, like yellow gold against white gold or oxidized silver, rather than two shades of the same warm gold, so the contrast actually reads.
- Ask your piercer whether your specific conch anatomy has room for two pieces of jewelry comfortably, since a shallow conch can feel crowded with a stud and hoop both present.
- Keep one piece plain if the other has detail. Two busy pieces stacked together tends to look cluttered rather than curated.
- Tell your piercer upfront that you want two distinct pieces rather than a matched pair, since some studios default to selling sets unless you say otherwise.
Styling Note
This suits someone whose whole ear already mixes metals rather than sticking to one, and it’s an easy way to make one piercing look like two.
15. Bold Hinged Segment Ring Conch
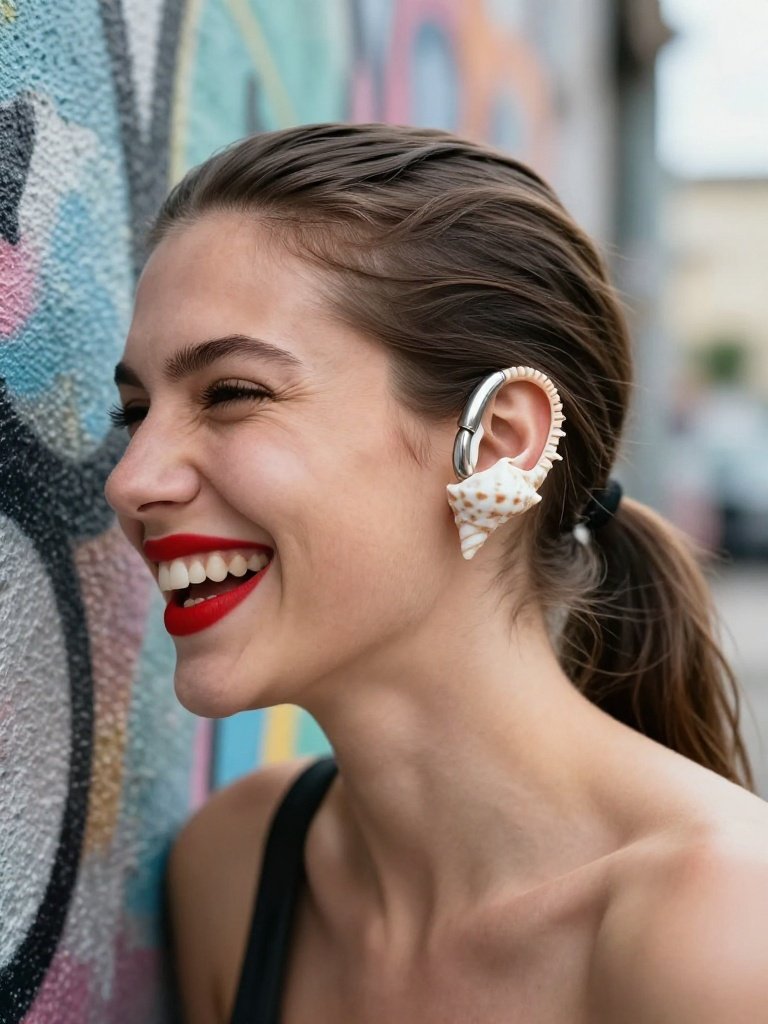
This one skips subtlety entirely: a thick hinged ring, opening at a single seamless hinge point rather than a clasp, sits in the conch with a clean, unbroken circular look once closed. The hinge mechanism is a practical upgrade over an old-style captive bead ring, since it opens and closes with one hand instead of needing two.
A ring this substantial tends to run on the longer end for healing, often eight to twelve months, since a heavier hoop puts more ongoing pressure on the piercing site while it settles compared to a lightweight stud.
Tip
- Ask specifically for a hinged clasp over a captive bead design, since it’s significantly easier to manage yourself once your piercer clears you to change jewelry.
- Choose a wider gauge than a standard hoop if you want the bold look to actually read, since a thin ring in a large-looking style can bend under regular handling.
- Avoid side-sleeping in the first several months, since the added weight of a thicker ring shifts more against a pillow than a flat stud would.
Styling Note
This is a statement piece meant to be seen clearly, and it tends to work best solo or paired with just one smaller stud rather than stacked with several other pieces nearby.
16. Daisy Cluster Conch Stud

Three small round stones arranged in a flower pattern, distinct from the pear-shaped opal trio, sit low in the conch with a rounder, softer silhouette. Where the opal trio leans elegant and vintage, this one leans playful and a little more girlish, largely because of the perfectly round stone shapes.
This piece follows a fairly standard cluster healing window, usually four to eight months, and like other clustered studs benefits from a bezel setting to avoid snagging during the early weeks.
Tip
- Ask for round-cut stones specifically rather than pear or marquise, since the rounder shape is what gives this daisy look its softer, playful character compared to a sharper cluster.
- Request a slightly smaller overall cluster size than you might for the opal trio, since a daisy shape reads best as delicate rather than large.
- Pair with simple gold studs elsewhere rather than other florals, so this stays the one clearly floral moment in the ear.
Styling Note
This suits a softer, more romantic overall ear theme and works especially well alongside a single small stone in the helix rather than anything bold or geometric.
17. Engraved Flat-Back Conch Stud

Engraving does the personalizing here. A small solid disc, etched with a fine line pattern or an initial, sits flush in the conch as a piece that rewards a closer look rather than catching the eye from across a room. The engraving is subtle by design, meant to be a personal detail rather than a visual statement.
As a flat, lightweight piece, healing tends to be on the shorter side, generally three to six months, since there’s minimal surface area or protrusion compared to a gem or charm.
Tip
- Ask whether your piercer’s jewelry supplier offers custom engraving on flat-back discs or labret stud posts, since this is more often special-ordered than found pre-made.
- Keep any engraved detail simple, a single initial or a thin line pattern, since fine detail on a piece this small gets lost if it’s too intricate.
- Choose a matte rather than high-polish finish for the disc, since matte metal catches the engraved lines more clearly in natural light.
- Confirm the engraving happens before the piece is sterilized and packaged, not after, since most studios can’t safely engrave in-house once a piece is already sealed for use.
Styling Note
This is one of the more understated options here and works well as a meaningful, personal piece rather than a look that’s meant to be the centerpiece of the ear.
18. Chain-Link Dangle Conch Stud

A short, fine chain hangs from a small flat-back post, ending in a tiny bead or charm, giving the conch a bit of movement that static studs don’t have. This is a more delicate take on a dangle piercing, since the chain length is kept short enough to stay close to the ear rather than swinging freely.
Because there’s a hanging element, this one needs a slightly longer settling period, usually six to nine months, so the healing piercing isn’t dealing with added pull from movement too early.
Tip
- Ask your piercer to keep the chain genuinely short, under half an inch, since anything longer starts catching on hair, phones, and headphone wires constantly.
- Wait until you’re fully healed before switching to a dangle style if you’re starting fresh, since a moving piece on an unhealed site slows healing down.
- Choose a secure, threaded flat-back rather than a friction-fit post for this style, since the extra weight of a chain makes a loose-fit post more likely to shift.
Styling Note
This adds subtle motion that a static stud can’t, and it suits an ear where you want at least one piece with a little movement without going as bold as a full dangle earring.
19. Ceremonial Coin Disc Conch Stud

Texture is everything with this one. A small, slightly domed metal disc, textured or coined like an old piece of currency, sits in the conch with a bohemian, worn-in look rather than a polished modern one. The texture is what sells the look, since a flat plain disc reads as generic while a coined or hammered surface reads as intentional and vintage.
A single disc-shaped piece heals similarly to other flat-back styles, typically three to six months, and doesn’t require any special care beyond what a standard stud would.
Tip
- Look specifically for a hammered or coin-textured finish rather than a smooth disc, since the texture is the entire visual difference between this and a plain circle stud.
- Choose a warm gold or antiqued brass tone over bright silver, since the bohemian effect relies on a warmer, aged-looking metal.
- Keep the disc on the smaller side, around 4 to 5mm, so it reads as jewelry rather than a coin literally stuck in your ear.
Styling Note
This suits an eclectic, well-traveled aesthetic and pairs naturally with mismatched hoops and charms elsewhere on the ear rather than a clean, matched set.
20. Solid Bar Conch Piercing
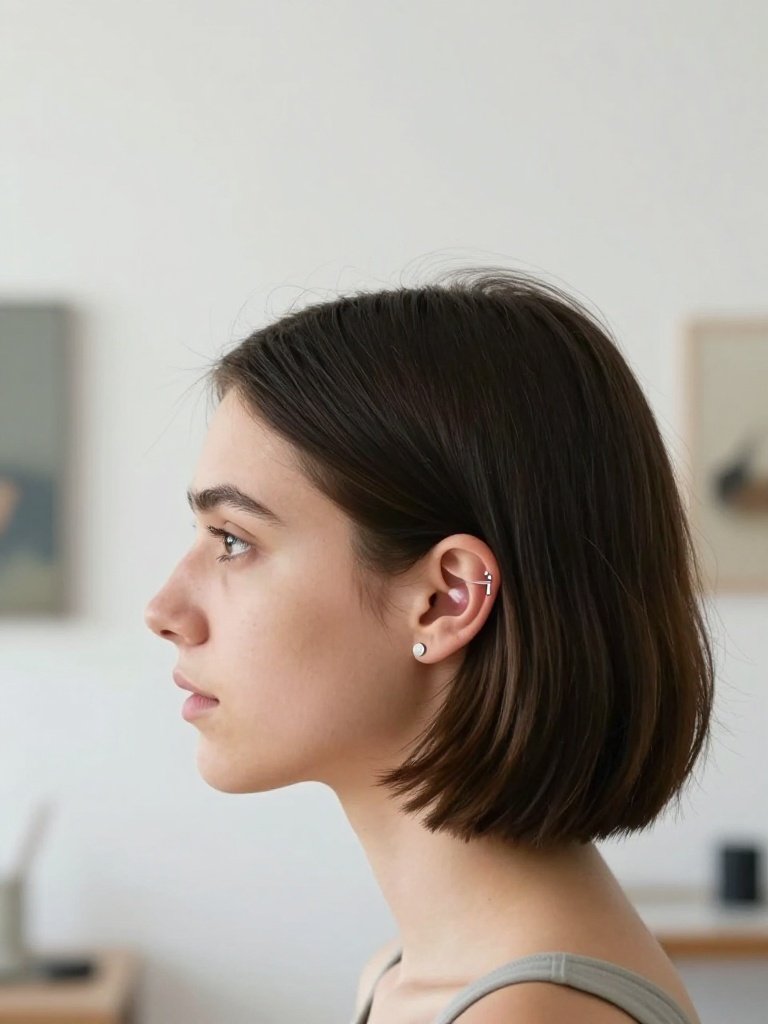
Instead of a round stud or hoop, this uses a short, straight barbell with flat or ball ends, giving the conch a sleeker, more architectural line than a rounded shape would. It’s a less common choice for this specific spot, which is part of what makes it stand out in a lineup of studs and hoops.
A straight barbell in the conch needs to be carefully sized to your ear’s curve, and healing generally runs in the standard four-to-nine-month range, though a poorly fitted bar is more prone to irritation than a curved piece would be here.
Tip
- Have the bar length measured precisely for your ear rather than using a generic size, since a straight piece that’s even slightly too long or short will visibly sit wrong.
- Ask your piercer directly whether your specific conch shape suits a straight bar well, since this style genuinely doesn’t work for every ear and a good piercer will tell you honestly if it’s not the right fit for you.
- Choose flat disc ends over ball ends if you want the architectural look to stay consistent, since round ball ends soften the straight line the bar is meant to create.
- Ask your piercer to mark the exact intended endpoints on your ear before piercing, since a straight bar leaves far less room to adjust placement afterward than a stud would.
Styling Note
This is the least conventional pick on this list and works best on an ear that’s already going for a sharp, minimalist look rather than a soft or romantic one.
Quick Comparison
| Style Name | Best Placement | Pain/Healing Level | Visibility |
|---|---|---|---|
| Opal Trio Cluster | Inner conch | Moderate, 3-9 mo | High, front-facing |
| Minimalist Single Ball | Lower conch | Low, 3-6 mo | Low |
| Botanical Rose Charm | Outer conch | Moderate, ~6 mo | High |
| Spiral Wrap Ring | Full conch | Moderate-high | High |
| Chunky Silver Hoop | Full conch | High, up to 9 mo | Very high |
| Orbital Conch | Two conch points | High, 8-12 mo | Very high |
| Double Conch Studs | Two conch points | Moderate x2 | High |
| Star and Moon Cluster | Inner conch | Moderate, 4-8 mo | Moderate |
| Birthstone Bezel Stud | Lower conch | Low, 3-6 mo | Low |
| Geometric Triangle Stud | Inner conch | Low, 3-6 mo | Moderate |
| Vintage Pearl Stud | Lower conch | Low, 3-6 mo | Low |
| Constellation Multi-Stud | Full conch | High, 9-12 mo | Very high |
| Snake Wrap Ring | Full conch | Moderate-high | High |
| Two-Tone Metal Stack | Full conch | Moderate | High |
| Hinged Segment Ring | Full conch | High, 8-12 mo | Very high |
| Daisy Cluster Stud | Inner conch | Moderate, 4-8 mo | Moderate |
| Engraved Flat-Back Disc | Lower conch | Low, 3-6 mo | Low |
| Chain-Link Dangle | Outer conch | Moderate, 6-9 mo | Moderate |
| Coin Disc Stud | Lower conch | Low, 3-6 mo | Low |
| Solid Bar | Inner conch | Moderate, 4-9 mo | Moderate |
Frequently Asked Questions
Is a conch piercing very painful?
Conch piercing pain tends to fall in the middle of the cartilage scale, generally more noticeable than a lobe piercing but less intense than a tragus or daith piercing. Most people describe it as a firm, sharp pressure for a few seconds rather than ongoing pain. Some searches for conch piercing migraine relief come up alongside pain questions too, but that pressure-point theory is generally associated with a different cartilage spot near the ear canal, so it isn’t a reason to choose the conch specifically.
How long does a conch piercing take to heal?
Conch piercing healing time usually runs three to nine months for a single stud, while heavier jewelry like a thick hoop or an orbital setup can take closer to twelve months. Healing time depends more on jewelry weight and movement than on the specific design chosen.
What jewelry works best for a first conch piercing?
Starting with a conch piercing with stud jewelry, specifically a flat-back, is generally the easiest choice, since it sits close to the ear and is less likely to snag on hair, clothing, or headphones while it settles. Hoops and rings are usually better as a second piece once the piercing is fully healed.
Can you get a double conch piercing?
Yes, a double conch piercing places two separate studs or one connected orbital ring within the same conch area, though most piercers recommend spacing the two sessions apart rather than doing both at once. It generally takes longer to fully heal than a single conch piercing since there are two sites involved.
Does a conch piercing suit every ear?
Not every conch shape accommodates every jewelry style equally well. A shallow or smaller conch generally works better with a small stud or thin ring, while a deeper conch has more room for a chunky hoop or a cluster piece. A piercer can usually tell at a glance which styles will sit cleanly on your specific ear.
Final Thoughts
If there’s one place to start, a bezel-set stud like the birthstone or opal trio is the safest first move since it’s low-maintenance, heals relatively fast, and still looks intentional on its own. The bigger, multi-piercing looks like the orbital or constellation setup are worth working toward rather than starting with, since they ask more of your ear and your patience. Whichever direction you pick, the conch is flexible enough to grow with your ear over time, so save the styles that match your Pinterest inspiration board now and build toward them at your own pace instead of locking into one look.