If you’re scrolling through Pinterest at 2 AM saving every cute nails ideas pin that crosses your feed, you already know the struggle: half of them are outdated, and the other half look amazing in photos but feel impossible to recreate or ask for at the salon. This collection cuts through the noise. Every idea here is currently showing up on Instagram, beauty editorials, and actual salon mood boards — and each one works for real hands, real lifestyles, and real budgets. Here’s what’s genuinely worth saving right now.
1. Micro-French Ombré With Sheer Pink Base
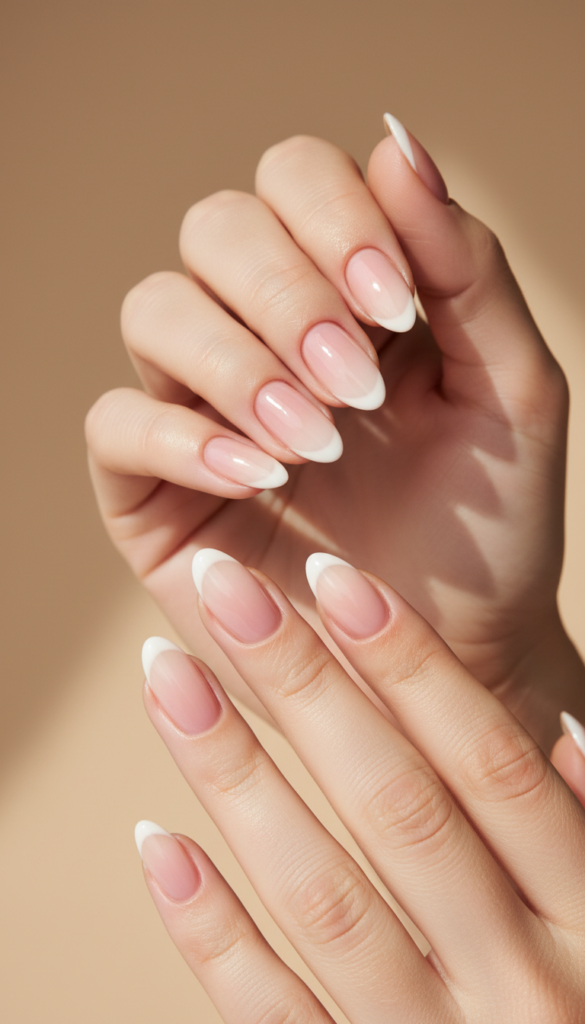
The micro-French is having a major moment, but this version softens the traditional white tip into a barely-there ombré that fades from a sheer, milky pink base into a whisper of white at the edge. The gradient is so subtle it reads as “your nails but better” from across the room, then reveals its precision up close. The key is keeping the white layer thin enough that it doesn’t look like a standard French — think a single sweep of pigment rather than a solid cap.
This elevated take on cute nails ideas works equally well for minimalist wardrobes and maximalist accessories. A high-shine top coat over the ombré creates a glass-like finish that makes the sheer pink base look liquid.
Tip
Ask your nail tech for a “soft fade French” and specify you want the white to start about a millimeter lower than a traditional French line. This look works best with a glossy top coat to enhance the sheer quality.
Best For
Almond or oval nails, especially if you’re growing out shorter lengths and want an elongating effect. Also ideal for bridal parties or any occasion where you need your cute nails ideas to work with multiple outfit changes.
2. Chrome Swirl Accent Nails
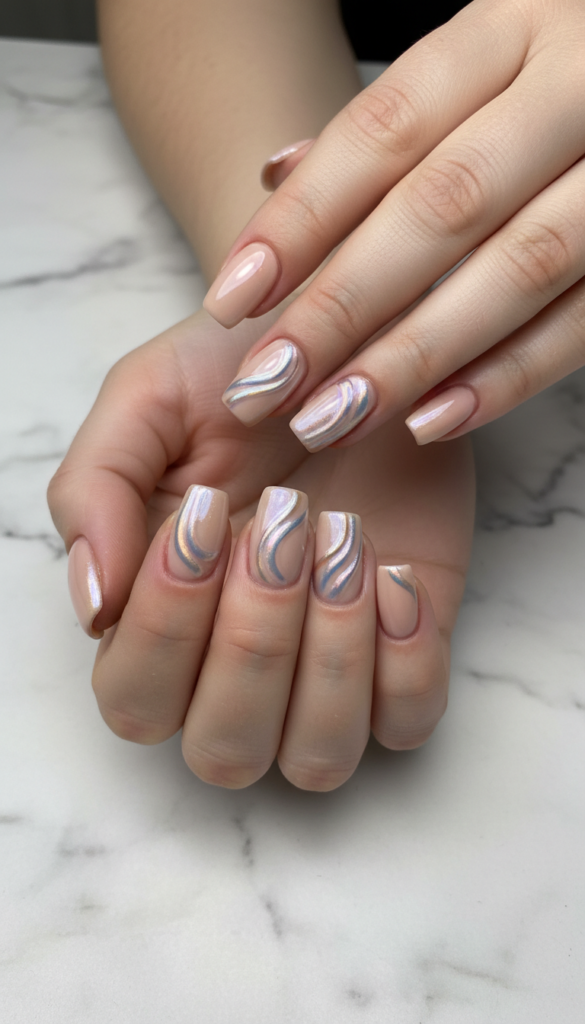
Chrome powders are still everywhere, but the trend has shifted from full-coverage chrome to strategic swirl accents on a neutral base. Picture a nude or soft beige nail with one or two fluid, ribbon-like streaks of pearl chrome sweeping diagonally across the surface. The chrome catches light differently from every angle, creating movement without being loud.
This is one of those cute nails ideas simple enough to describe to a tech in thirty seconds but looks like you spent an hour on the design. The swirl placement matters — keep it off-center and asymmetrical for the most contemporary feel. Buffing the powder into a no-wipe top coat layer before curing locks the reflectivity in place and prevents dulling.
Tip
Bring a reference photo that shows the chrome as a streak, not a solid block. The effect comes from buffing the chrome powder into a thin layer of no-wipe gel top coat before curing, so the design stays smooth and reflective.
Best For
Squoval or round nails where the curved surface helps the chrome catch light naturally. This design also works beautifully on shorter lengths because the swirl doesn’t need a large canvas.
3. Matte Baby Blue With Glossy Cloud Details
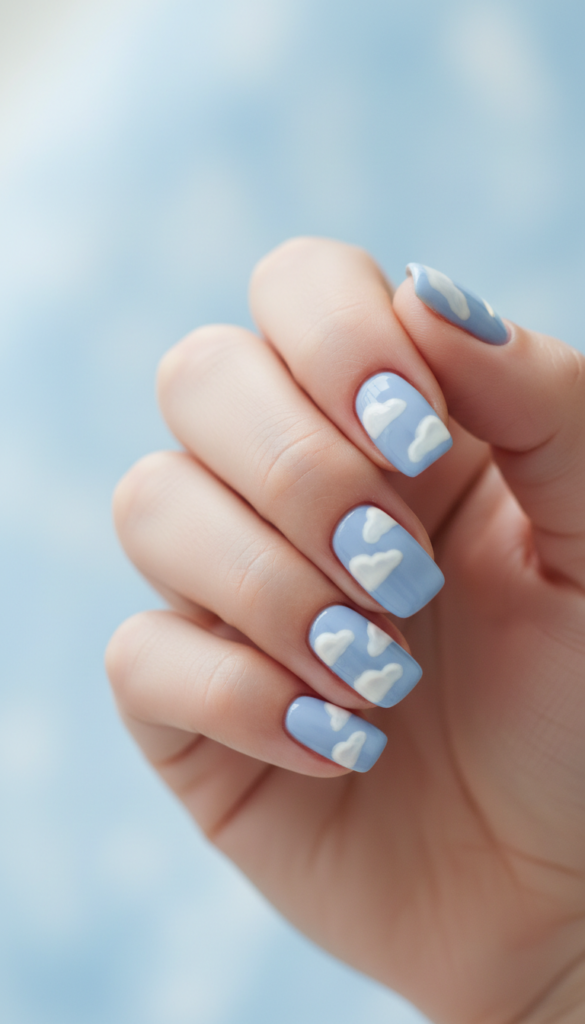
Matte nails have been around for a while, but pairing them with glossy detail work changes the game entirely. This design uses a soft, pastel baby blue matte base with puffy cloud shapes painted on top in a high-gloss finish. The contrast between the matte background and the shiny clouds makes the design feel dimensional and almost three-dimensional.
The clouds should be soft-edged and irregular — stiff, perfect circles ruin the effect. This approachable style is particularly popular as cute girl nails for 12 year olds, since the matte surface mutes the blue into something soft enough for school while the glossy clouds add a playful touch. The pigment distribution in the matte top coat requires careful curing to maintain an even velvet texture.
Tip
The matte top coat goes on before the cloud details, not after. Your tech needs to paint the clouds over the cured matte base using a glossy gel or regular polish, then top just the cloud area with a shiny top coat. This ensures the contrast stays crisp.
Best For
Shorter, squoval nails where the clouds can sit comfortably without being crowded. This is one of the best cute nails ideas short because the details read clearly even on a smaller canvas.
4. Tortoiseshell Speckles On Milky White
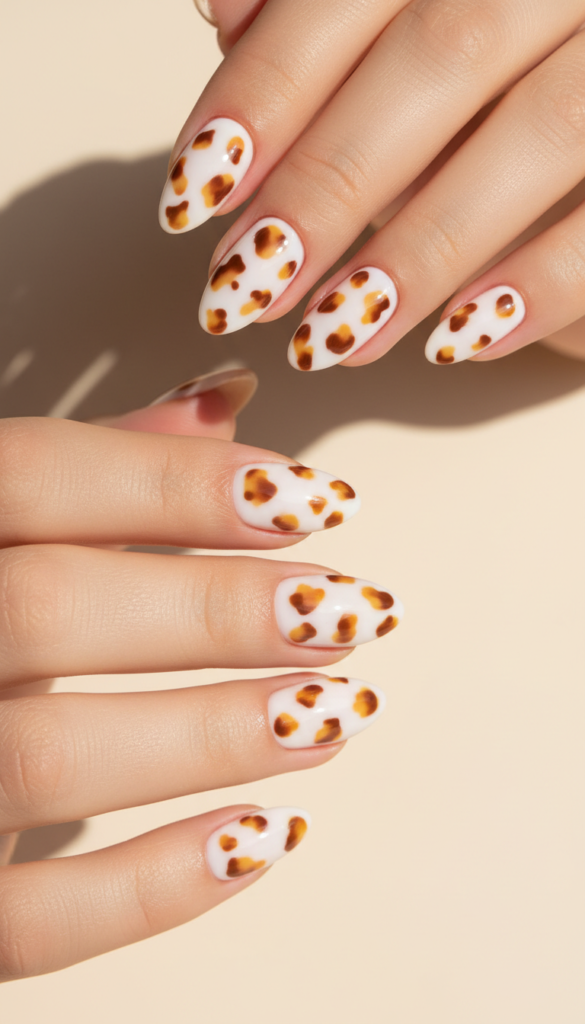
Tortoiseshell has migrated from sunglasses to nails, but the full-shell look can feel heavy. This lighter version scatters tortoiseshell speckles across a milky white base — think translucent amber and warm brown dots and small irregular patches, spaced widely so the white still dominates. The speckles should look organic, like they floated onto the nail rather than being placed.
For anyone browsing cute nails ideas that lean earthy, this design offers the perfect balance of natural texture and refined polish. Creating the effect requires layering two sheer pigments rather than opaque ones, so the amber and brown blend softly into the milky white like sediment settling in water.
Tip
The speckles are typically created by dotting with a small brush or toothpick and then gently dragging the color to blur the edges slightly. Ask your tech to use a sheer brown and a sheer amber rather than opaque colors for the most authentic look.
Best For
Medium-length almond or oval nails where there’s enough surface area for the speckles to breathe. The milky base also helps disguise any minor nail imperfections.
5. Reverse French In Peach Nude
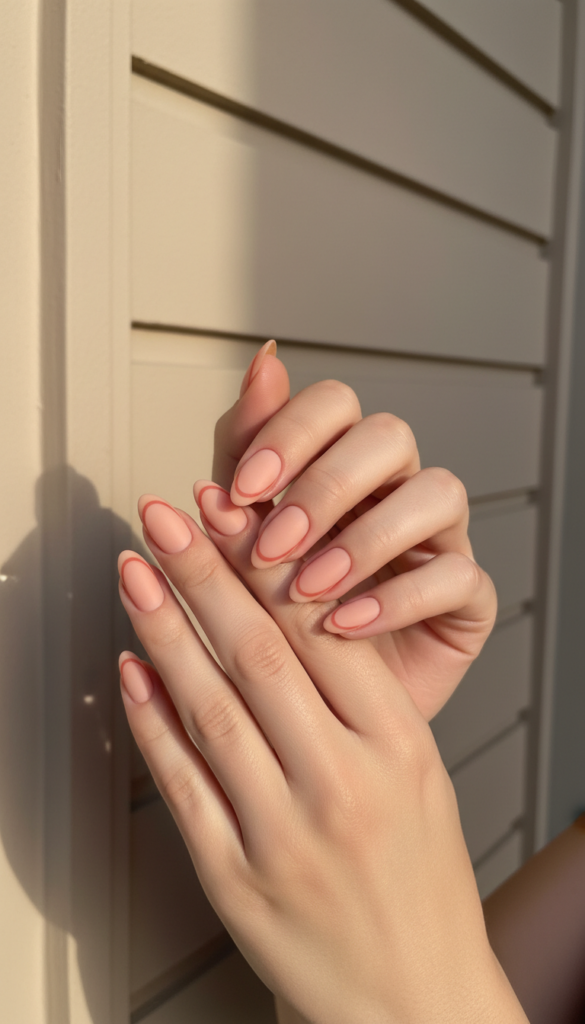
Instead of coloring the tip, this design paints a thin, curved line just below the tip — essentially a reverse French that sits about two millimeters below the free edge. Using a soft peach-nude shade on the base and a slightly darker, almost terracotta peach for the reverse line creates a subtle color-block effect that’s entirely unexpected. The line follows the natural curve of your nail bed, so it feels architectural rather than decorative.
This cute nails idea gets compliments precisely because people can’t figure out what’s different about it — the reversed placement disrupts the eye’s usual expectation of where color should sit. The line width should remain consistent at roughly one millimeter from side to side for a balanced effect.
Tip
The reverse line works best when it’s painted with a thin striping brush rather than freehanded with the polish brush. It should be crisp and consistent in width from side to side. A matte top coat over the whole thing modernizes the look instantly.
Best For
Nails that are at least medium length so the negative space above the line has room to breathe. This design also suits wider nail beds because the curved line can be adjusted to flatter the natural shape.
6. Pastel Rainbow Color-Blocked Tips
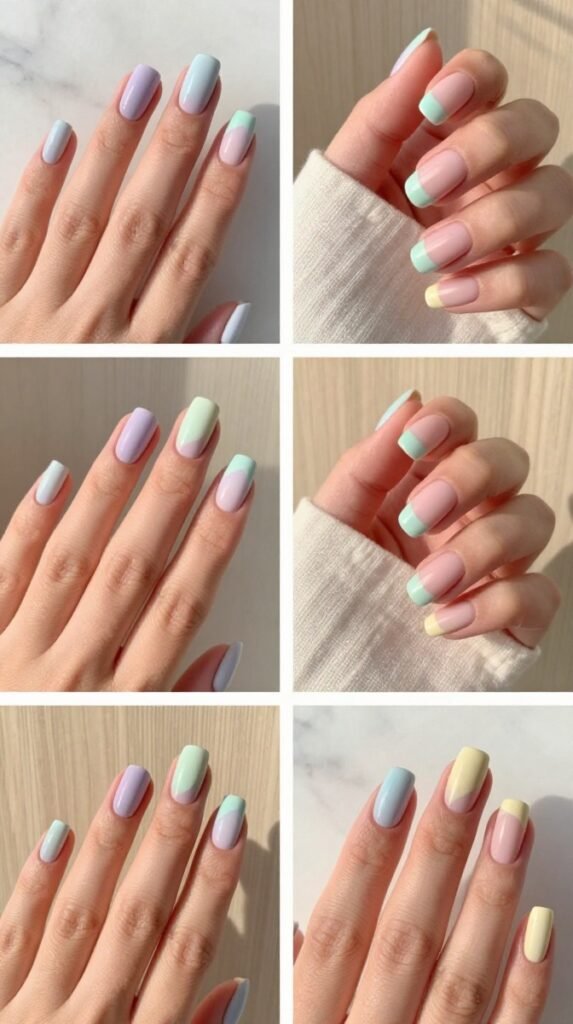
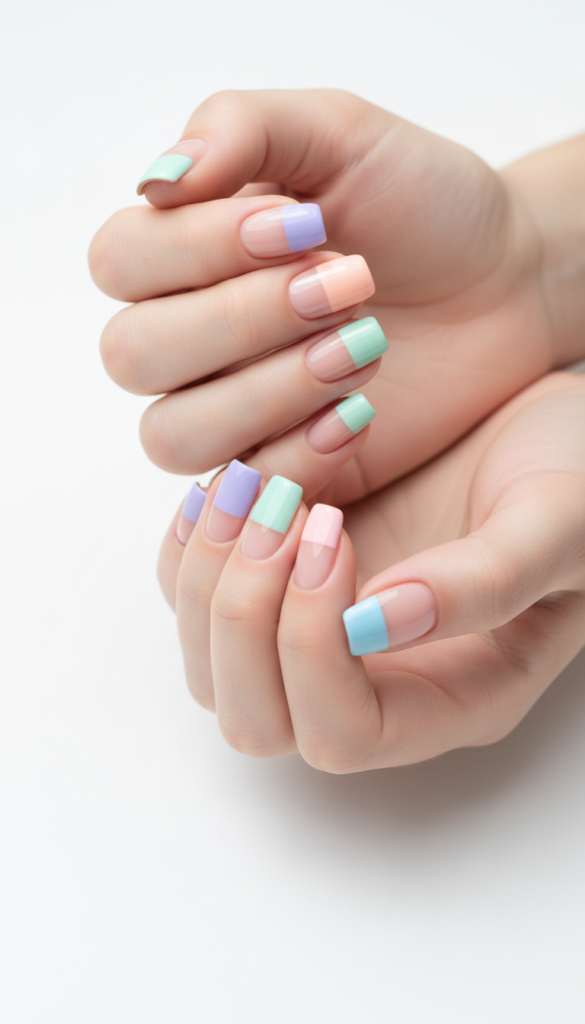
Take the traditional French tip and multiply it into five or six pastel shades, each one painted as a separate tip segment. Think lavender, mint, peach, baby pink, and sky blue, each taking up about a fifth of the nail’s tip area, with a clean nude base underneath. The effect is playful and graphic without being childish, especially when the pastels are kept dusty rather than bright.
The straight-across color-blocking creates a clean, modern line that stands out from the usual rainbow gradient or scattered dot designs. It’s one of the most shareable cute nails designs on Pinterest right now, and achieving the opacity requires at least two thin layers of each pastel to prevent streakiness across the nude base.
Tip
The key to this look is keeping the tip line perfectly straight and consistent across all ten nails. Some techs use a thin piece of tape as a guide, but a steady freehand line often looks more intentional. Make sure the pastels are opaque enough to cover the nude base in one or two thin coats.
Best For
Squoval or square nails where the straight tip line complements the overall shape. The pastels read best on fair to medium skin tones but can be adjusted warmer for deeper complexions.
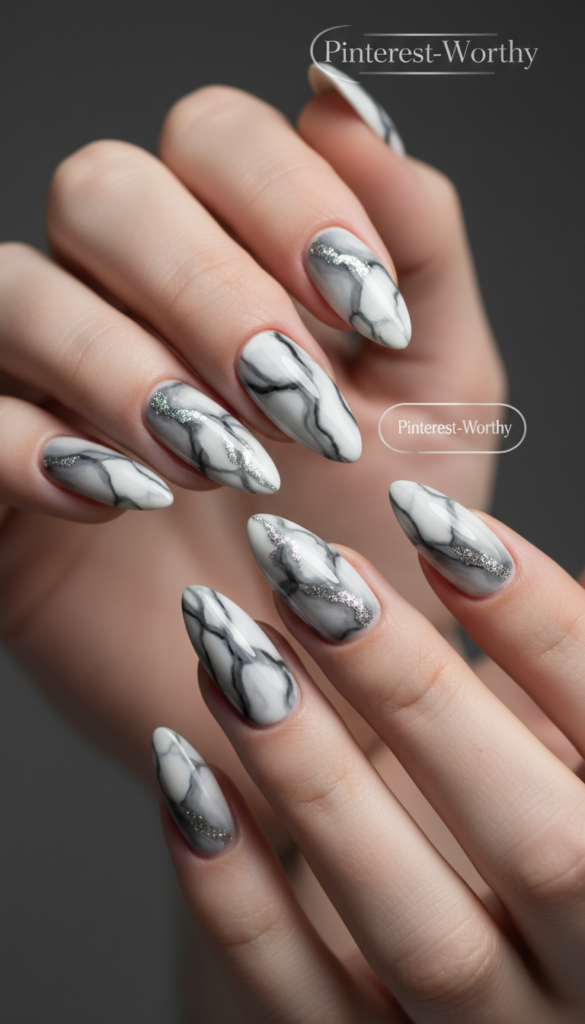
7. Swirling Marble In Cool Grays And Whites
Marble nails have been popular for years, but the current iteration uses cool-toned grays, whites, and a hint of silver shimmer to create a stone effect that looks genuinely geological. The swirls should be irregular and veiny, with thin lines of darker gray cutting through the white base. A touch of silver shimmer in the gray veins adds dimension without making the nail look metallic.
The marbling process relies on manipulating the pigments while they’re still wet — dragging a thin brush through the layered colors creates the veining, but overworking the pigments turns them muddy, so precise technique matters. This sophisticated cute nails idea reads as polished stone rather than painted design.
Tip
Marble is created by dropping the colors onto the nail and moving them around with a thin brush or toothpick before curing. Less manipulation is more — too much blending and the colors turn muddy. A glossy top coat is essential for making the marble look like polished stone.
Best For
Medium to long nails with rounded edges. The swirling lines need room to travel, and rounder shapes allow the marble to wrap slightly around the nail’s curve for a more natural effect.
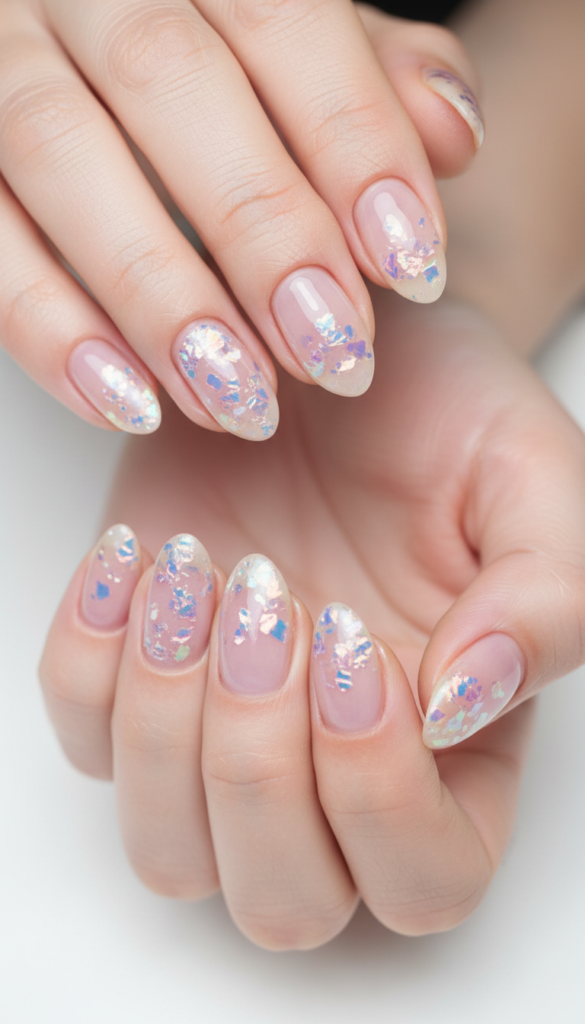
8. Sheer Lavender With Iridescent Flakes
This is the grown-up version of glitter nails. A sheer, barely-there lavender base (think tinted top coat rather than full coverage) gets scattered with irregular iridescent flakes that catch light in pale pink, blue, and gold. The flakes are sparse enough that the lavender base remains visible and the overall effect is ethereal rather than party-glam.
This is one of the easiest cute nails ideas simple to request because the execution is straightforward, but the finish looks expensive and considered. Encapsulating the flakes in a thick gel layer prevents them from catching on fabric or hair while keeping the surface perfectly smooth — a detail that separates professional results from DIY attempts.
Tip
The flakes should be applied as a scattered layer, not a dense coverage. Your tech can pick them out individually with a wax pencil or dip a brush into the flake pot and tap the excess off before applying. A thicker gel top coat helps encapsulate the flakes so the surface stays perfectly smooth.
Best For
Shorter nails where full-coverage glitter would feel overwhelming. The sheerness also makes this design forgiving for grow-out, so it’s great if you’re stretching time between appointments.
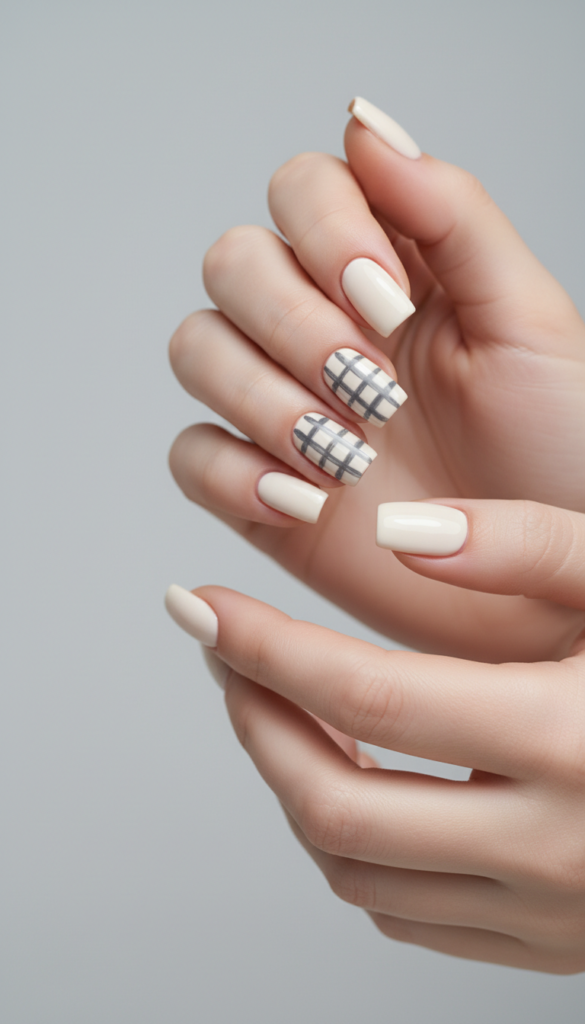
9. Checkered Accent In Charcoal And Cream
The checkerboard trend has settled into a more sophisticated pairing: charcoal gray and cream, painted as a checkered accent on just one or two nails per hand. The rest of the nails stay a solid cream or pale gray to keep the look cohesive. The checkered pattern should be small-scale, with each square about the size of a grain of rice, so it reads as a textile pattern rather than a board game.
The high contrast between charcoal and cream makes the pattern pop while the neutral palette keeps it elegant. This cute nails idea pairs beautifully with textured fabrics like knits or tweed because the pattern echoes woven materials. The square edges require sharp, straight lines, which means using a guide or having a very steady hand.
Tip
The checkerboard is easiest to achieve with tape or a stamping plate, but freehand with a thin brush gives it a slightly imperfect, hand-painted quality that feels more current. If you’re asking for this, bring a reference photo that shows the square scale clearly.
Best For
Medium-length square or squoval nails. The straight edges of the shape complement the structured pattern better than rounded or almond nails would.
10. Glazed Donut With A Dusty Rose Twist
The glazed donut nail (sheer nude base with a pearl chrome overlay) has been everywhere, but the version gaining traction now swaps the nude for a dusty rose base. The rose is muted enough to read as a neutral, while the pearl chrome on top gives it a luminous, lit-from-within quality. The chrome should be applied lightly enough that the pink still reads clearly underneath.
This is the kind of cute nails ideas that works for absolutely everything — the dusty rose warms the skin without competing with accessories, and the pearl overlay catches enough light to elevate the look for evenings. This timeless option ranks among the most chic classy nail designs because the pearl chrome overlay adds luminosity without adding bulk or texture.
Tip
The pearl chrome needs to be buffed onto a no-wipe top coat for maximum shine. Ask your tech to use a lighter hand with the chrome powder than they would for a full chrome effect — the goal is a shimmer, not a mirror.
Best For
Any nail shape or length, but it looks particularly stunning on oval, almond, or even coffin nails where the curve catches light from multiple angles. The dusty rose also flatters a wide range of skin tones.
11. Negative Space Half-Moons In Tangerine
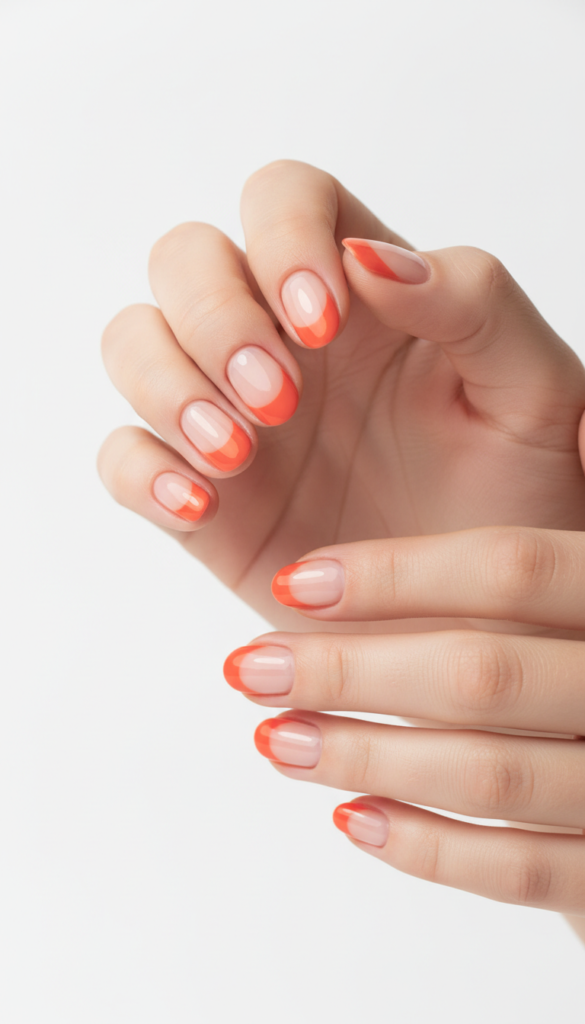
Negative space designs continue to trend, and the half-moon shape in particular feels fresh again. This version paints a tangerine-orange crescent at the base of the nail, leaving the rest of the nail bare (or with a sheer nude tint). The orange sits right at the cuticle, creating a bright pop of color that’s visible when you gesture or type.
The clean, graphic quality of the half-moon makes it feel architectural. This cute nails idea feels bold precisely because it leaves so much space — the bare nail acts as a visual break that makes the orange crescent stand out more than it would on a fully painted nail. The crescent curve should match your cuticle line’s natural arc for the most polished finish.
Tip
The half-moon is usually created with a curved sticker guide or painted freehand with a thin brush starting from the center and working outward. The edge should be crisp and match the natural curve of your cuticle. A glossy top coat over the orange and the bare nail keeps everything looking intentional.
Best For
Shorter to medium nails where the bare nail surface still looks polished and healthy. The negative space draws attention to your natural nail, so this design is best for nails that are in good condition.
12. Micro-Dots In Neon Pastels
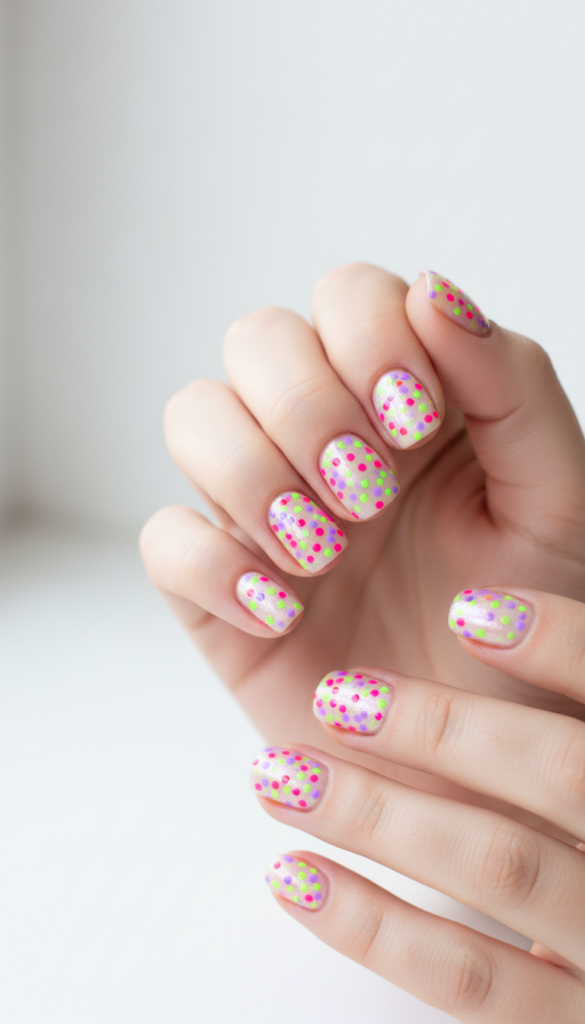
This is the most subtle way to wear neon. Take a pale, almost white base — think milk or off-white — and scatter micro-dots in neon pastel shades across the nail. We’re talking dots smaller than a pinhead in shades like neon lime, hot pink, electric lavender, and bright coral. The dots should be randomly placed rather than in a pattern, like confetti that landed gently.
The neon colors pop against the white base while the tiny scale keeps the design from feeling loud. This playful cute nails idea gets its energy from the contrast between the clean white background and the intense neon pigments, which read bright because they’re applied at full saturation despite their tiny size.
Tip
The dots are usually applied with a fine-tipped dotting tool or the end of a bobby pin. One drop of polish per dot is all it takes — any larger and the effect shifts from delicate to polka-dotted. A single coat of glossy top coat smooths everything out without smudging the dots.
Best For
Short to medium nails where the micro-scale of the dots won’t get lost. Round or squoval shapes work particularly well because the dots don’t have to compete with sharp corners.
13. High-Gloss Black With A Single Gold Line
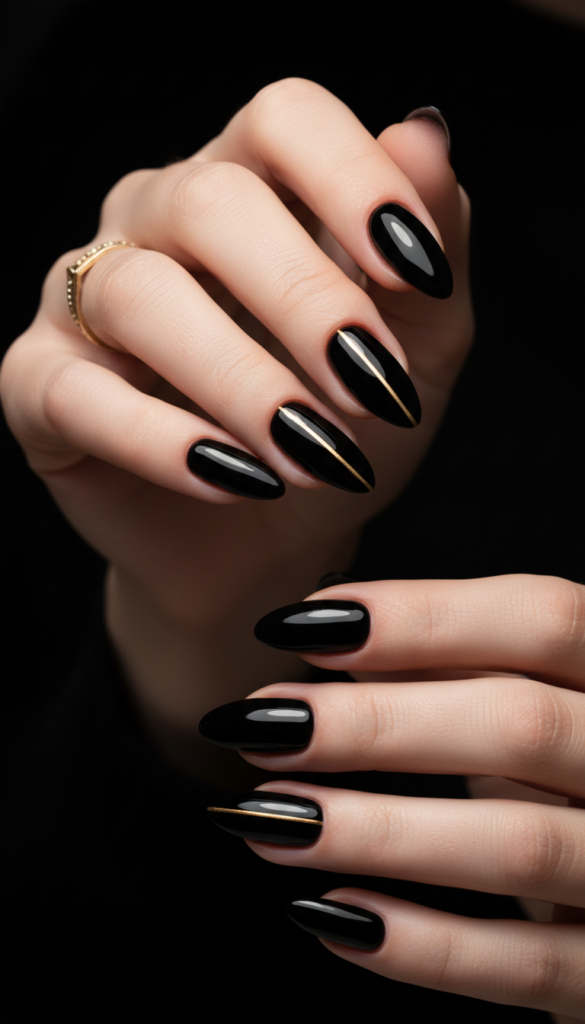
Black nails are a classic, but the updated version adds one single, thin line of gold — either straight down the center of the nail or slightly off-center — on just two accent nails per hand. The rest stay solid, high-gloss black. The gold line should be metallic and precise, and it breaks up the darkness of the black without adding bulk or pattern.
This design works for high-fashion editorial looks and everyday wear alike, because the single line draws the eye vertically and visually elongates the nail. The striping brush technique here is critical — the gold line should be no wider than a hair strand to maintain the minimalist aesthetic.
Tip
The gold line is typically painted with a striping brush and gold gel polish, then topped with a glossy coat to match the shine of the black. Make sure the black base is fully cured and glossy before the gold goes on so the line stays crisp.
Best For
Medium to long nails in any shape, though stiletto shapes give the gold line an especially dramatic runway. The black elongates and slims the finger, and the gold line adds a touch of interest without interrupting the clean silhouette.
14. Milky White With 3D Pearl Clusters
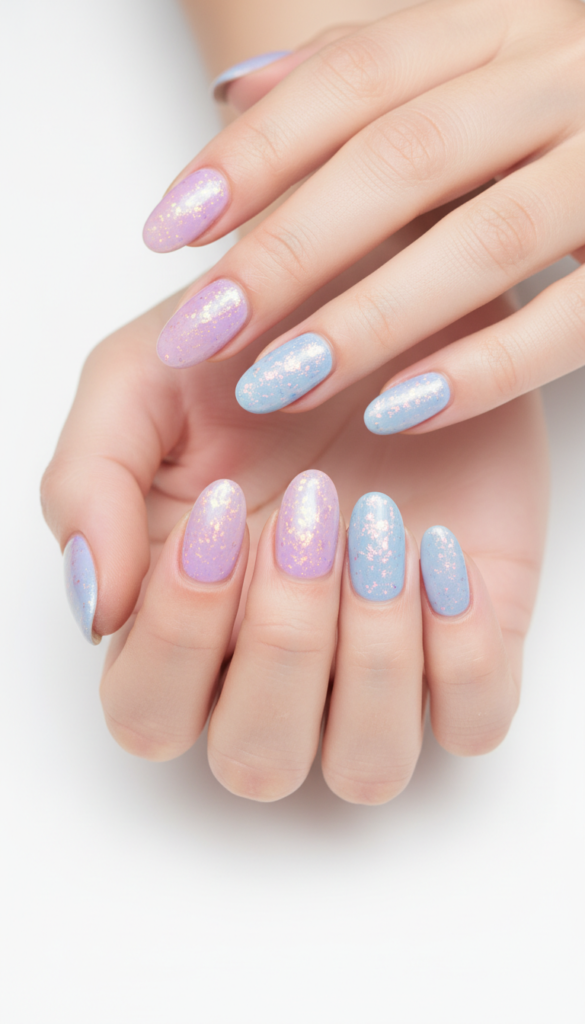
Milky white nails have never really gone out of style, but the current version elevates the look with small clusters of 3D pearls placed at the base of the nail or along one side. Think two or three tiny pearls grouped together like a subtle embellishment rather than a full row or design. The milky white base keeps things fresh and clean, while the pearls add a touch of dimension and texture.
It’s one of the few cute nails designs that can go from everyday to black-tie with zero adjustments, because the pearl clusters sit low enough not to catch on clothing but catch enough light to read as special occasion. The pearl diameter should stay under three millimeters to keep the clusters delicate.
Tip
The pearls are applied with a small dot of gel adhesive and cured in place. They should sit slightly raised above the nail surface. A single layer of top coat around the pearls (not over them) seals them without dulling their shine. Small to medium pearls work best — oversized pearls look dated.
Best For
Medium-length oval or almond nails that have enough surface area for the pearls to sit comfortably without overlapping the free edge.
15. Color-Shifting Thermal With Flakes
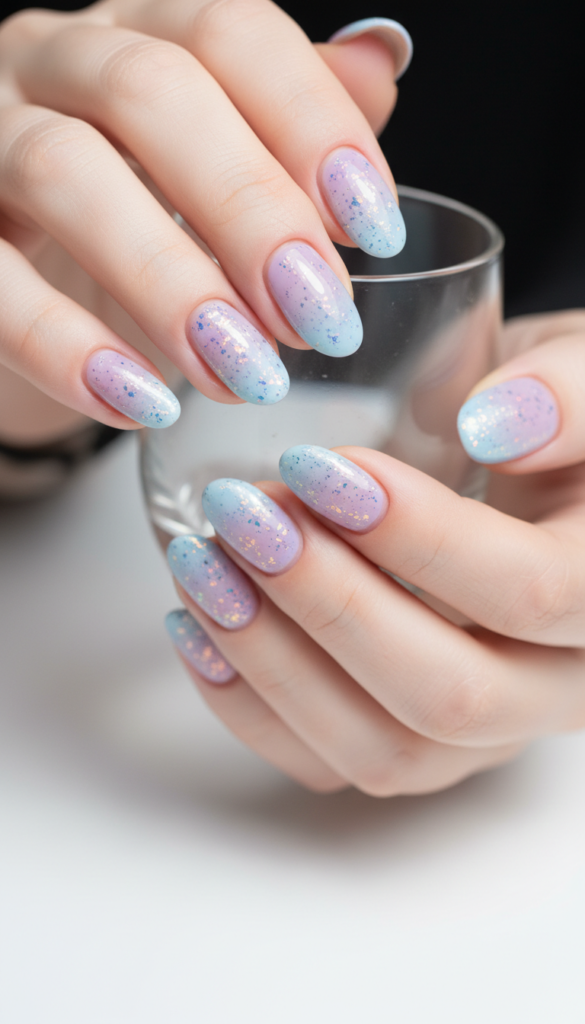
Thermal polishes change color with temperature shifts, and the current trend pairs them with a scattering of iridescent flakes for added depth. Imagine a soft lavender that shifts to a pale blue when your hands get cold, or a peach that warms to coral. The flakes add dimension that makes the color shift even more noticeable and interesting.
This is one of those cute nails ideas that feels almost magical because your nails look different throughout the day depending on the temperature and lighting. The chemical reaction behind thermal polishes means they respond best to thin layers applied in a consistent temperature environment — thick layers or temperature fluctuations during curing can mute the shift effect.
Tip
Thermal polishes are temperature-sensitive, so they need to be applied in a consistent environment. Ask your tech to work quickly and use thin layers. The flakes go on after the thermal base, before the final top coat, to keep the surface smooth.
Best For
Medium-length nails in any shape. The color shift is most noticeable on nails that are long enough to have temperature variation from base to tip.
16. Watercolor Blooms In Dusty Pinks And Mauves
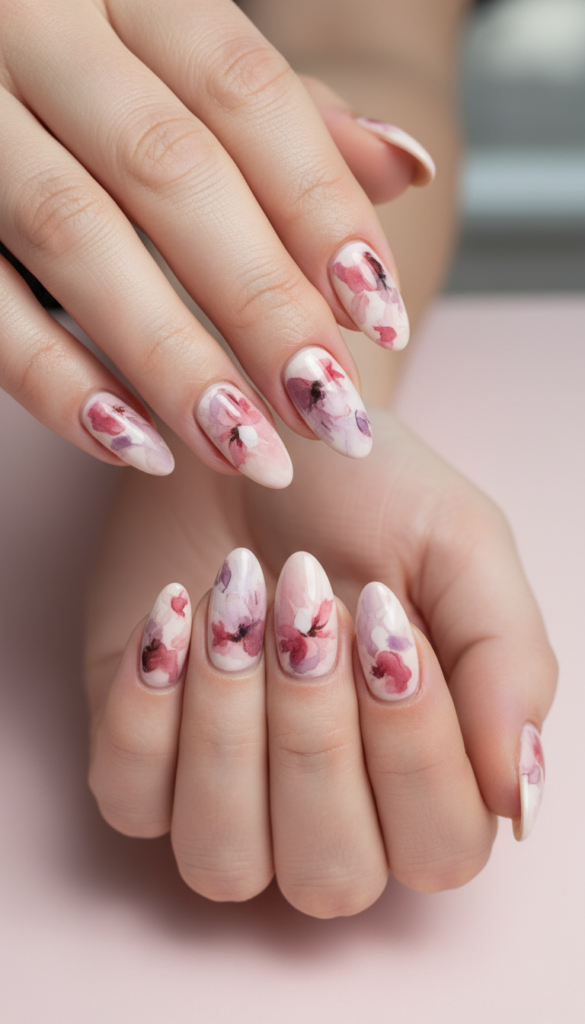
Watercolor nails have been around for a while, but the current iteration uses dusty pinks, mauves, and a touch of lavender to create soft, floral blooms that look painted onto the nail with watercolor washes. The colors are applied as thin, diluted layers that blend into one another at the edges, creating a dreamy, painterly effect. The blooms should be slightly abstract — think the suggestion of a flower rather than a realistic depiction.
This watercolor cute nails idea thrives on the spontaneous blending of pigments, which means each nail ends up slightly different — the color spreads through a liquid medium rather than being brushed on as solid pigment, so the edges feather organically.
Tip
The watercolor effect is usually achieved by dropping diluted polish or gel onto the nail and spreading it with a brush soaked in a special solution. The blooms should be concentrated toward the center of the nail with softer color fading toward the edges. A matte top coat often looks more authentic with this design, but glossy also works.
Best For
Medium to long oval or almond nails where the blooms have enough space to spread. The soft colors also look beautiful on shorter nails, but they read better with a longer canvas.
17. Geometric Striping In Warm Neutrals
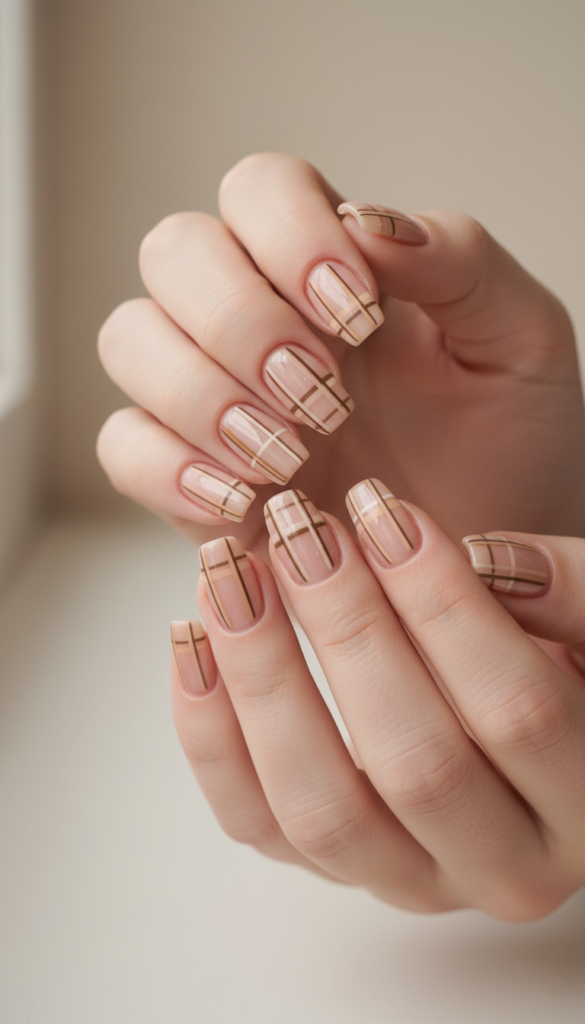
Think clean, thin lines in warm neutral tones — beige, camel, warm taupe — creating geometric patterns on a sheer nude base. The stripes could be parallel, diagonal, or crisscrossing, but the key is that they’re precise and thin, like architectural blueprints for your nails. This is a more grown-up take on geometric nail art, with the warm neutrals keeping it soft and wearable while the clean lines add structure.
This cute nails idea is one of the most wearable trendy simple nail designs because the neutral palette works with everything and the geometric pattern adds visual interest without shouting. The striping requires steady, even pressure to keep the line width consistent from cuticle to tip.
Tip
The stripes need to be applied with a fine striping brush or nail art tape for the cleanest lines. Warm neutrals show up best on a slightly darker nude base, so make sure your base is visible but not so light that the stripes disappear. A glossy top coat finishes the look.
Best For
Medium-length squoval or square nails where the straight lines of the geometry complement the sharp edges of the shape. The clean aesthetic also works well for professional environments.
18. Speckled Nude With Matte Finish
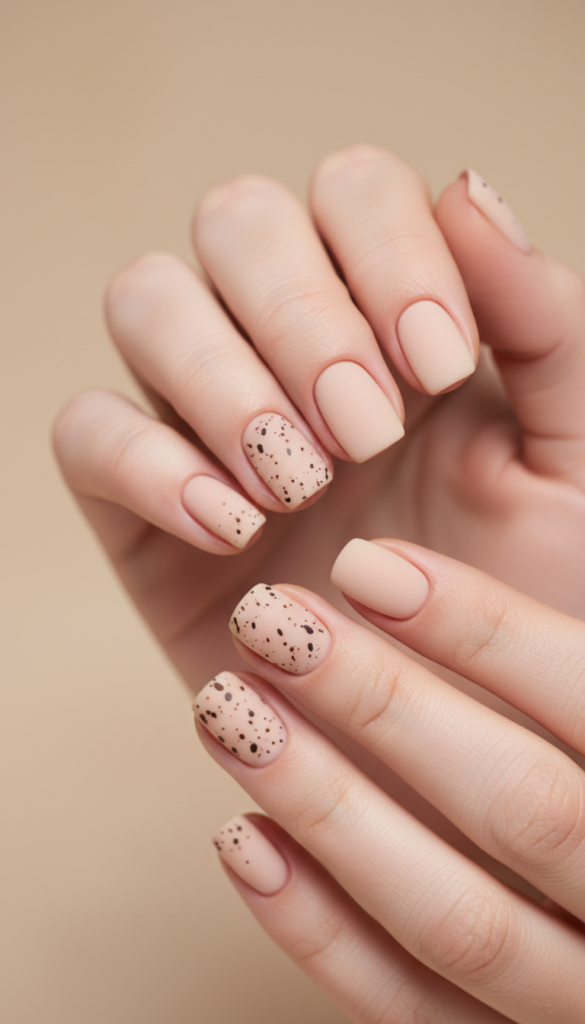
This design takes the classic nude nail and adds a subtle speckled texture — tiny dark brown and black dots scattered across the surface like quail eggs or sandstone. The dots are small and irregularly placed, and the whole thing is finished with a matte top coat that mutes the shine and emphasizes the texture. It’s an earthy, organic take on the neutral nail that feels fresh and unexpected.
Unlike the tortoiseshell design which uses translucent amber speckles on a milky base, this version uses opaque dark dots on a solid nude base and relies entirely on the matte finish to unify the texture. The matte surface absorbs light rather than reflecting it, which makes the speckles feel embedded in the nail rather than painted on top.
Tip
The speckles are usually created with a tiny dotting tool and a dark brown or black polish. The dots should be very small and spaced widely enough that the nude base remains dominant. A matte top coat is non-negotiable for this look — shiny would make it read as a sprinkle or confetti design.
Best For
Shorter nails where the matte finish and speckles create a textured look that compensates for the lack of length. Squoval or round shapes work well with the organic, natural feel of the design.
19. Glossy Clear With Pressed Flower Details
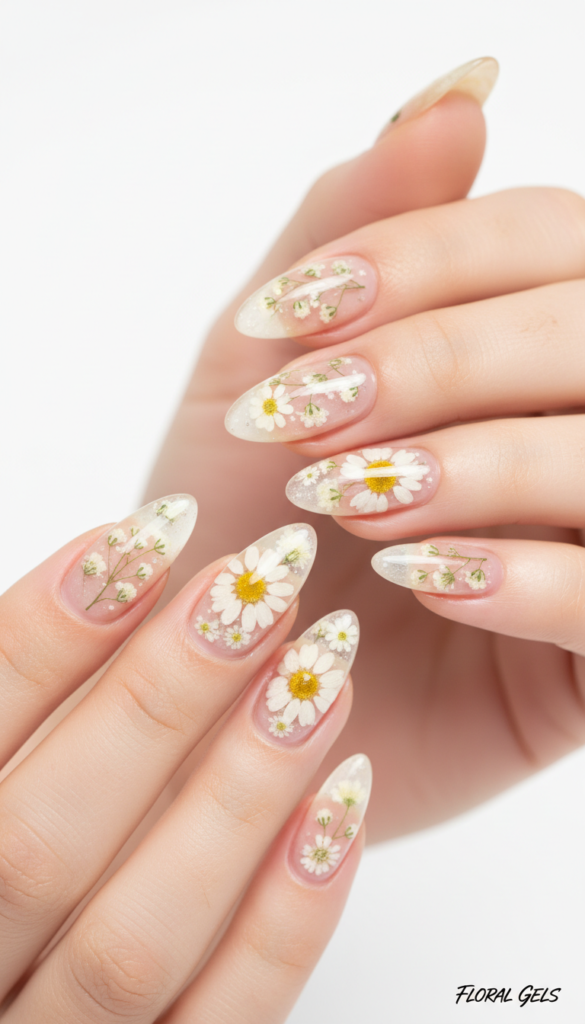
Pressed flowers encapsulated in clear gel have been trending for a while, but the version gaining popularity now uses very small, delicate flowers — think baby’s breath or tiny daisies — pressed flat and embedded in clear gel on a completely bare nail. The flowers are suspended in the gel so they look like they’re floating inside the nail. The effect is romantic, ethereal, and entirely unique.
It’s the ultimate cute nails ideas for anyone who wants something genuinely different without committing to color or pattern that might feel limiting. The encapsulation process requires building the gel in layers, curing each one separately, to suspend the flower without creating air pockets that would ruin the clear effect.
Tip
The flowers need to be completely dried and pressed before embedding. Your tech will apply a layer of clear gel, place the flowers, then cover with more gel to encapsulate them. Multiple layers are usually needed to get the flowers fully suspended without bumps. A thick, glossy top coat ensures the surface is perfectly smooth.
Best For
Medium to long nails where there’s enough length to see the flowers clearly. Almond or oval shapes work best because they draw attention to the center of the nail where the flowers sit.
Frequently Asked Questions
How long do cute nail designs usually last?
Gel designs last two to three weeks with proper application and care, while regular polish lasts about a week. Keeping your cuticles hydrated and wearing gloves for cleaning tasks extends the life of any cute nails ideas.
What are the easiest cute nails ideas for beginners to try at home?
Dot designs, simple color blocks, and sheer nudes with a single accent nail are the easiest entry points. These cute nails ideas simple don’t require advanced brush control or specialized tools.
Can I get cute nail designs on short nails?
Yes. Many cute nails ideas short designs actually look better on shorter lengths because the scale keeps details from getting lost. Micro-French, speckled nudes, and chrome accents are all excellent choices.
How do I pick the right cute nail design for my skin tone?
Sheer pinks, peaches, and warm nudes flatter most skin tones, while brighter colors can be adjusted warmer or cooler to complement your undertone. The cute nails designs on this list include options for every complexion.
Are cute nail designs still professional for work?
Yes, especially when you choose muted palettes, negative space designs, or classic shapes. Many cute nails ideas on this list — like the micro-French, marble, and geometric neutrals — are entirely workplace-appropriate.
Where To Start
The most practical approach is to save three or four designs that genuinely excite you, then book a consultation with your nail tech a few days before your appointment. Bring your reference images, ask which design suits your natural nail shape and lifestyle best, and be open to slight adjustments. The cute nails ideas that look best are the ones that work with your hands, not against them — and the right tech will help you land on the perfect version.

Ali Hamza Lali is the founder and content lead behind GlowVibesSpot. Every article is personally researched, tested, and published by Ali. I am covering makeup, hairstyle, nail, piercing, and tattoo inspiration you can actually trust.